Simple & Symmetrical
A few years ago I was asked by a customer to come up with a mount for his 7″ chart plotter that:
1- Was not one of those “gawd awful looking” NavPod boxes (his words not mine).
2- Could utilize the existing 1″ Edson feet and 1″ pedestal guard top plate.
3- Was symmetrical and not off to one side.
4- That looked professional, like it came from the factory.
5- Still provide a hand hold.
6- Make the plotter easily removable.
7- Not cost an arm and a leg.
8- Kept the plotter and cables mostly out of harms way.
View From Above
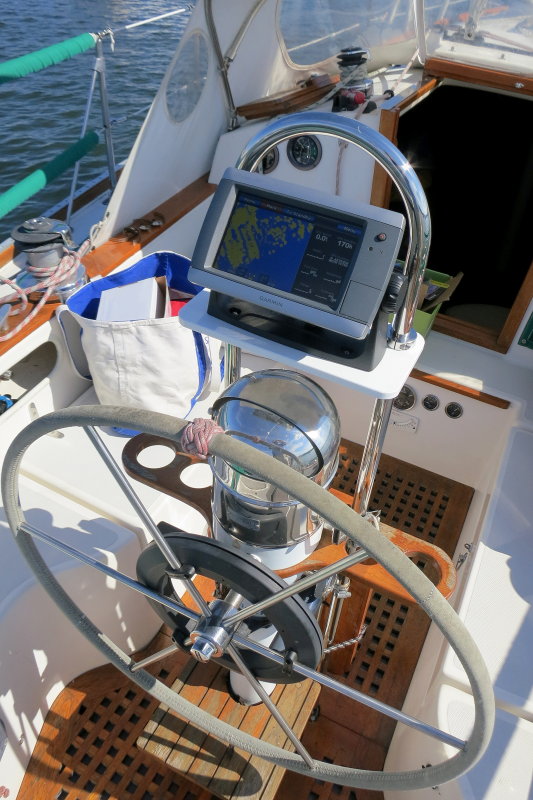
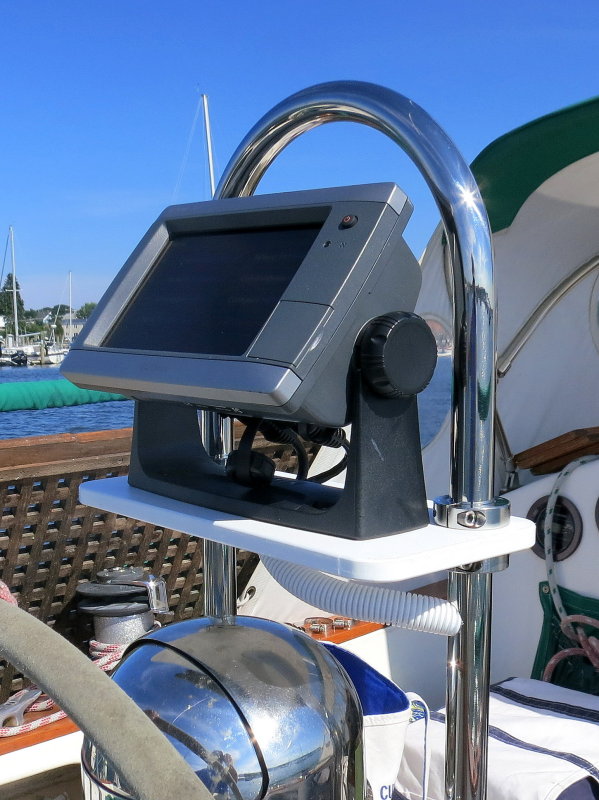
I gave the idea some thought and agreed with my customer that there was a product missing for mounting a single plotter between the two legs of a 1″ pedestal guard, without an “unsightly & large” NavPod box and that did not look “cobbled” together..
This is the design I came up with and it will fit most all 4″, 5″ and 7″ chart plotters.
Since designing this mount I have been continually asked to do more and more of them. I finally decided to stop making the mounting plates on a one-off basis and now make them 10-20 at a time.
This allows me to sell them to boat owners who don’t want to take the time to make one themselves. At $58.75 it is actually a very good value when you consider your time, the tools needed, and waste material. They are all pre-cut, shaped and ready to go..
Back Side
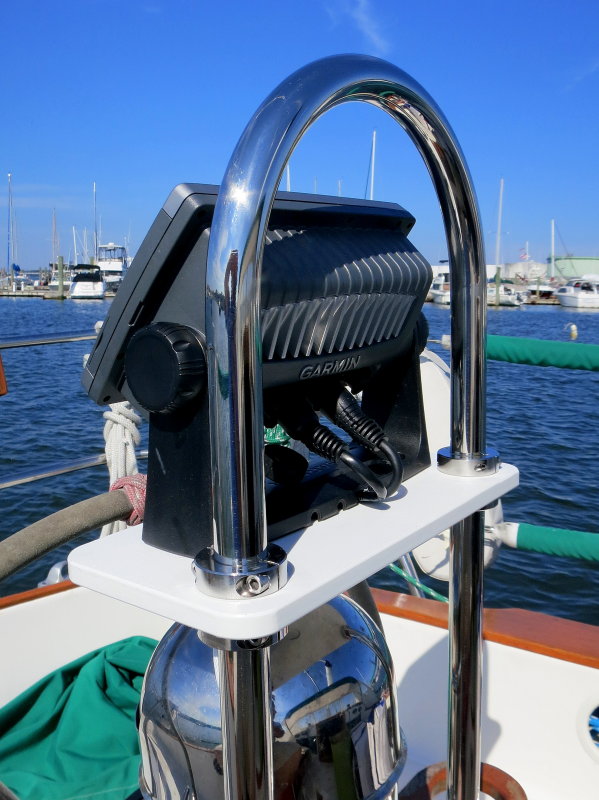
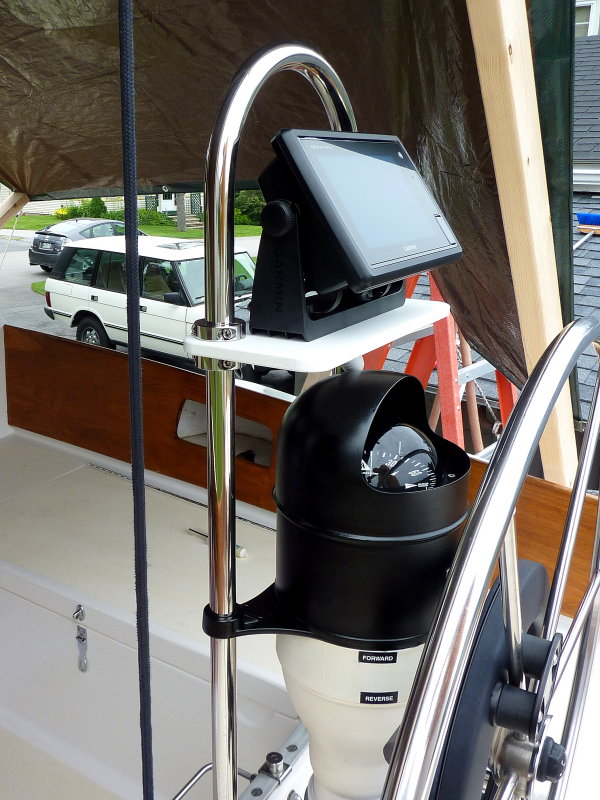
The design is simple, symmetrical, easy to install and the wires are kept out of harms way. They are protected by the pedestal guard, the mount plate and tucked under the plotters bracket.
This is a 7″ Garmin 740S chart plotter and it fits like a glove on this Sabre 34 MKI. This is a boat with a relatively small cockpit that really can’t afford an offset pedestal guard and large NavPod box.
1″ Clamp Collars
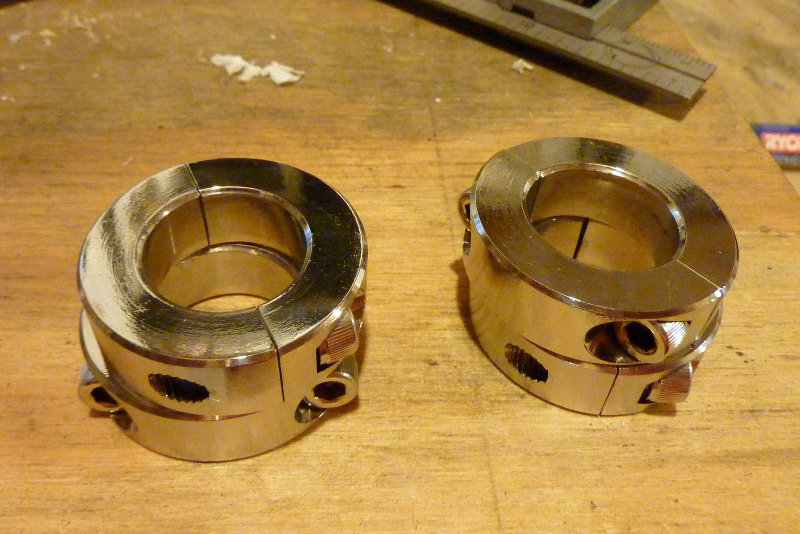
In order to make this mount work you will need four 1″ Clamp collars. I buy them from McMaster-Carr. I’ve searched high and low for a better price, even going direct to the manufacturer but McMaster-Carr is literally selling these at about 5% over their cost.
I generally use the 316SS version but the 303/304 version will work too IF brightly polished. The 303/304 collars run about $17.00 each and the 316SS run about $32.00 each.
Either collar type will greatly benefit from polishing. They come in a mill finish which will show rust spots if not polished bright…
NOTE: McMaster-Carr links are odd and your back button may not work once you get there. Bookmark this page before you click the links below.
1″ Clamp Collar – 303/304 Stainless PN# 6436K38 (LINK)
1″ Clamp Collar – 316 Stainless PN# 9633T19 (LINK)
NOTE: Clamp collars are always purchased based on the tube, pipe or shaft OD. So a 1″ pedestal guard gets 1″ clamp collars or a 1″ prop shaft would also get a 1″ clamp collar.
Here the four collars are shown mid-buffing…
To install the mounting plate set your bottom collar height first. Now using some long nose pliers, preferably with electrical tape on the jaws, press the top and bottom collars together while tightening the set screws. This makes for a nice stiff mount that does not wobble.
The Pedestal Guard
In many cases, but not all, you may need a new 1″ pedestal guard to clear the compass. Many OEM 1″ guards are simply too short. Edson has stopped producing 1″ straight guards, perhaps in order to sell more top plates and new feet. Certainly a nice sale $$$$$ wise for them. This design allows you to retain the top plate and your original pedestal guard feet.
NOTE: Other brand pedestals do not use the Edson 9.5″ hole centers. Be sure you have an Edson pedestal with 9.5″ hole centers before ordering a new pedestal guard. We offer new pedestal guards that fit an Edson pedestal in our web store;.
1″ OD X 58″ Tall Straight Pedestal Guard 316SS
The biggest problem with any of these upgrades is that many pedestals have the assembly bolts frozen into the pedestal. More than one owner has totally destroyed a steering pedestal by snapping off a SS bolt in the aluminum pedestal. This design does not require you to remove the pedestal guard top-plate and replace it.
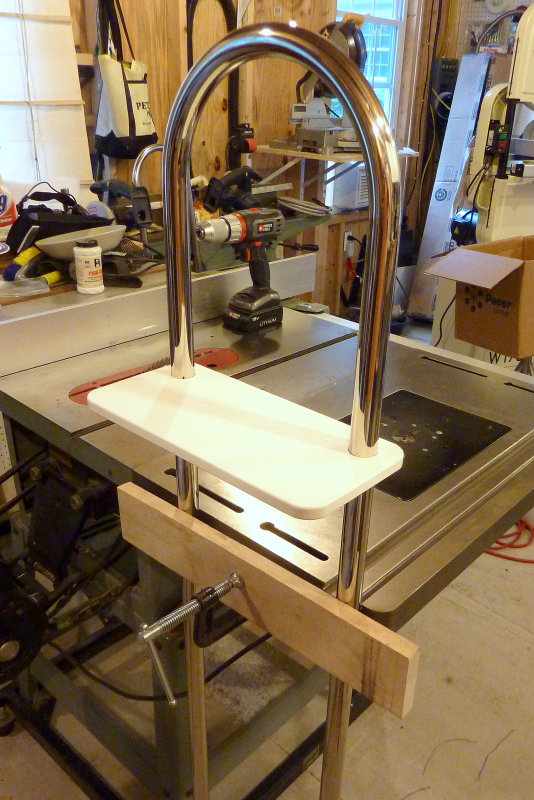
For mocking it up in my shop I simply clamp the pedestal guard to my table saw, as shown, but a work bench will work too. This makes setting your height, installing the collars and mounting the plotter yoke to the mounting plate quite easy.
While Edson dropped the 1″ straight pedestal guard we can now offer a beautiful 1″ X 58″ tall straight pedestal guard (see link above). This pedestal guard ships tall enough to cut to the exact height you prefer. This pedestal guard is beautifully mirror polished and cost less than the now discontinued Edson guard did..
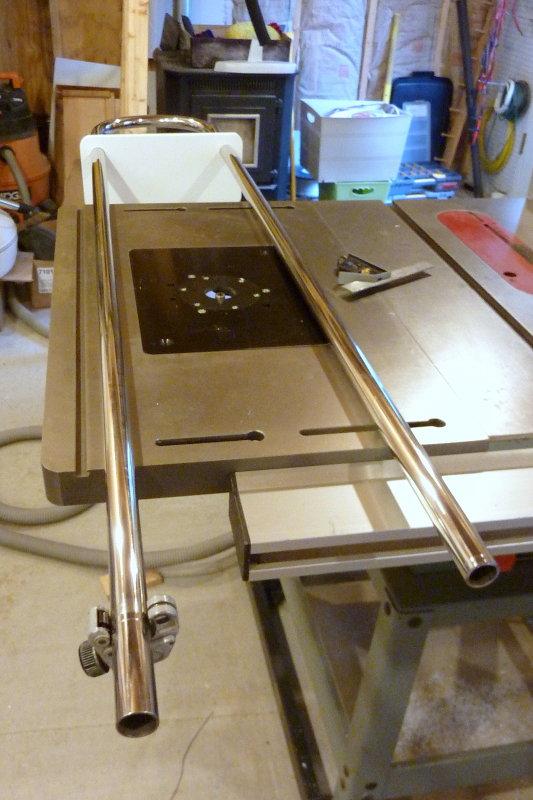
Cut To The Height You Want
As I mentioned the replacement pedestal guard is 58″ tall & 1″ OD. A 58″ height is pretty tall on many boats. This extra height allows you to decide just how tall you want to make it. I general find cutting 3-4″ off is the perfect height for most owners. This still allows for a good hand hold and room for the plotter to clear even a fully enclosed compass.
For cutting 1″ SS tubing I use a Ridgid pipe cutter with Ridgid stainless cutting wheel. A standard cutting wheel can certainly work to cut two SS legs but will be toast afterwards. I find a pipe cutter to make the cleanest cuts in marine SS tubing. I generally recommend buying Ridgid pipe/tube cutters because parts and cut-off wheels are always available at any plumbing supply house. I can still get parts for some of my 40+ year old Ridgid pipe cutters.
Before the Ridgid name was in Home Depot, they were the plumbers tool line of choice. Home Depot simply bought licensing rights to use the Ridgid name. Do yourself a favor and buy one at a plumbing supply house. You’ll save some money and not get the home-owner grade product.
Once the legs are cut to length be sure to de-burr the inside of the legs. I use a Dremel and grinding wheel to do this. You don’t want the guard legs to mar or slice the wires jacket or the wires themselves..
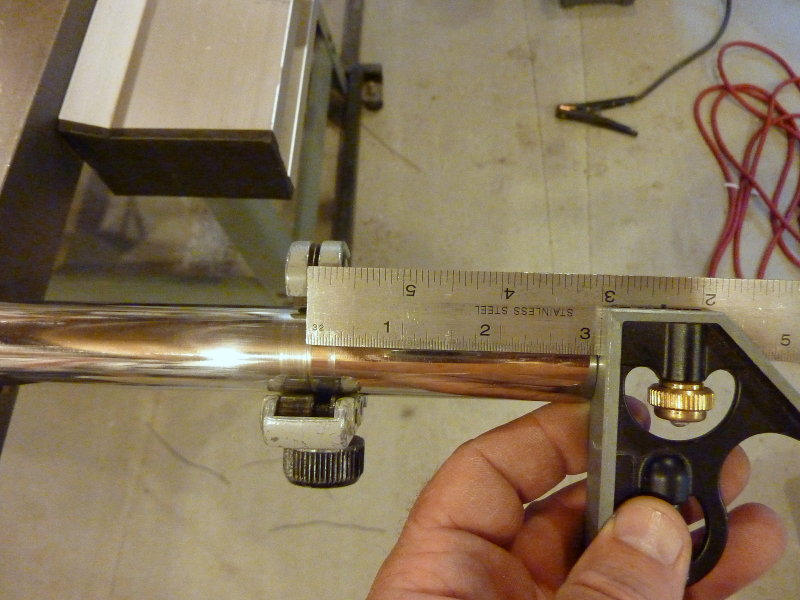
One Leg Cut
Here one leg has been cut to length and I am in the process of cutting the other leg. These close quarters Ridgid pipe cutters work well between legs if a standard cuter is too long..
De-Burr The Tube
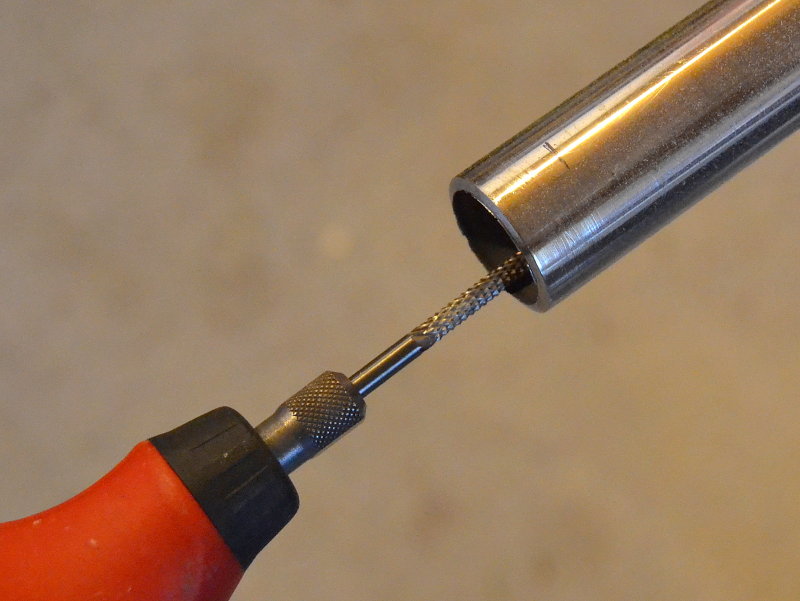
One of my peeves is installers who install marine electronics into pedestal guards and make zero effort to de-burr the holes they’ve made, or to smooth the cut ends. Quite often I see horribly molested wire jackets and sometimes wind up cutting myself on this sloppy workmanship. Frustrating to say the least.
Please, please, please take the time to de-burr any holes you make in the pedestal guard. This hould be done anywhere wires pass through or exit the guard.
I start with a rough rasp in a Dremel type tool..
Make It Smooth
Once the heavy lifting is done I move to a fine grade stone in the same Dremel type tool. I run my fingers over the surface to ensure there are no sharp edges that could damage the wire..
The Rotary Tool Bits
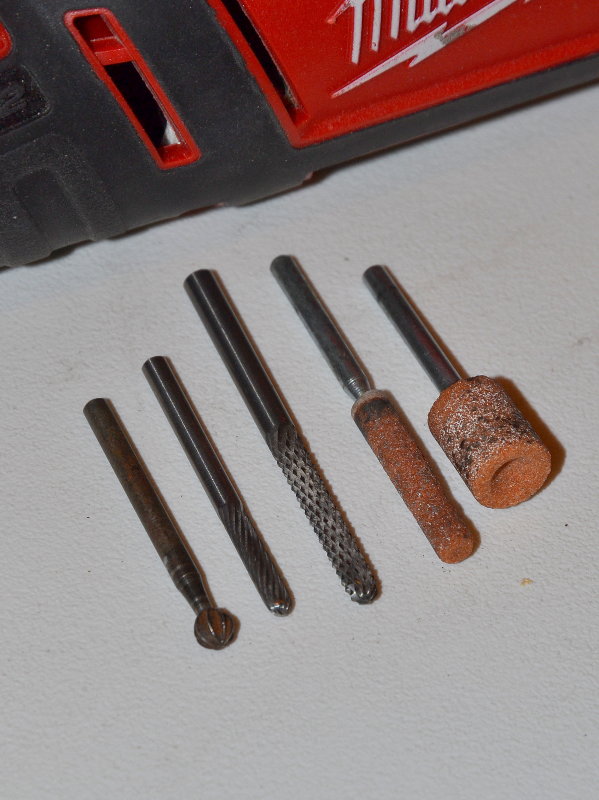
I have a pretty good collection of Dremel bits, unfortunately they are no longer in the original packaging. This means I really have no clue what the part numbers are?
Just look for bits like these and you’ll be doing well. The rasps are great for getting the big chunks off then I move to the stones a good for final surface smoothing. The round ended bit works well in small holes, as may be used for a single wire. It works well to smooth the back side of the hole inside the guard if you can’t get the angle with a straight wraps or stone.
Buff & Polish The Clamp Collars
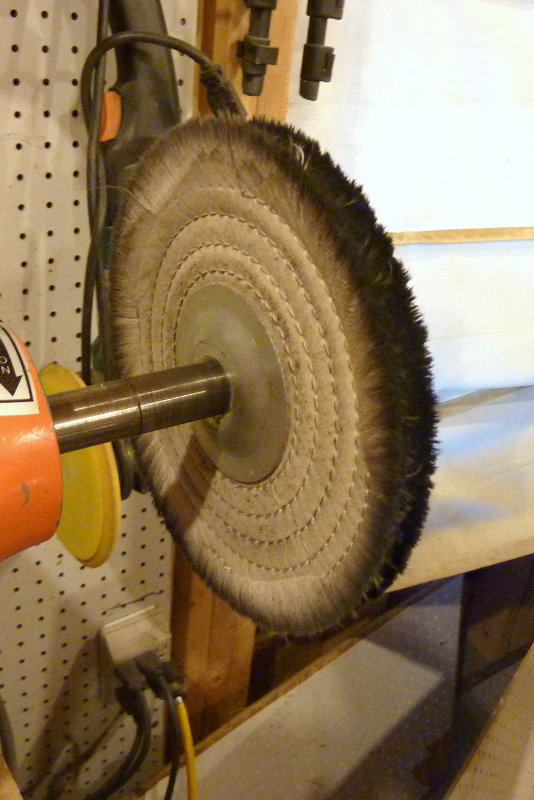
In order to buff the clamp collars I use a buffing wheel and some Tripoli or stainless specific compound. These wheels and compounds are available at Home Depot and will fit most bench grinders. IMHO every boat owner could benefit from a buffing wheel. I use mine all the time.
I get my wheels from Grizzly and some of my compounds too.
Grizzly Buffing Compounds (LINK)
Home Depot / Ryobi may be easier but the quality of the wheels from Grizzly is much better.
Buffing Compound/Rouge
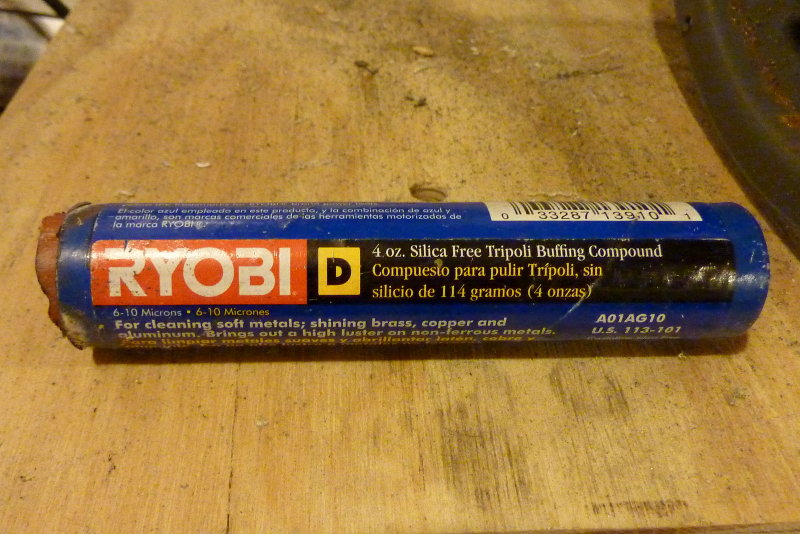
Here is an example of the Home Depot / Ryobi version of Tripoli compound. It is inexpensive and works quite well.
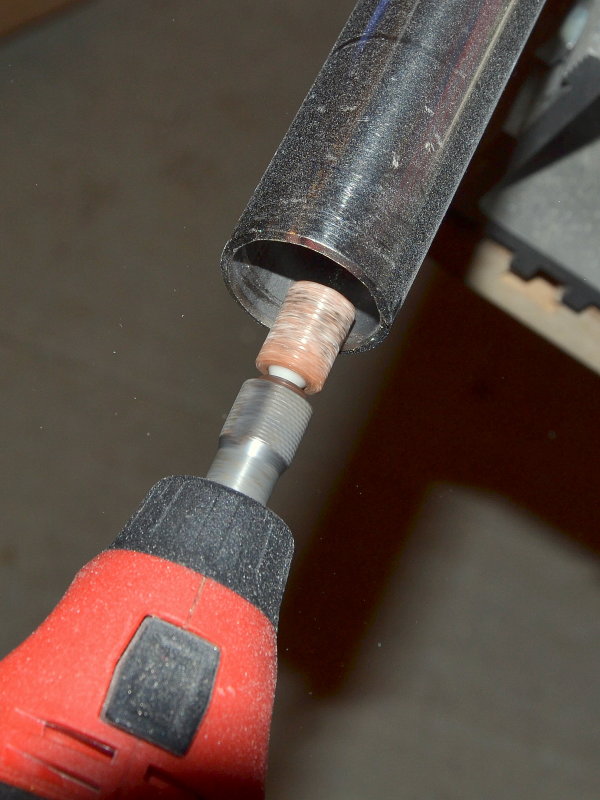
I Clamp To Scrap Tubing For Polishing
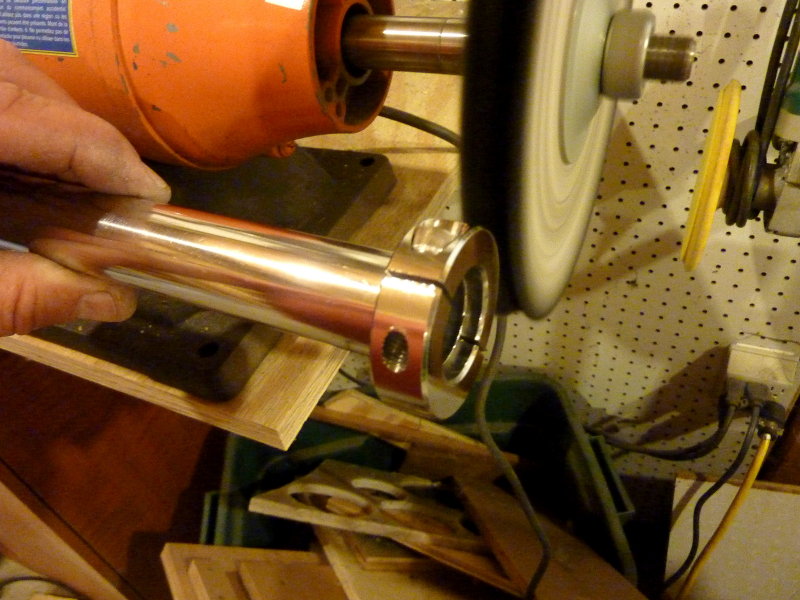
TIP: Buffing & polishing stainless steel creates some pretty good heat and can be tough on your hands. In order to buff the clamp collars I use a scrap piece of 1″ stainless and simply clamp the collar to it. Easy, simple and cuts buffing time dramatically!
Drill The Wire Hole
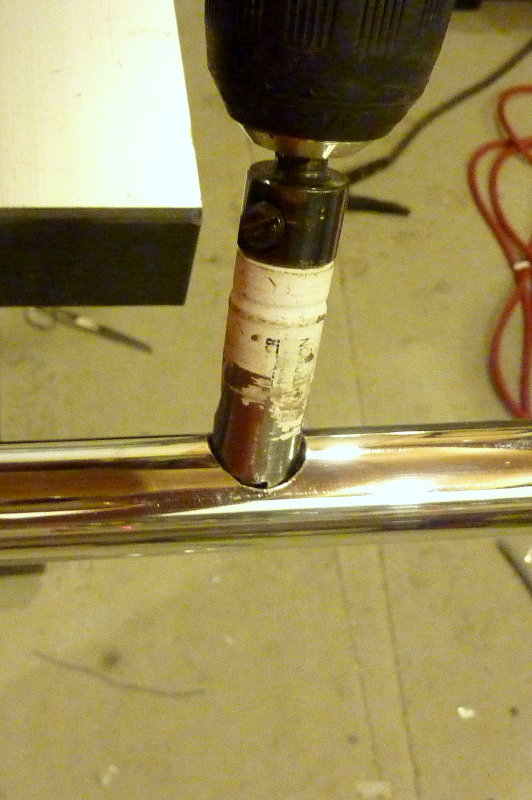
Once you have decided upon the height of your mount and clamped it in place you are now ready to drill the hole for the wires.
I first drill a 1/4″ Pilot hole into the pedestal guard to center my hole saw into. For drilling a large enough hole I use Lenox Bi-Metal hole saws. They make easy work of 1″ SS.
Once the hole is drilled please be sure to do a good job at de-burring this hole. Again, for this, I use a Dremel type tool but a small round file can work too. The important thing is to have a smooth hole that won’t destroy the wire when pulling it through the guard..
TIP 1: When drilling stainless steel use a very slow drill speed, lubrication and don’t stop or pause. Stopping or pausing while the work area is hot can cause the stainless steel to work-harden. If it work hardens you’re pretty much going to go through drills like like Teddy Kennedy went though alcohol. Don’t let that happen!
TIP 2: For drilling into stainless I use drills made by Viking/Norseman. Viking/Norseman are actually the same company but go to market under two different brands, like Johnson / Evinrude did..
These drills are made here in the USA and are very good quality. One of my favorite drill sets for the boat are the Norseman/Viking 29 piece round drill index sets 1/16″ to 1/2″ in 1/64th increments.. They are in a round plastic container with screw on lid and an EXCELLENT gasket seal. The set is totally waterproof and stays closed in a tool bag, unlike metal indexes.
I use this set for 85-90% of the drilling jobs I need to do on boats. These drills also eat SS for lunch… Both Norseman and Viking offer the same sets under different part numbers. I think at last count I had three of these drill indexes.
I like them because KL Jack, a local nut & bolt wholesaler, stocks the replacement drills from Norseman/Viking and when I break one I can easily replace it with a matched drill of the same quality. The crap you get these days at Home Depot, Lowes or other retailers is pure unadulterated JUNK!
Running The Wires

You have many options here for running wires as you can use grommets, split loom or hose as I have on this one.
On this guard I ran the wires through some tubing and into the pedestal leg. For this Garmin 741 everything needed fit in a single leg of the 1″ guard. The wires included the power/data cable, Garmin network cable for radar and a NMEA 2000 drop.
Garmin 741 On a Bristol 40
This is one of the production mounting plates on a Bristol 40. The owner really liked the finished product and loved that it did not change the overall feel & aesthetics of his beautiful boat. He liked that it did not get all “gawdy looking” like he had a “40” plasma TV at the helm”.
View of Compass From Standing At Helm
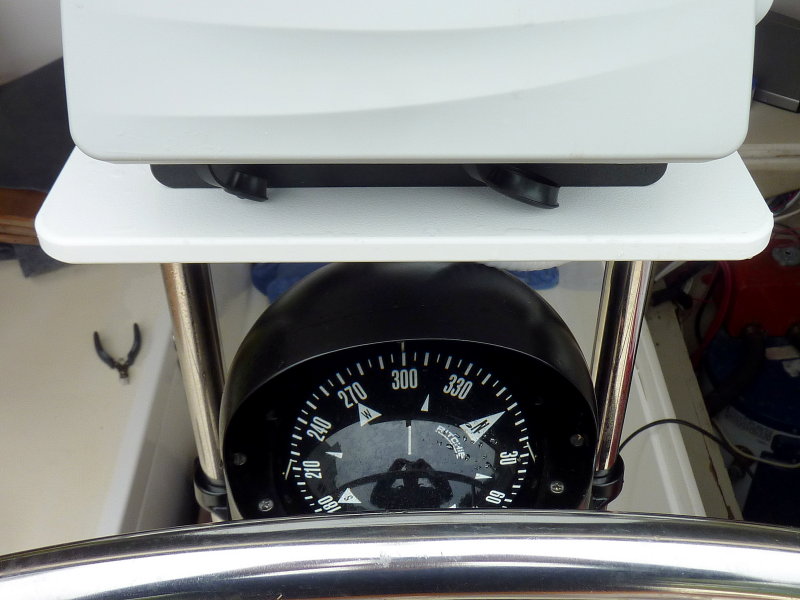
You want to ensure you can see the compass from standing at the helm so adjust your height accordingly.
IMPORTANT: Installing any plotter, at the helm like this, will create some level of interference with your compass. Any time you do, you should have your compass professionally swung and a deviation card made. I’ve have yet to find a plotter that could not be swung, even magnet door plotters like those from Raymarine, Garmin, Simrad, Lowrance HDS units etc..
RANT: I believe magnetic doors on plotters are a dumb, arrogant and an ignorant move by the plotter manufacturers. It is common knowledge that your navigation compass will be close to the plotter yet they still install magnets in the chart doors. A magnet door is simply unnecessary.
COMPASS ADJUSTMENTS: For those located here in Maine Dave Witherill of Pathfinder Compass does exceptional compass work.
Laying Out A Raymarine e7D
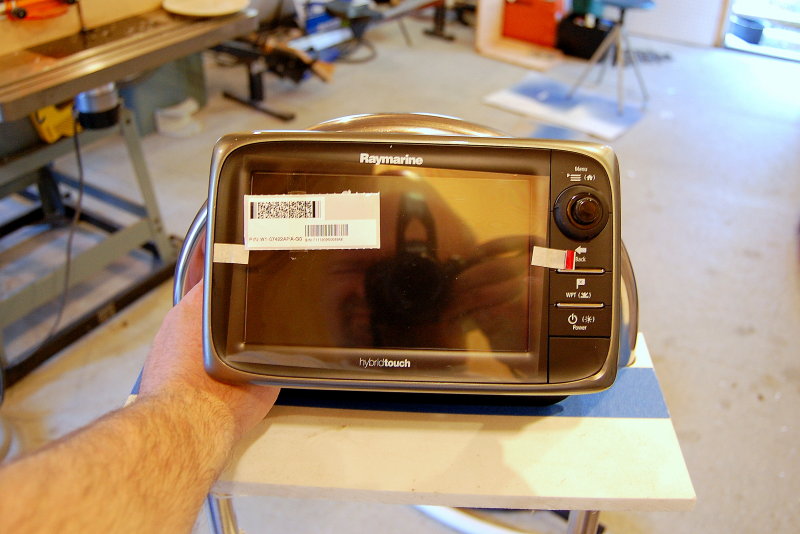
This is a prime example of an OEM pedestal guard that was simply too short. I did not want the owner accidentally grabbing the plotter when looking for a hand hold so we opted for the taller replacement pedestal guard..
Mocking It Up In The Shop

I know most of you don’t have a spare pedestal kicking around, to do mock ups with, but with careful on-boat measurements you can easily figure and calculate your needed height. Here you can see why this factory OEM Edson guard was simply too short. The mounting plate is where I needed it to be in order to have good visibility for the compass and this left too little room for a hand hold..
You will need to measure to the top of the compass dome and then add about 4-5″ clearance between compass top and the bottom of the mounting plate. This height will vary slightly depending upon your physical height.
e7D Installed On An Ericson

This was one of the original prototypes holding a Raymarine e7D. This owner had a very, very tired pedestal and he went hog wild on an all new set up.. New complete steering pedestal, new pedestal guard, new plotter, new folding wheel, new compass etc. etc..
Side View
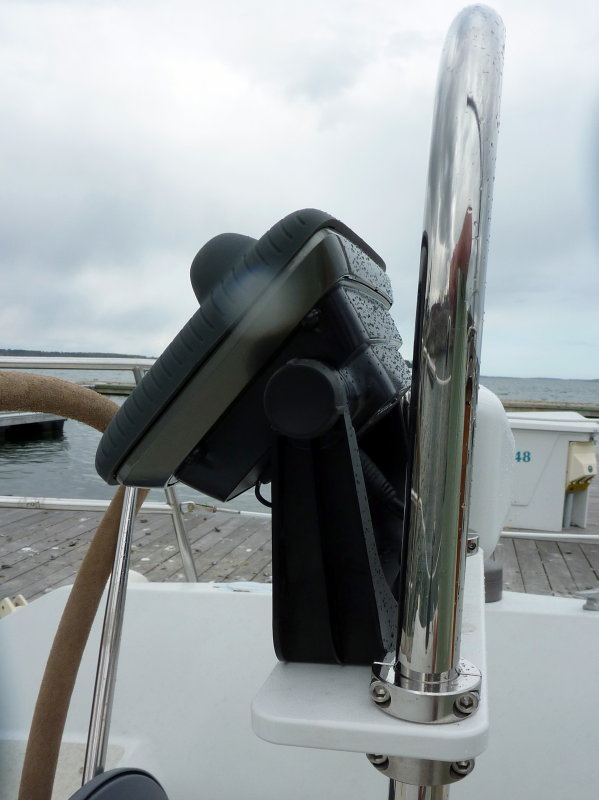
The original plate design was narrower but I have since made it deeper to accommodate a wider range of plotters.
Total Project Cost:
1 – Compass Marine Mounting Plate = $58.75
4 – 316 SS Clamp Collars = $142.28 ($78.96 if using 303/304SS)
1 – Replacement Pedestal Guard = $184.52
TOTAL = HIGH RANGE $356.75
TOTAL = LOW RANGE $265.75
Cover Your Pedestal
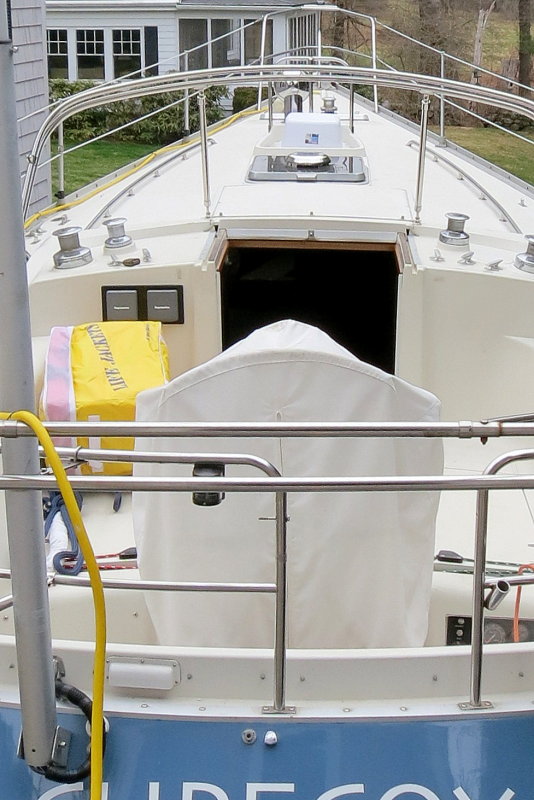
I am continually amazed at the sheer number of sailors who don’t cover their pedestals when not in use. Any canvas maker can make you a pedestal cover that will literally pay for itself in reduced UV and water damage to your expensive pedestal and electronics. Compasses, pedestal paint & electronics are not immune to constant attack & exposure to the elements.
Pedestal covers prevent moisture ingress, limit UV damage and keep your gear out of sight, out of mind for thieves.
Let’s Keep This Site Running!
Like what you saw or read? Would you like to see more articles like this? Is so feel free to donate, support the site and keep it growing. I am trying my hardest to keep this information FREE. If you liked it, learned from it or I saved you some money feel free to make a small donation, that’s all I ask.