What Not To Use
For winterizing your fresh water system you will need a few items. The number one item to have is RV type propylene glycol antifreeze that is safe for domestic plumbing systems. Unfortunately, I see this type of alcohol based RV type product all too often.

The pictured bottle is not a propylene glycol product, it is an alcohol based antifreeze. Alcohol based products can damage certain plastics and seals. While it is cheap, please don’t be tempted by price and please do read the labels.
WARNING: Do not use ethylene glycol that’s designed for use in automotive engines. It’s poisonousto mammals/humans! Propylene glycol usually comes in windshield washer type bottles and ethylene glycol generally comes in Prestone or Peak type bottles.
Using the method outlined below the RV type antifreeze is sucked through the system pipes only, and the tanks are left dry and drained with no antifreeze to purge in the spring.
You will also want a section of hose and the associated fittings to bypass your hot water heater so it too has no antifreeze in it for spring purging.
Some other items to consider would be a five gallon bucket, turkey baster, screw driver and some spare hose of the same diameter as your plumbing system.
“RC why don’t you just blow the lines out with air”
While this technique may work on some boats it does not successfully work on all boats. Also most boat owners generally don’t have large enough portable compressors to facilitate doing so. The Maine based boat yards I frequently do work in winterize hundreds of boats and they blow out none of them. Almost every every boat has antifreeze sucked through the pipes because it is far more reliable.
COMBUSTIBLE…???
TIP: If the RV antifreeze says “WARNING:COMBUSTIBLE” walk away. A propylene glycol product is not flammable but one made with ethyl alcohol is. This cheap product is a blend of ethyl alcohol and PG. Choose a product that does not contain alcohol.

When in doubt always read the labels. Do not be tempted by price. Ethyl alcohol blends can be had for as little as $1.99 to $2.99 per gallons while a typical price on a propylene glycol -50F rated product is about $4.50 – $5.50 per gallon..
A Better Product
Here’s a shot of a better true propylene glycol antifreeze product that is safe for most plumbing parts. It also has a decent corrosion inhibitor. It’s safe for engines and domestic plumbing systems. It has no alcohol in it.
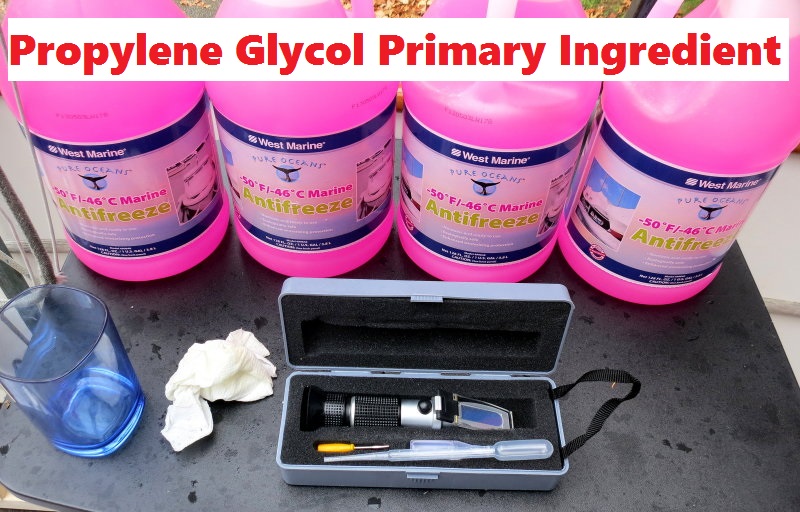
The Refractometer:
The item in front is a called a sight refractometer. This is the tool I use to test the concentration of the propylene glycol, that has been sucked into the system, in order to determine when I have pumped enough through the system to adequately protect it. Samples are taken at each faucet, shower head and wash-down spigot etc. and tested for concentration strength..
Star-Brite Aintigel -50 is also an excellent -50F antifreeze. If you’re in an area that gets really cold, less than -25F, then you may want to consider a -100F rated propylene glycol.
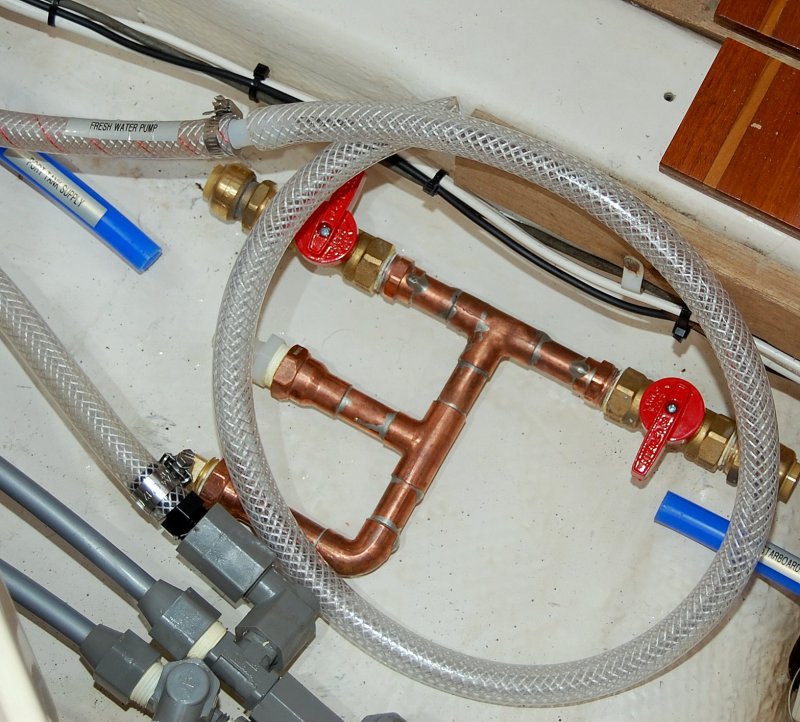
The Water System Manifold
Step 1 – Drain Tanks:
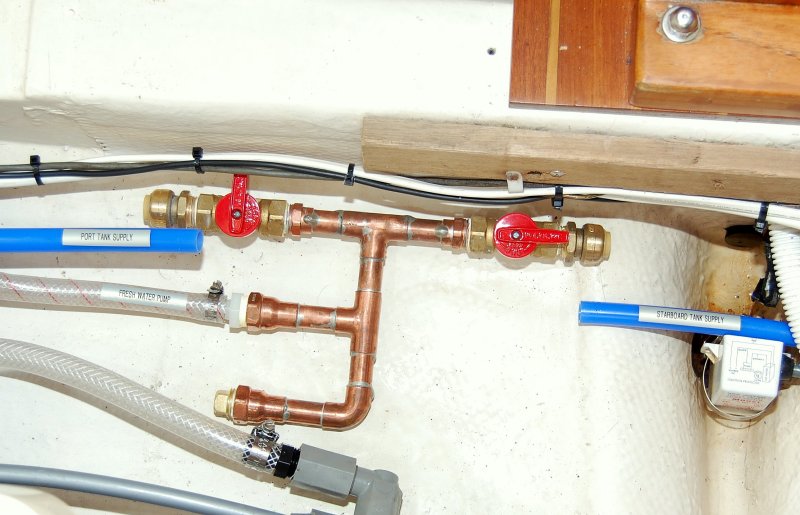
In this photo I’ve drained the port and starboard water tanks, by using the fresh water pump, & then disconnected the tank outlets from the supply manifold. This manifold uses PEX & “Shark Bite” brand PEX tube fittings. They disconnect easily so they can drain into the bilge compartment, naturally & through gravity, with the rocking motion of the boat.
This photo was taken after only a few hours and it was almost totally drip free and dry at this point. This means both tanks have virtually zero water in them and the tanks will get no antifreeze.. I prefer not to put any antifreeze into tanks because it is a bear to get out through the process of dilution in the spring.
I’m rather uptight about keeping a dry bilge, mold allergies, that’s why you’ll notice a rubber stopper in the limber hole to keep the water contained in that compartment.
NOTE: Not all boats lend themselves to the tanks being drained fully via the 12V water pump. In these situations I use a 12V pump and rags to empty the tanks from above, if there is a clean out port. If there is no way to get into the tank then the only option may be to add antifreeze directly to the tank..
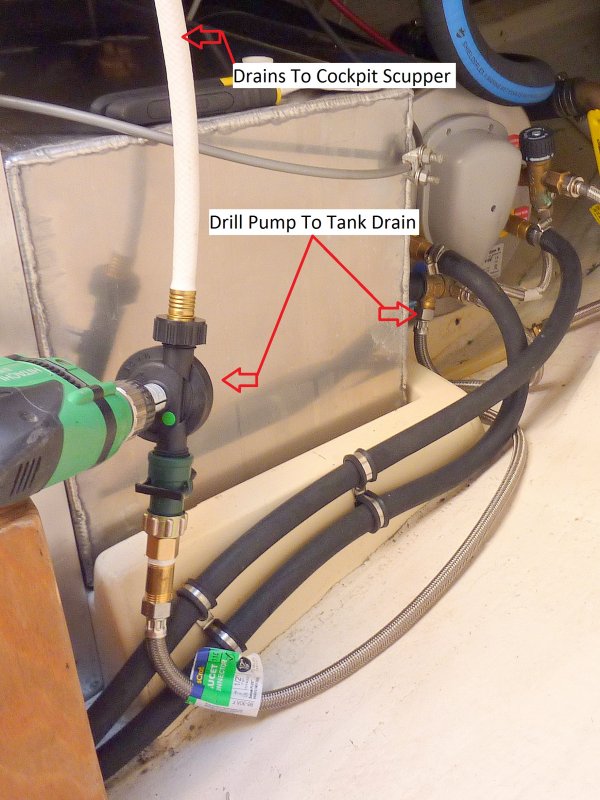
Drill Pump To Drain Water Heater
Step 2 – Drain Water Heater:
Many boat yards will simply open the water heater and let it drain into your bilges. This can lead to mold, hidden trapped water and odors. I am not a fan of this corner cutting practice but do recognize it saves labor time.
To avoid this you can use a drill mounted pump like this to keep the bilge dry and to avoid draining the entire contents of the water heater into the bilge. These drill pumps are cheap and available at any Wal*Mart.
Simply connect it to the drain spigot of your water heater and then suck the water out and into a bucket in the cockpit or cabin. Once the water heater is empty disconnect the drill pump and place a few rags under the spigot to catch any remaining drips.
The Water Heater Drain Bucket
For illustrative purposes I used a bucket to catch the contents of my water heater after pumping it dry. You can also just drain it onto the floor of the cockpit or stick the hose directly into a scupper.

If you don’t mind water in your bilge by all means just drain the water heater into your boat.
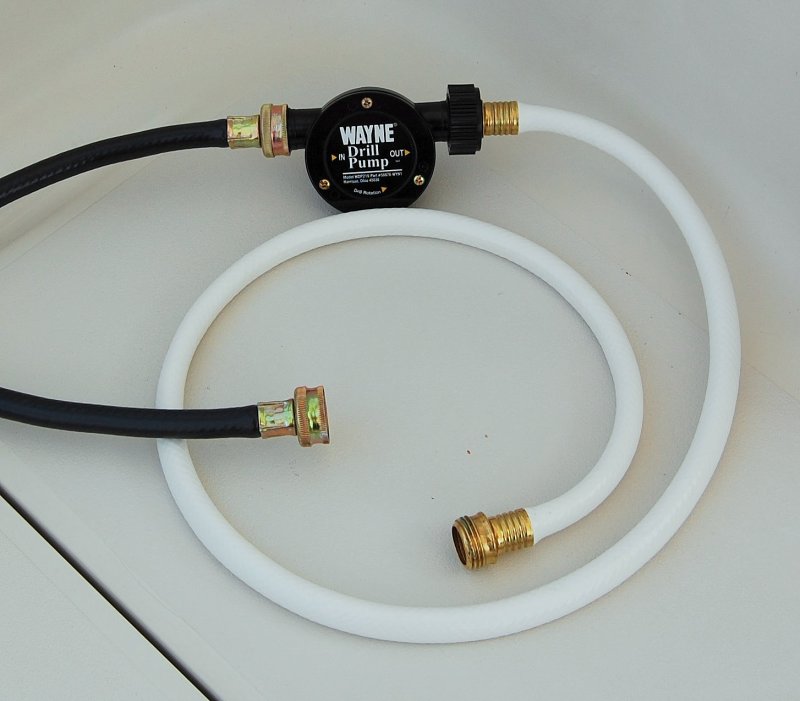
The Drill Pump
This is a drill pump you can use to drain the water heater. I think it cost me about $7.00, at Wal*Mart. I personally use a 12V DC pump but these work really well for the money.
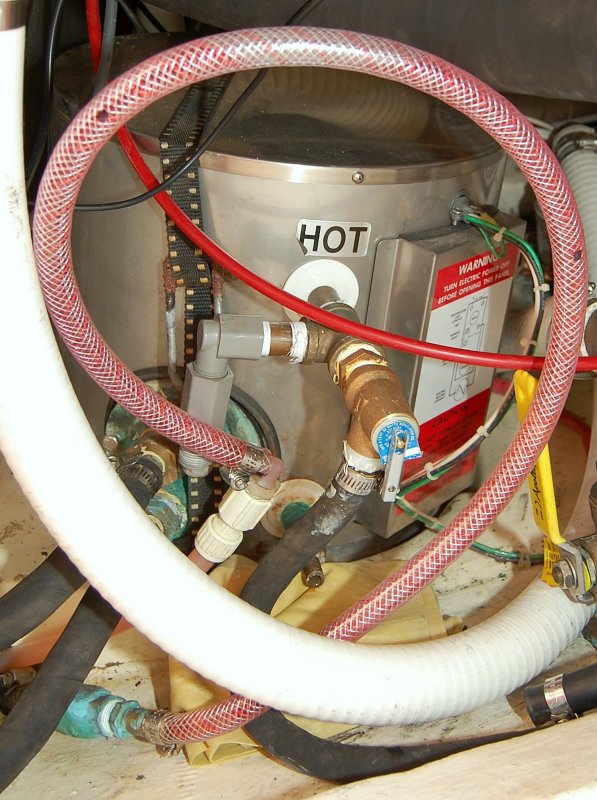
Water Heater Bypass Hose
Step 3 – Install Water Heater Bypass Hose:
IMPORTANT: Water heaters are always drained & bypassed for winterization. Please do not attempt to run antifreeze through it or you will have a very high probability of freezing and splitting it!
This is a water heater bypass hose in use. It’s installed so you don’t fill your water heater with antifreeze. You first suck all the water out then place some rags under the drain. After a few hours of rocking at the dock no more water comes out. The water heater can be left drained and the spigot open for the winter.
The bypass hose serves the function of connecting the cold water supply hose to the hot water outlet hose so the tank is entirely bypassed from the domestic water system. To install this hose simply disconnect the cold supply and hot return line for the domestic water side of the tank and then connect them together with a bypass hose.
NOTE: Do not try & bypass the engine supply & return lines for the water heaters internal heating coil. These lines will usually be black, like a radiator type hose, and will not generally be the same color as the domestic water side. When in doubt follow the lines. If they lead directly to the engine they are the wrong hoses..
Water Heater Bypass Nipple
The brass nipple between the two stainless braided hoses is acting as the bypass for this IsoTemp water heater. The bypass may not need to be hose at all.
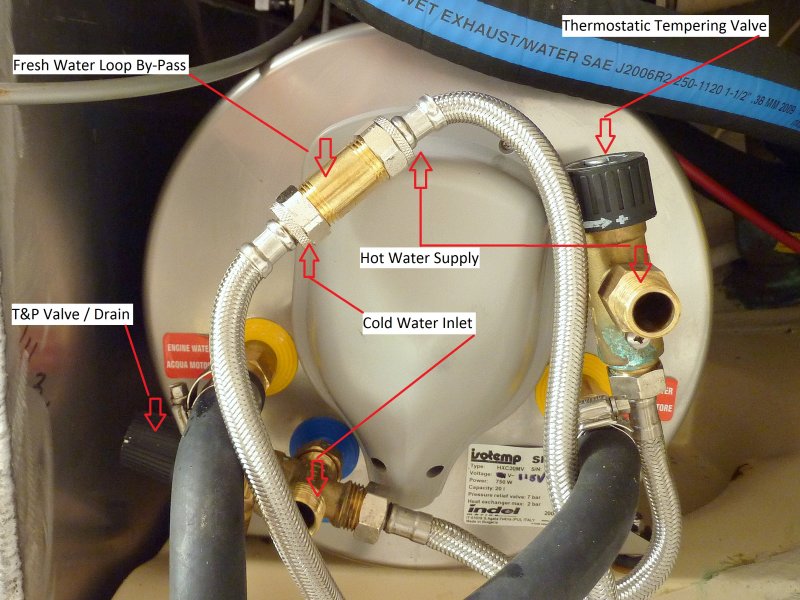
While fitting a manual by-pass is easy, some owners are always looking to make the winterizing process even easier. For this, we offer a pre-packaged water heater by-pass kit..
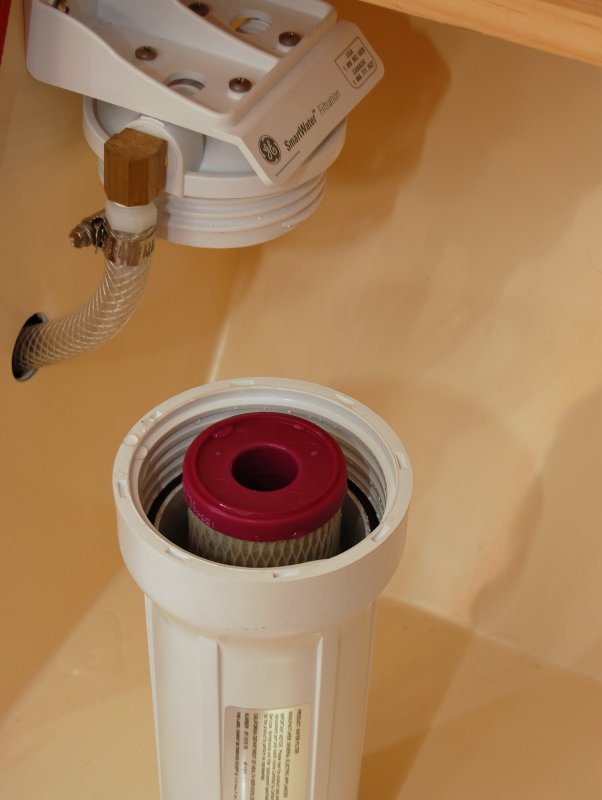
Remove Any Water Filters
Step 4 – Remove Water Filter Cartridge:
If your boat has any on board water filters now is the time to remove them. Simply pull the cartridge out and spin the filter back together without the filter in it.
Add a Length Of Hose to Your Water Pump Supply
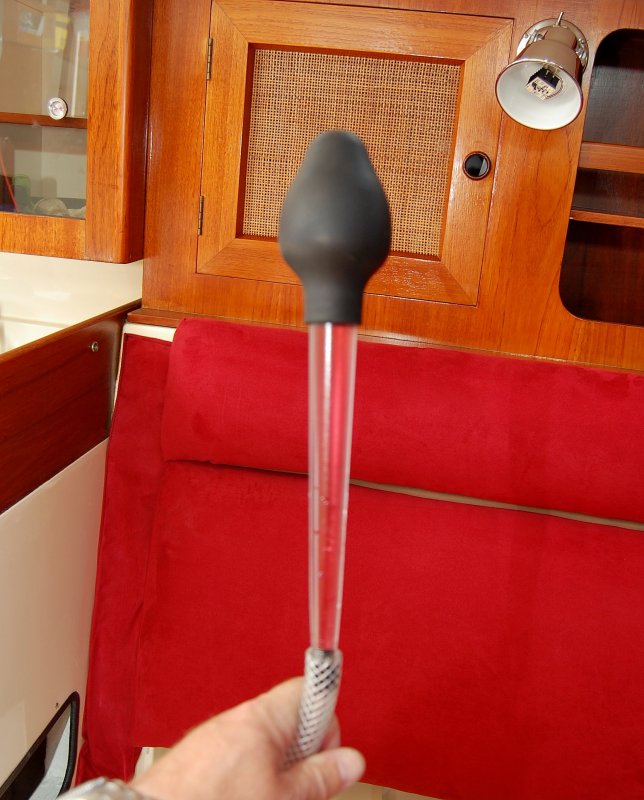
Step 5 – Adding a Sucking Hose:
As you can see I’ve pulled the supply hose for the water pump off the manifold. I then use a hose barb and a spare length of hose to make an extension that could reach the antifreeze bucket.
Using Turkey Baster To Prime The Pump
Step 6 – Priming The Water Pump:
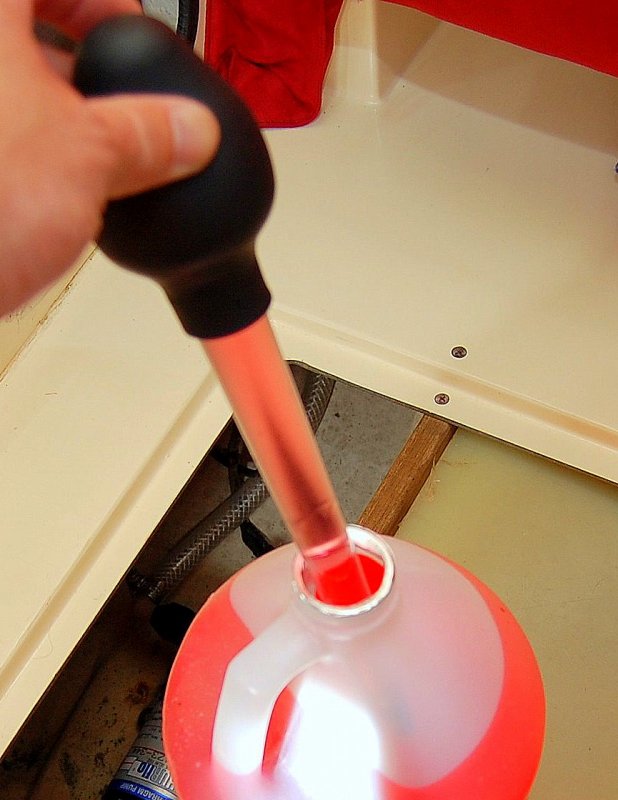
Sometimes when you run a water pump dry, from draining the water tanks, it can become hard for the pump to create a new prime and begin sucking fluids again. Some pumps are worse than others in this regard.
An easy way to avoid this problem is to pre-prime the water pump using a turkey baster. Not all pumps will require this trick and if yours won’t prime this will do the trick.
Filling the Sucking Hose
I have the turkey baster full of antifreeze and am now pre-filling the hose that leads to the water pump.
Antifreeze Bucket
TIP: The 5 gallon bucket I use for antifreeze has been graduated with a Sharpie marker at each gallon. This makes it very easy for me to stop pumping, take a concentration measurement, and then continue on. In the end I know exactly how many gallons it took to get the right concentration into the system, no more, no less.
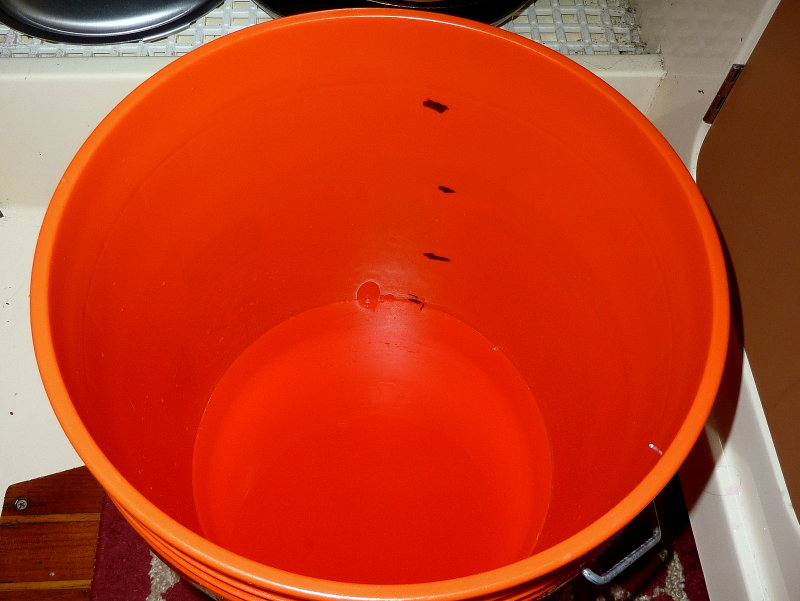
In this image the bucket has exactly 1 gallon in it…
Ready to Protect the Piping
Step 7: Sucking The Antifreeze Through The Water System:
With the hose full of antifreeze, and the domestic water pump primed, use a clean bucket, or the sucking hose stuffed into a gallon of antifreeze you are now ready to flip the switch.
Turn the water pump switch on and open each tap, in rotation, until it runs a color that looks the identical color in the bottle.
Run and test each tap until the concentration of the PG matches exactly what is in the new bottle. If you don’t have a refractomer samples in a clear glass placed next to a new undiluted sample can give somewhat decent guidance. When in doubt suck in more antifreeze.
TIP: Sucking in another gallon or two will always be less costly than a freeze up.
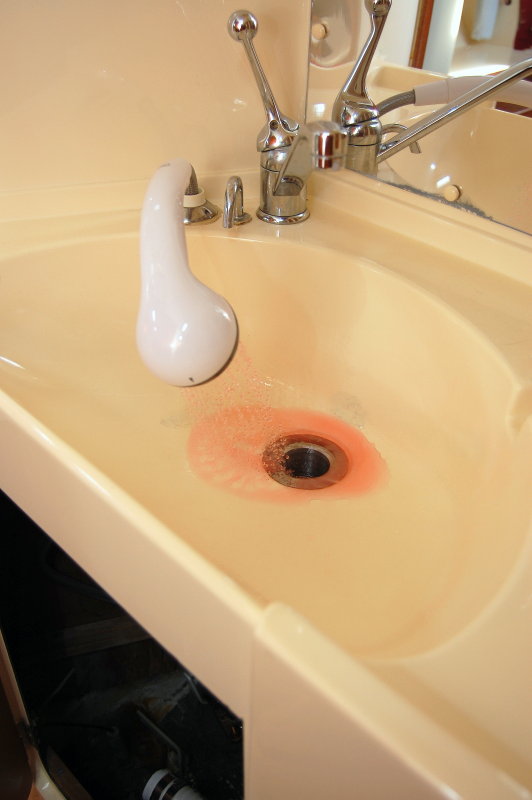
Make Sure You Get Pure Pink
After you flip on the water pump switch open each and every faucet, shower head or wash down fixture. I suggest doing them one at a time, first cold then hot at each faucet. Do this to ensure all the domestic plumbing are getting pure pink, the same exact color it was coming out of the bottle.

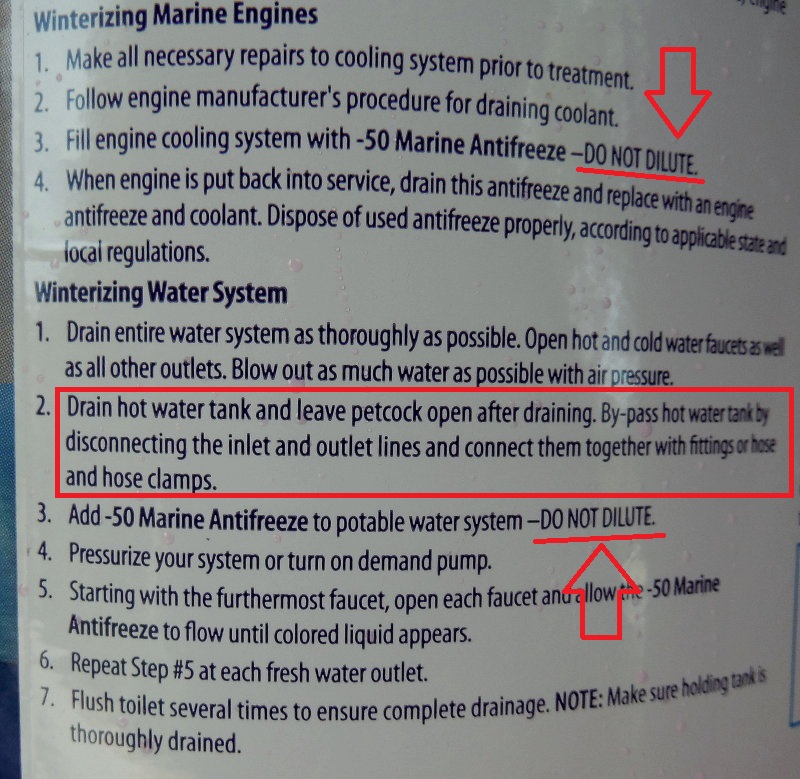
IMPORTANT: -50F & -60F RV/Marine antifreeze is already pre-diluted. It is not intended to be diluted any further. Diluted antifreeze means considerably warmer burst & freeze points.
At Two Gallons
When your sample from each tap is on the extremely diluted side the differences in color are easy to spot.. This was an approx 18F spread on the refractometer. NOT GOOD…
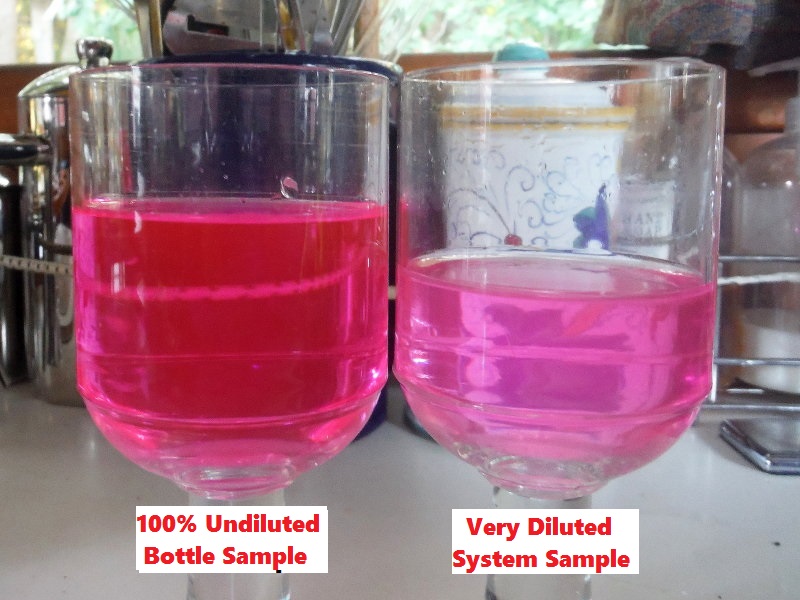
The often repeated method of seeing pink is not the correct manner in which to winterize your system.
They May Look The Same
In this image we have an out of the bottle sample and a spigot sample. This was measured at after 3.5 gallons had been sucked in to the system piping only. The refractometer readings were still a 4 degree spread which translates into a dangerous burst point for Maine.
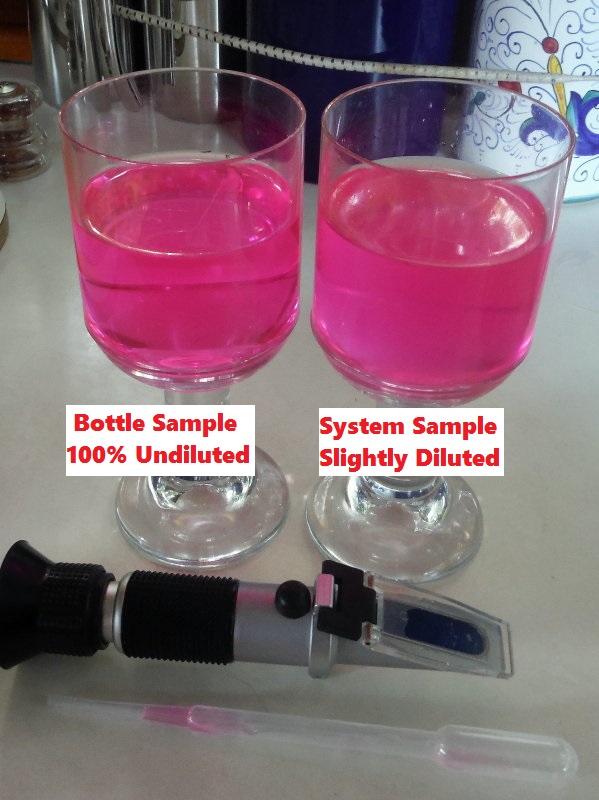
The refractometer readings should match perfectly.
Don’t Forget The Sanitation System!
I know this article is about the fresh water system but I need to make a plug for the sanitation system.
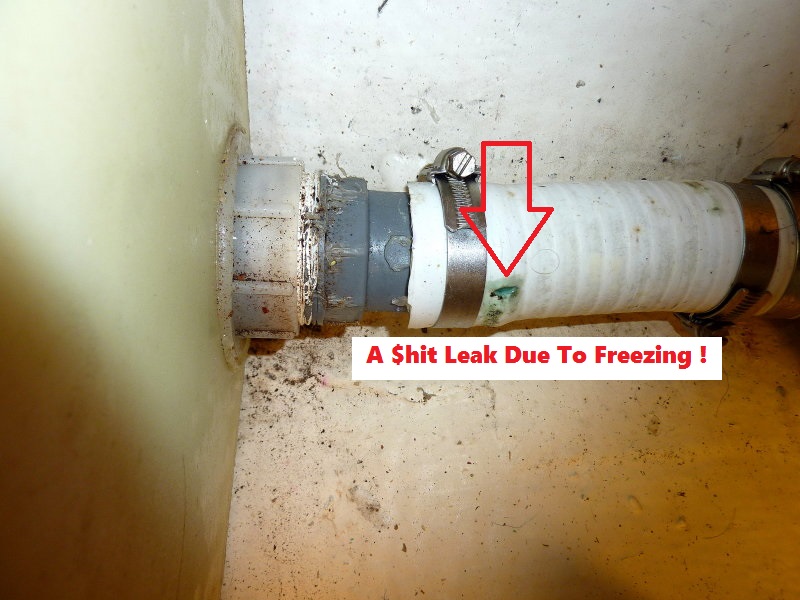
This owner did a DIY winterizing and paid a really big price. The price for improperly winterizing the holding tank was massively repulsive odors in the boat. Come spring, when the frozen shit & urine melted, the leaks began and this was only one of them. The entire boat wreaked of raw sewage. it was absolutely disgusting. On top of the leak he went in late and the leak was not discovered until early June. Under the hot cover the odors had baked into everything. He had flushed one gallon of -50F PG through the head. His hoses alone held more than one gallon and the tank still had at least 3-4 gallons in it. Remember when I said -50F & -60F PG should not be diluted, this is the why.
This is also another reason I do not like elcheapo PVC sanitation hose. Every leak from the freezing was in the white PVC hose… Rubber based hoses may have survived this, PVC did not.
Sanitation System Punch List:
1- Holding tanks should be completely empty before you winterize them.
2- Hoses from head to tank should be pre-purged of effluent by dry pumping.
3- Try to wash out your holding tank before putting the boat away. Most tanks have a clean out port, use it.
4- Ask your pump out guy to do a flush service. Evacuate, fill with clean water, re-evacuate.
5- You may need a manual pump to get the tank dry. Pump into a 5 gallon bucket and pour it into a land based toilet.
As a Point Of Reference
I do not accept sanitation odors as normal on our boat, or any boat. As a point of reference this is what the inside of the holding tank looks like on our boat each fall. The photo was taken through the clean out port. This is what it looks like before she is winterized.
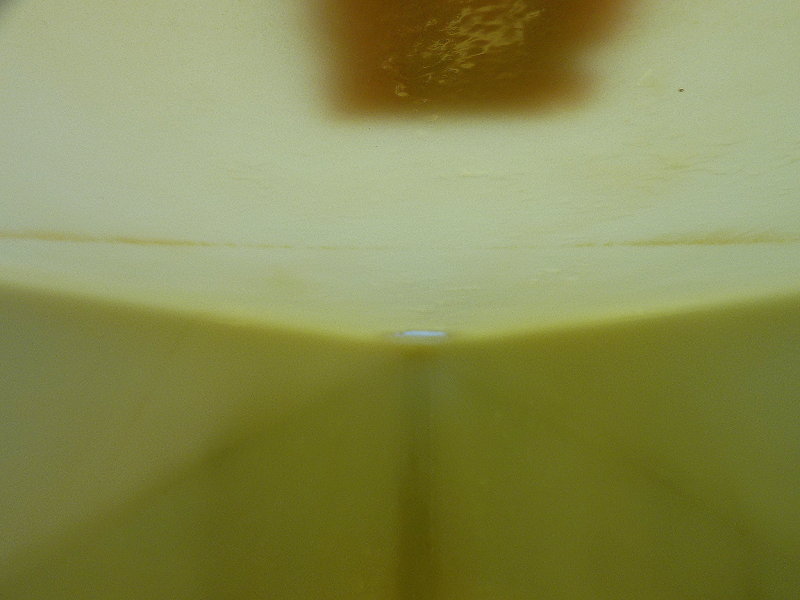
The tank is pumped out, back flushed, pumped out again then physically hosed out via the clean out port. I then fully bleach sanitize the tank and it is 100% drained via a dip tube and utility pump. I use 1/2″ PEX as the dip tube and a small utility pump to get all the contents out.. A little extra work? You bet, but well worth it to our family. The hoses are also pre-purged/rinsed before any antifreeze goes into the system.
We have zero sanitation odors on our vessel…. (wink)
When In Doubt…
I will leave you with this image..
I simply can not stress enough the importance of not diluting the PG mixture in your systems. When in doubt suck more in or physically test it with a refractometer..
IMPORTANT: When using a refractometer the best practice is to match a test sample from the bottle to what is coming out the taps or exhaust, if doing an engine. Ignore the numbers or specific gravity segments and just make sure the bottle sample matches the tap sample at the same line or point in the refractometer. You are simply comparing a bottle sample on the refractometer to the tap sample. They should line up identically.
Water heaters are always drained and by-passed you do not run antifreeze through a water heater. See red highlighted paragraph.
Good luck, and don’t dilute!!