Choose the Location
This photo is showing the spot for the new seacock & thru-hull as chosen from inside the vessel. Care should be taken when considering anew location for an additional seacock which includes, easy access, hose routing and seacock location for valve movement..
Once you have chosen your new location drill through the hull from inside using a 1/4″ drill bit. The reason for the 1/4″ bit is that it matches the size bit used on most hole saws.
You then drill into the hull from outside using the proper sized hole saw to match the thru-hull.Be very careful to drill perpendicular to the hull or the thru-hull fitting will not fit flush.
TIP: Start the hole saw in reverse, as I have done here, and you’ll greatly minimize or remove the possibily gelcoat chipping. Once the hole saw is through the gelcoat, switch to forward and drill up through the hull making sure you are perpendicular to it.
Tape, Knife & Thru-Hull
The next step is to tape off the hull and then use an X-Acto knife, or similar, to cut out a hole in the tape.
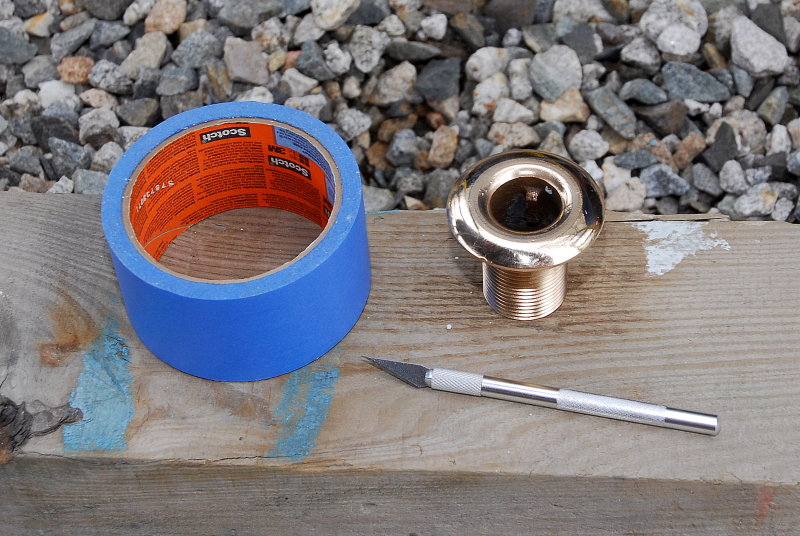

Tape The Hull & Cut The Hole
The hull has been taped off and the hole cut out cleanly with the X-Acto knife.
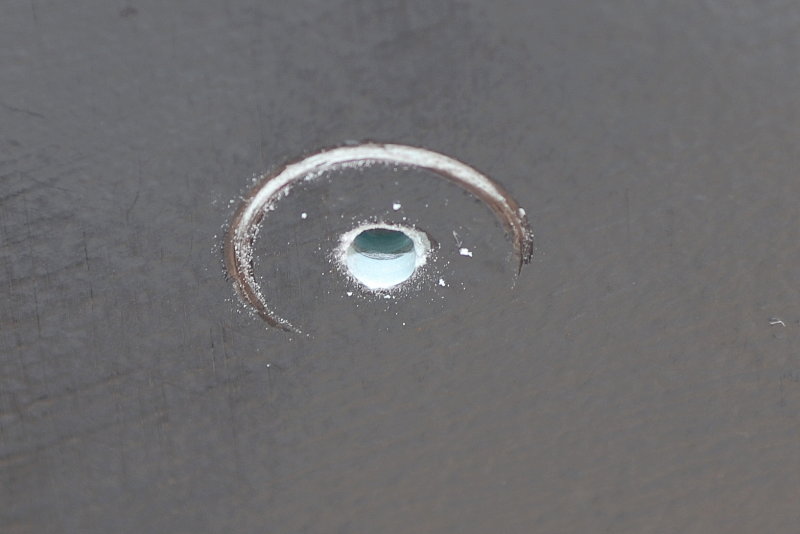
Sand Away Bottom Paint
With a hole cut in the tape press the thru-hull tightly into the hull and lightly trace it with the X-Acto knife, just enough to cut the tape, then peel away the tape that was under the thu-hulls head.
Once the ring of tape has been pulled off sand away the bottom paint that would be under the thru-hull. Sand until you get to gelcoat or a barrier coat as shown here. This will create the best watertight seal between the hull & thru-hull fitting.

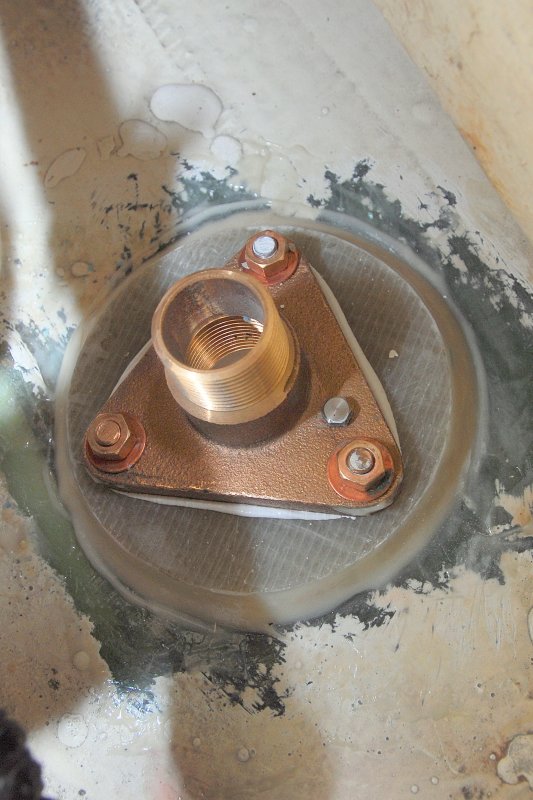
Install Your Backing Block
Install your backing block following the instructions in my other articles on seacocks. Here the backing block, and Groco flanged adapter are shown epoxied, bolted & sealed into the hull with Sikaflex 291 and ready for the bronze thru-hull to be threaded into it from outside.
Goop The Thru-Hull
With the seacock or flanged adapter already installed and bedded to the backing plate, lather up the thru-hull fitting with a marine sealant of your choosing. For this installation I used Sikaflex 291.
The beveled mushroom head of the thru-hull fitting is what creates the water tight seal against the hull, and is the most important place to put sealant. Putting some sealant on the threads is only a secondary measure and adds some thread lubrication when tightening it down.

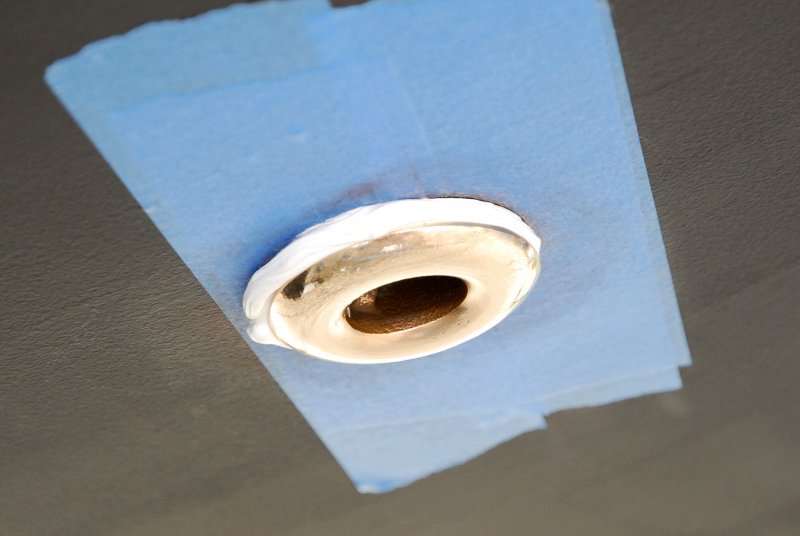
Install the Thru-Hull
The thru-hull fitting is now threaded into the seacock or, in this case, the flanged adapter. It’s important to dry test fit everything first to make sure you’ve cut the thru-hull to the proper length and that everything fits perfectly. Do a dry run before applying the marine sealant.
Tighten & Torque the Thru-Hull
In this photo the thru-hull has been fully tightened using a thru-hull step wrench and a large wrench. I torque it down fairly well into the seacock.
At this point it’s time to thread the bronze Marine UL ball valve onto the flanged adapter. For this you coat the male thread of the flanged adapter with a plumbers pipe dope. I use Hercules Real-Tuff a my pipe dope of choice.
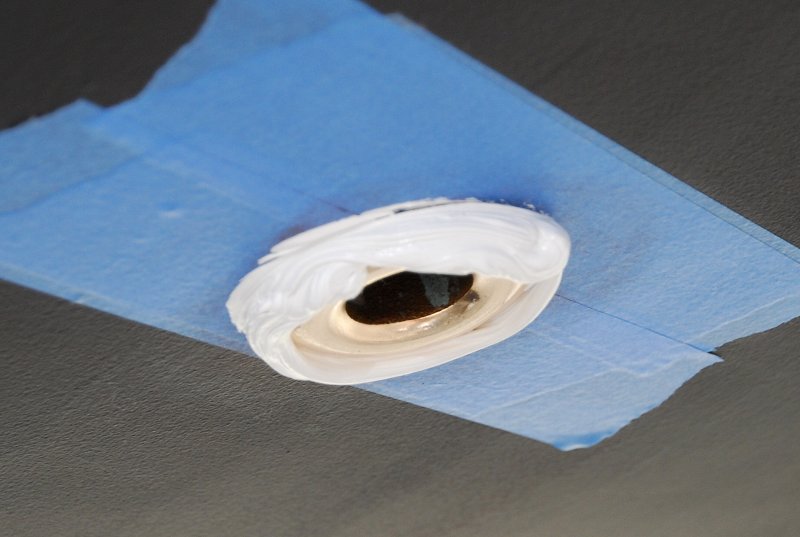
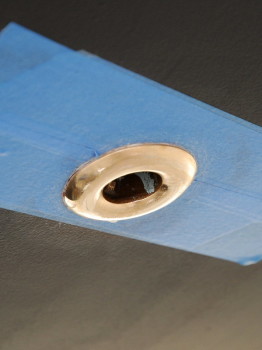
Clean Up & You’re Done
Once the thru-hull is torqued down clean up the excess sealant and then remove the tape. This job is pretty easy and by using the tape method you don’t impact the bottom paint more than is absolutely necessary for the installation.
Good luck & happy boating!