Solar MC4 Connectors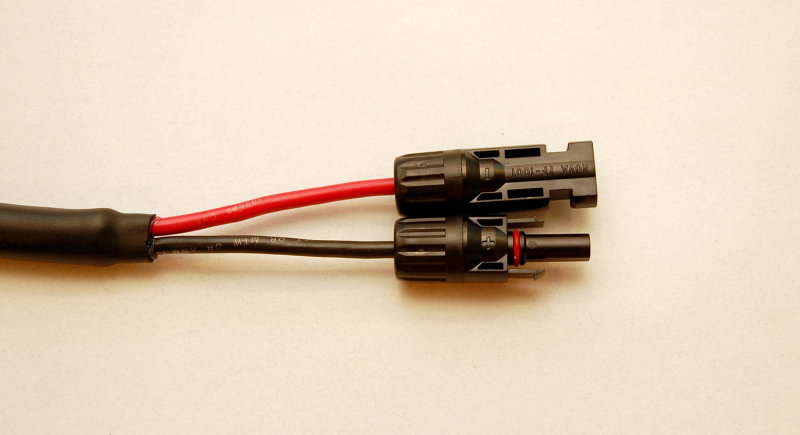
These are solar *MC4 connectors, the FEMALE is on the bottom, and the MALE plug is on top. Today, more and more solar panels are shipping with MC4 terminals and less and less with actual junction boxes. I still personally prefer a water tight j-box, and water tight entry gland, but not all panels ship that way.
*IMPORTANT: Technically these are fake/knock off MC4 connectors. They were used to keep the cost of this article as low as possible while not destroying the more expensive, and much higher quality, Stäubli Multi-Contact branded MC4 connectors. Here in our shop we only use Genuine Stäubli MC4 solar connectors are UL rated for 1000V DC and up to 30A of maximum current using 10GA wire. The term MC4 stands for “Multi-Contact“. Multi-Contact / Stäubli Electrical Connectors is the German manufacturer, they invented the MC4 connector. Genuine Stäubli made MC4’s are IP68 rated which means they are fully “dust & water jet tight” and can be submersed to 1 meter for 1 hour and still retain water resistance (IP68). The Stäubli MC4 connectors are available in 14, 12, 10 & 8GA sizes. As an alternative to the Stäubli MC4’s (very expensive). Kep in mind Cross-mating of different brands of MC4 terminals is banned by the NEC/NFPA,IEC etc.
MC4 Sizing:
14GA = 22.5A
12GA = 37A
10GA = 43A
8GA = 50A
Like any other project on boats this project will add yet another tool to your tool box.
You can Purchase our recommended products via the affiliate links below
MC4 FEMALE / + Positive
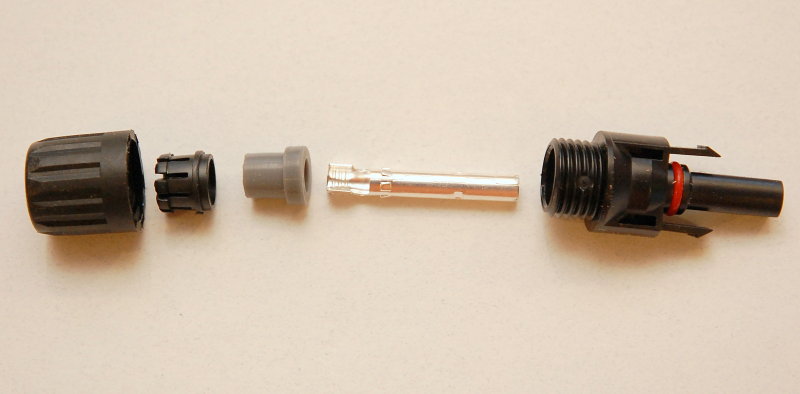
These are the individual pieces of the FEMALE MC4 connector:
From Left to Right:
- Compression Nut
- Gland Compressing Ring
- Water Tight Sealing Gland
- MC4 FEMALE Crimp Terminal
- MC4 FEMALE Plug Body
MC4 MALE / – Negative
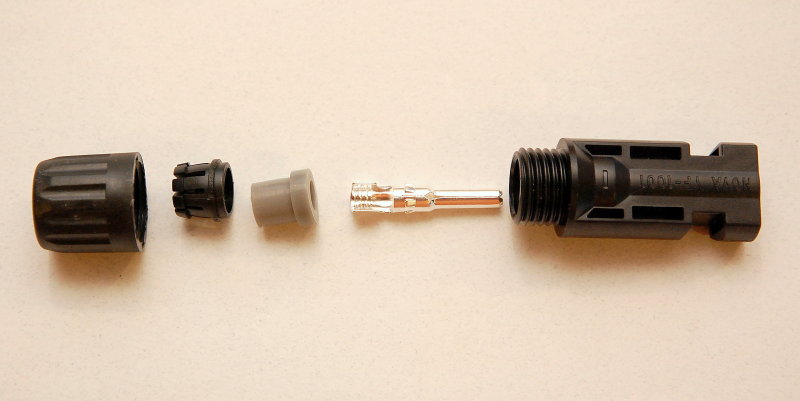
These are the individual pieces of the MALE MC4 connector:
From L to R:
- Compression Nut
- Gland Compressing Ring
- Water Tight Sealing Gland
- MC4 MALE Crimp Terminal
- MC4 MALE Plug Body
FEMALE & MALE
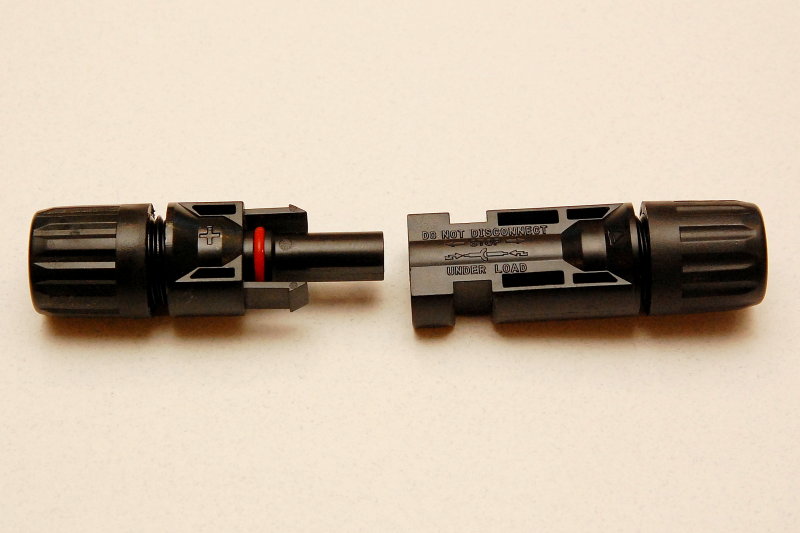
The FEMALE terminal on the left is ready to connect to the MALE terminal on the right.
Insert FEMALE into MALE
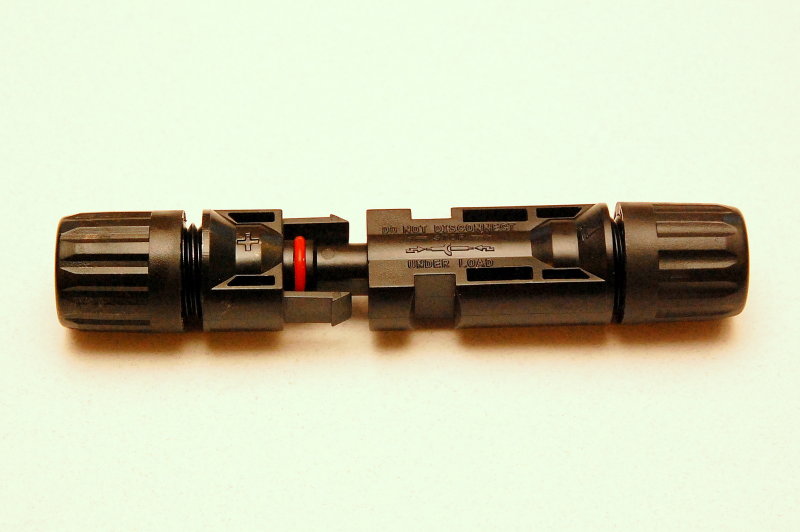
I know it’s a bit confusing, the FEMALE vs. MALE with MC4’s, because the one on the left clearly looks like a MALE and the one on the right clearly looks like a FEMALE.
The terminology relates to the crimp terminals inside the plastic housing not the physical body of the plugs. The plug on the right has the small MALE “pin” and the plug on the left has the FEMALE barrel/receptacle.
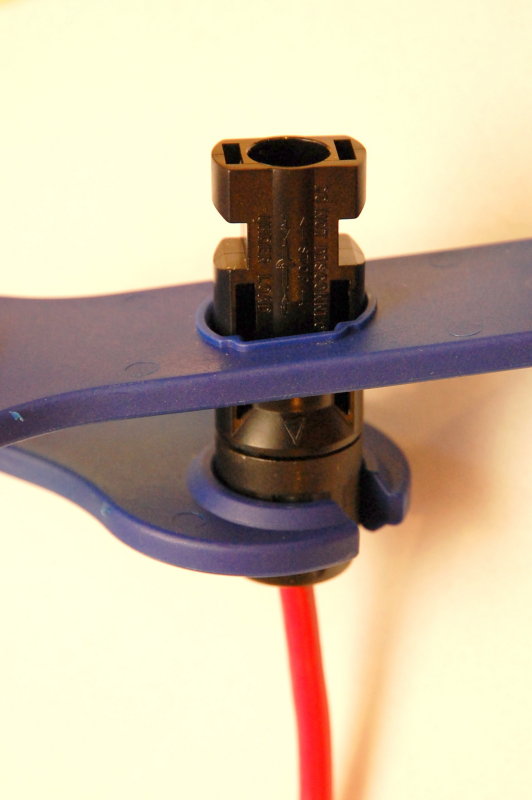
Press & Snap Closed
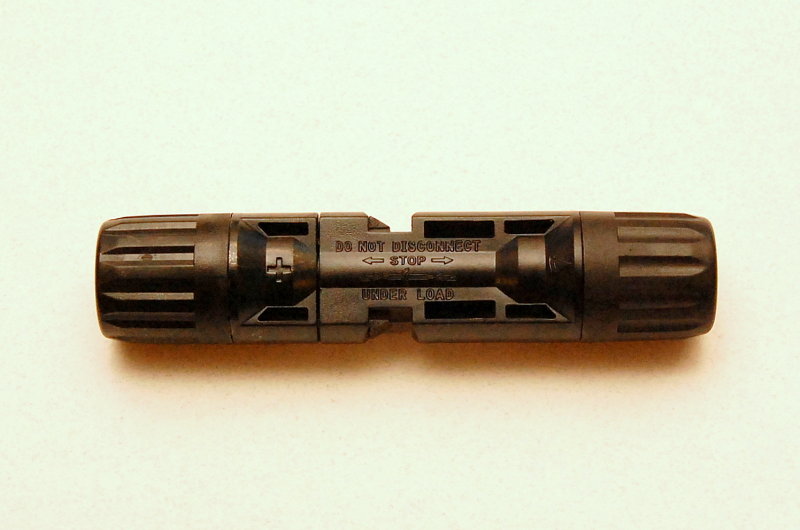
You just press the two MC4’s together until the snap closed.
MC4 Assembly & Disassembly Tool
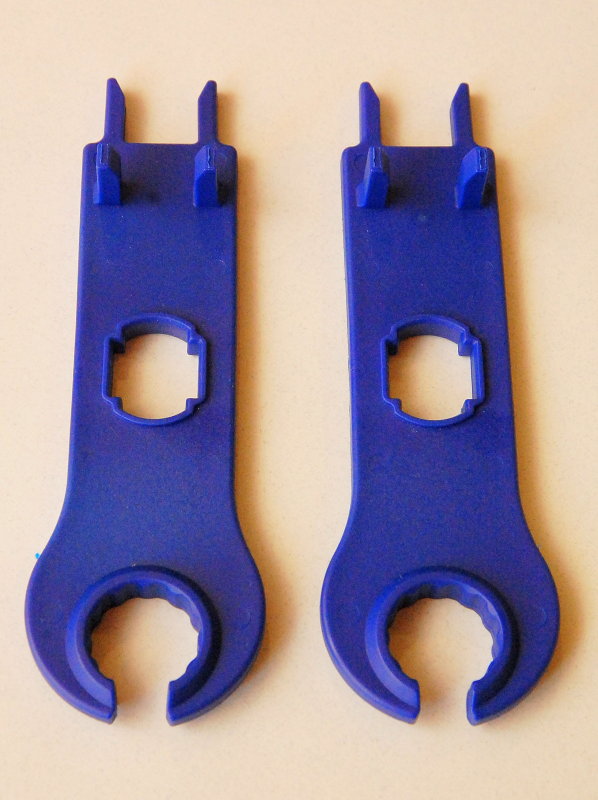
These are the tools used for snugging the MC4’s together. They are inexpensive, and worth having, especially for taking the terminals apart after they have been closed for a while.
MC4 Crimp Dies
Here’s where the extra tool cost, that I mentioned earlier, comes into play. We have inexpensive, Sub $50.00, Parallel-action tools in our Amazon Store
Buy MHT Recommended Solar Products- Amazon
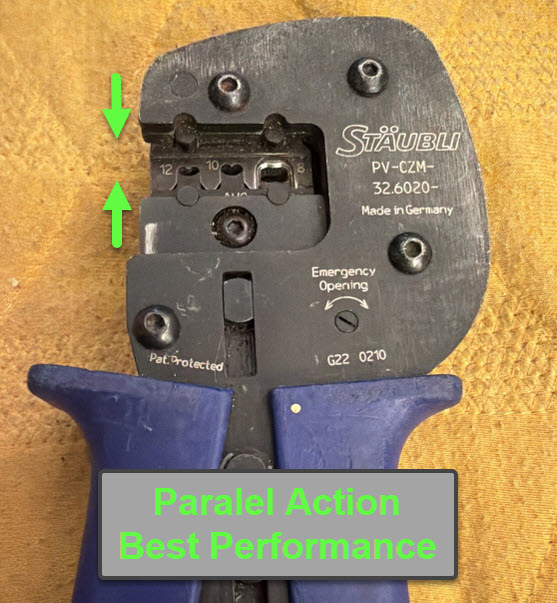 MC4 Crimp Dies Close-Up
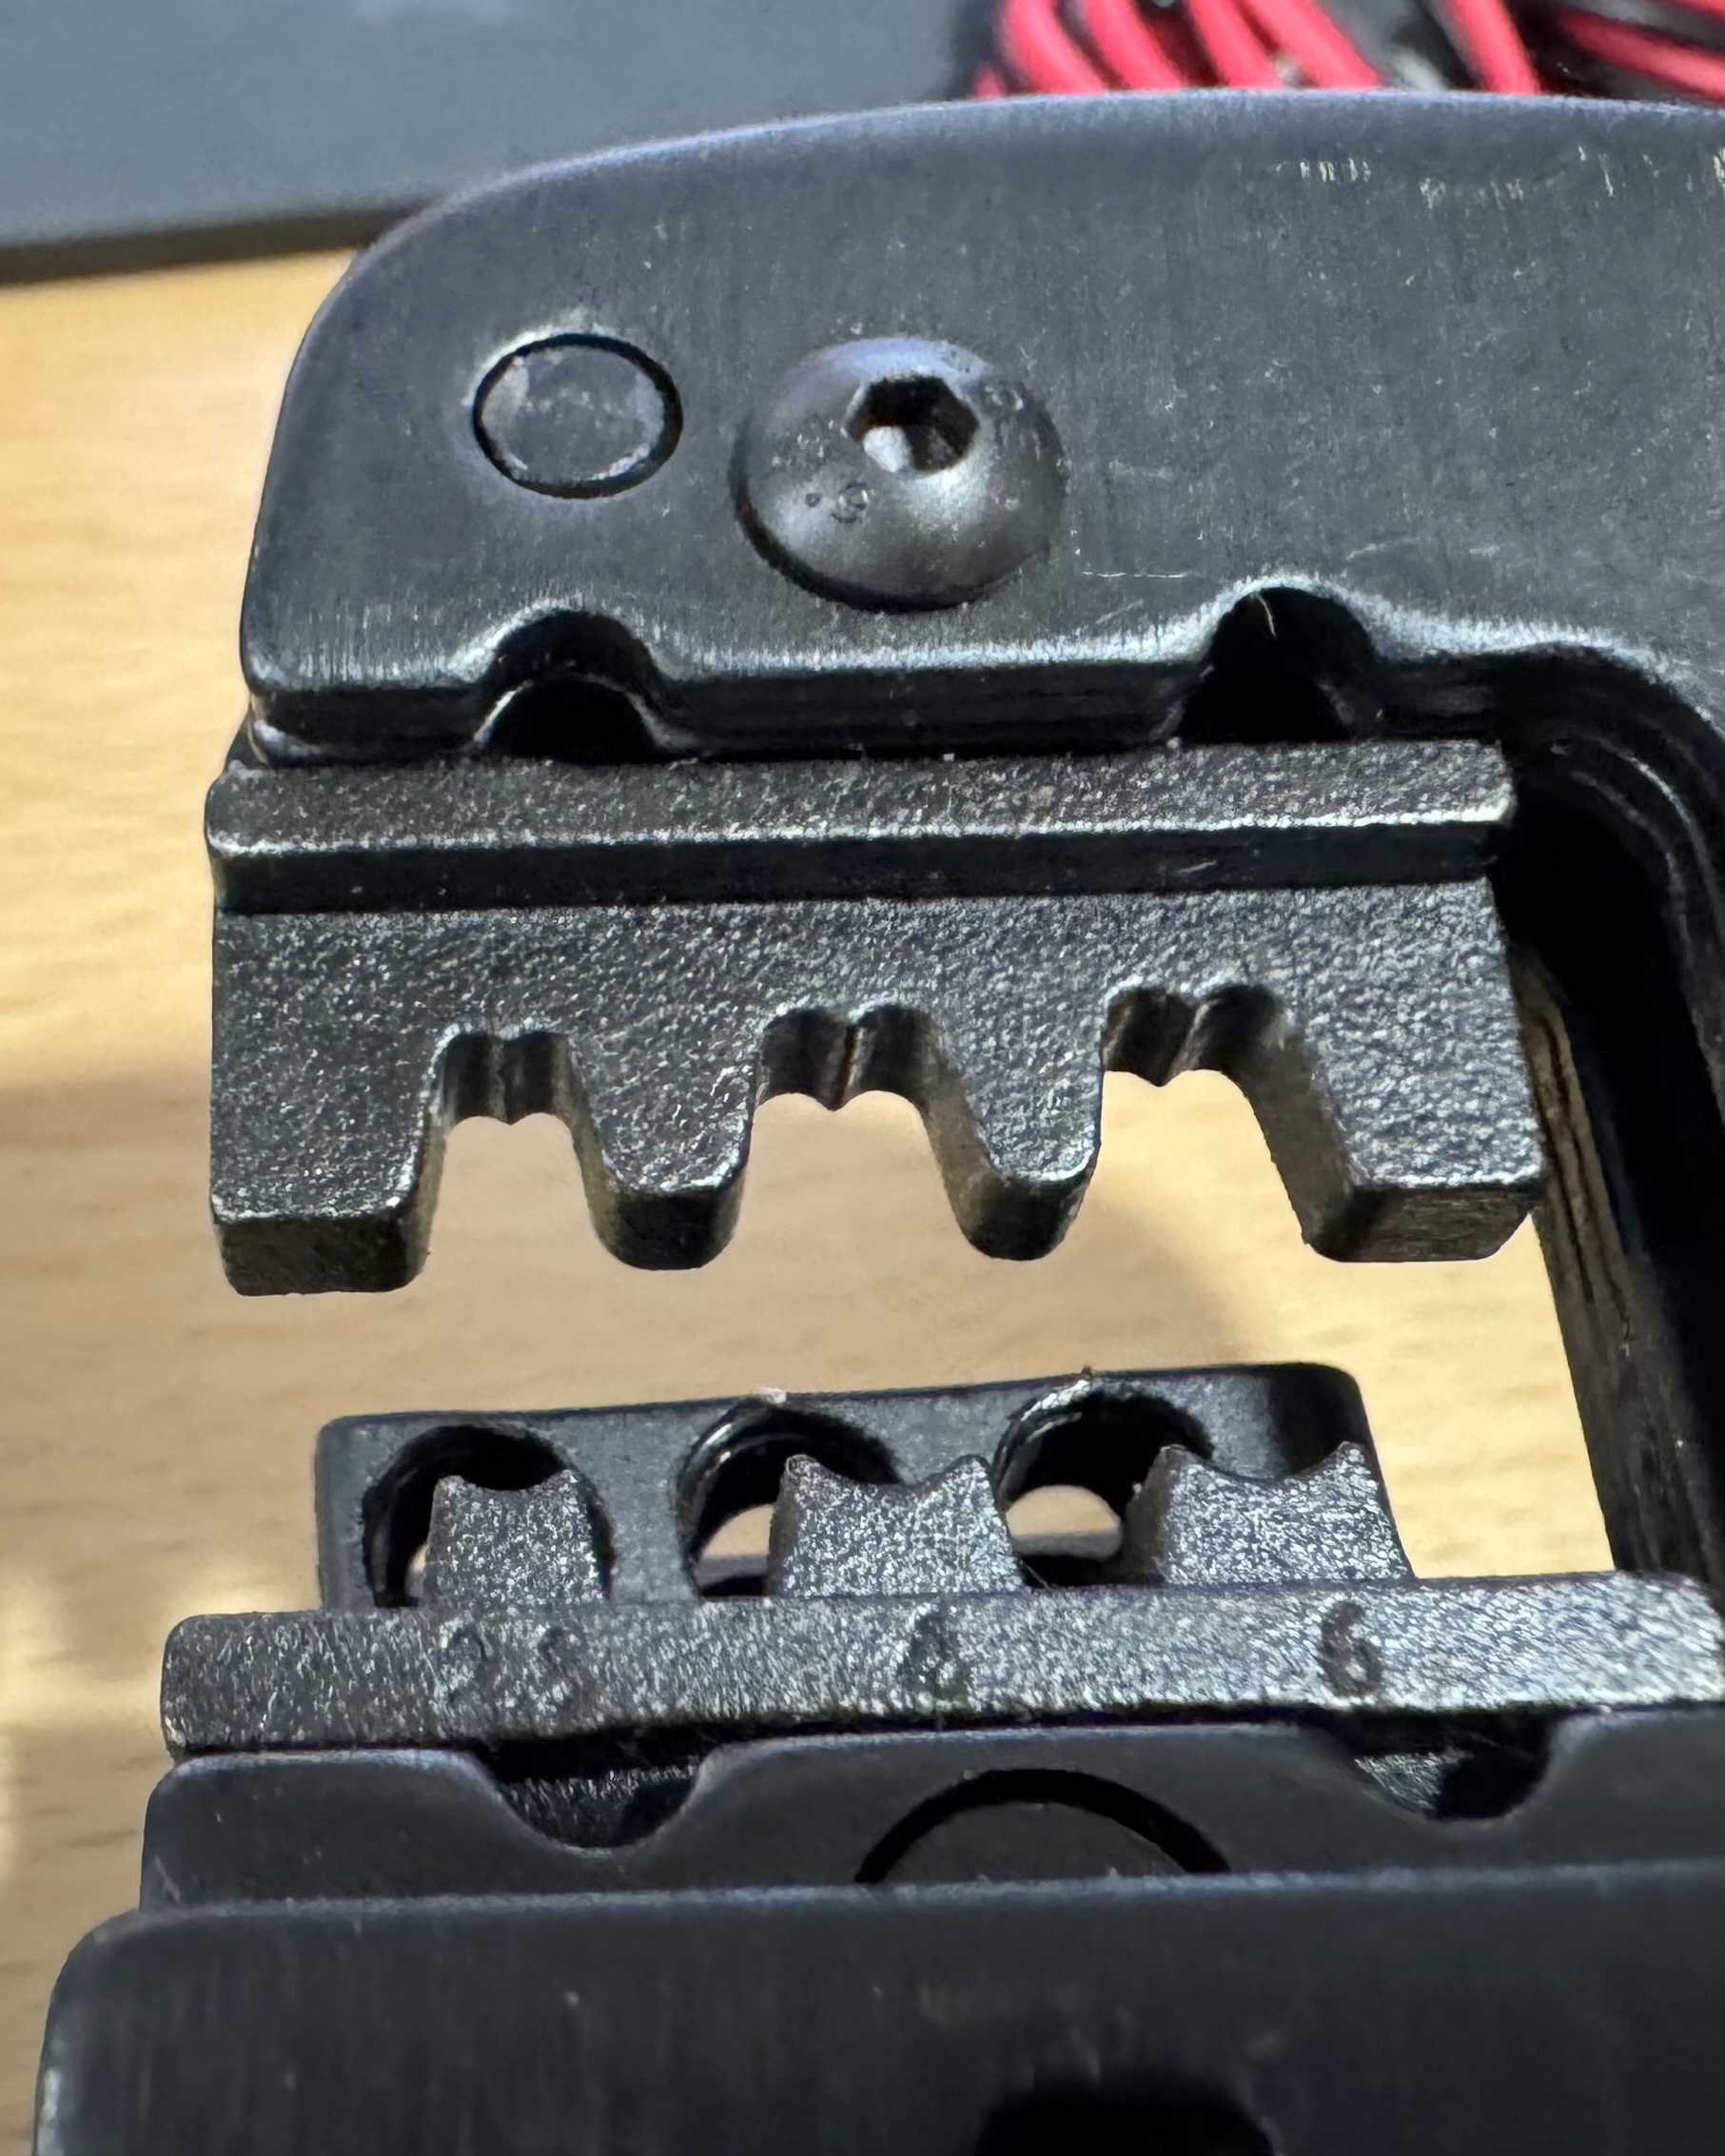
Like a D-Sub or Packard style crimp tool the MC4 dies make a “B” or “butt-cheek” type crimp. The pictured die set is sized for 10, 12 & 14 AWG wire as well as 2.5 mm², 4 mm² and 6 mm² wire.
Why Not To use Scissor-Style Tools
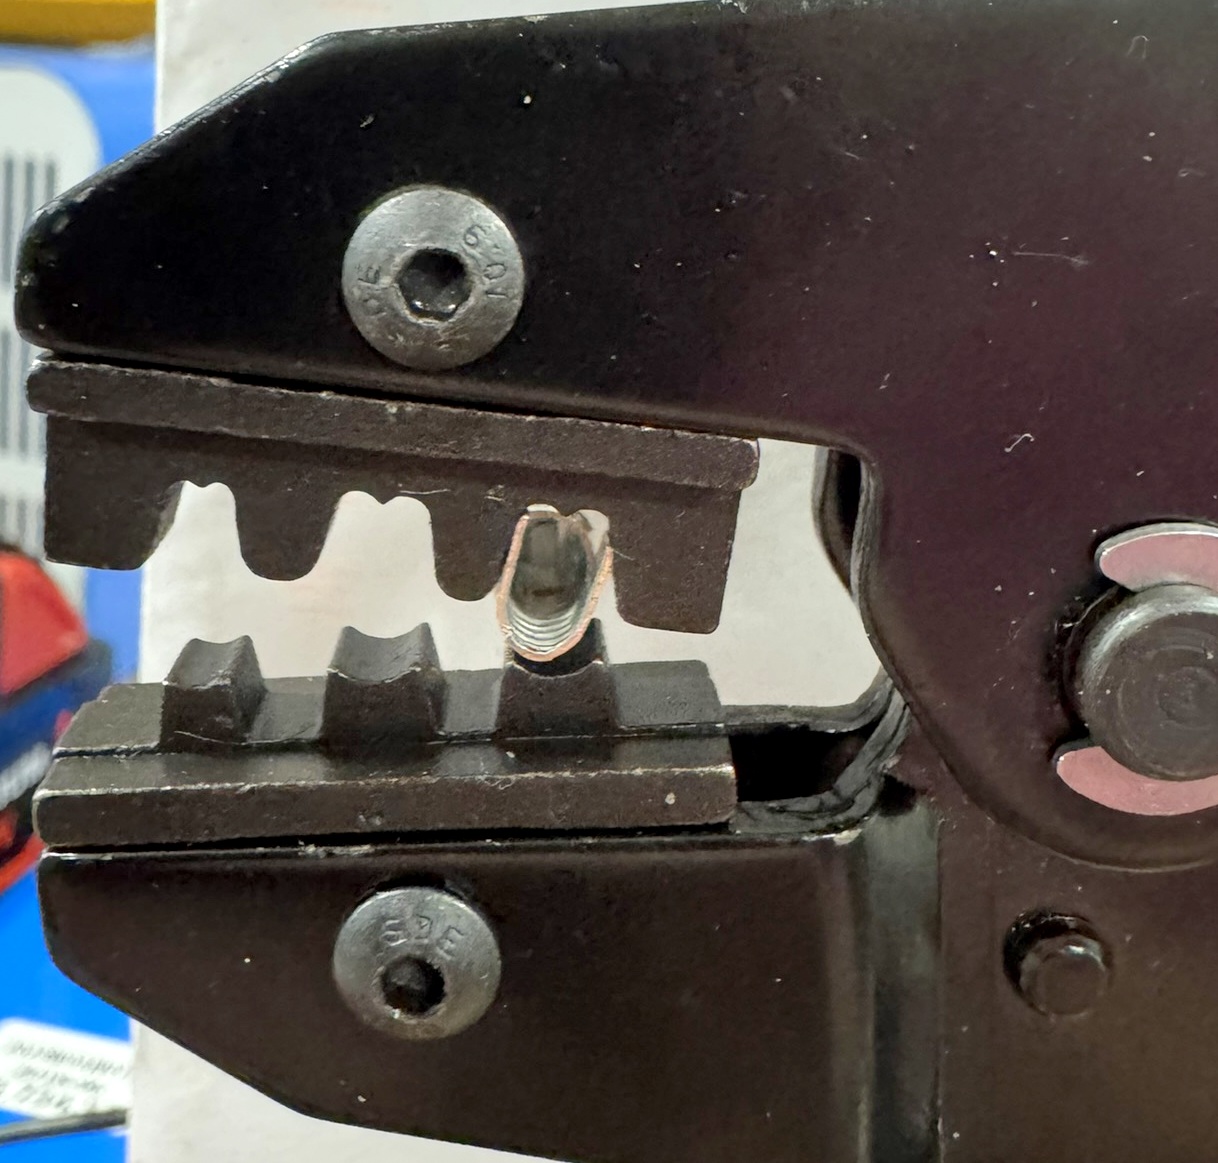 Scissor Style tools make proper crimp execution very tough, as the dies don’t contact the terminal vertically. As can be sen here the crimp will not be properly executed.
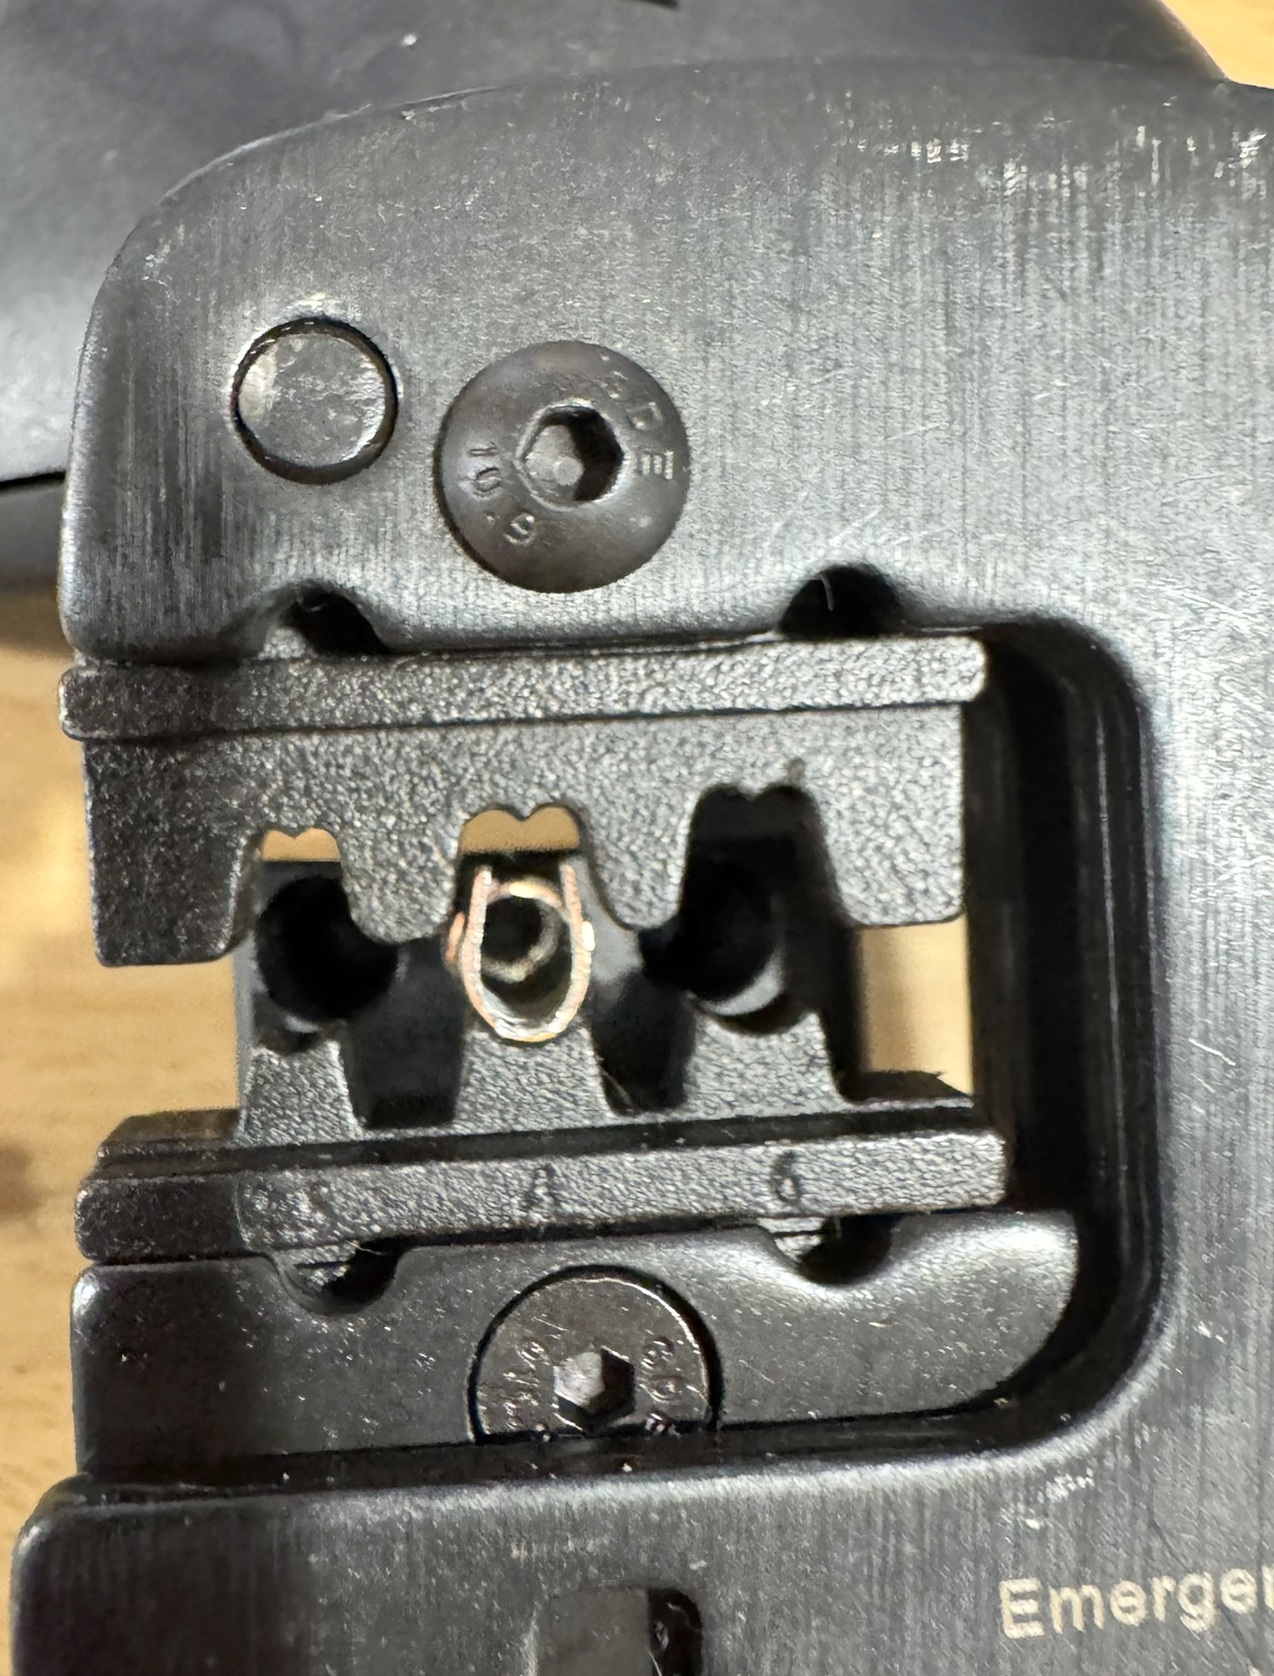
Parallel-Action
You’re now ready to place the terminal into the crimp tool dies. The open wing-ends of the terminal face up towards the butt cheeks so it can be rolled over and formed to execute the crimp.
TIP: It helps to compress the crimp frame just a click or two. This will hold the terminal as shown and you can then insert the wire and finally squeeze the handle to complete the crimp. Professional level MC4 crimp tools such as those by Staubli, Rennsteig and others, use a locator that holds the terminal for you. We even have two very affordable parallel-action tools, with locators, in our Amazon store.
Buy MHT Recommended Solar Products- Amazon
Here I have executed a crimp, sans wire, so you can see how a quality tool forms the crimp.
Strip Outer Jacket From Cable
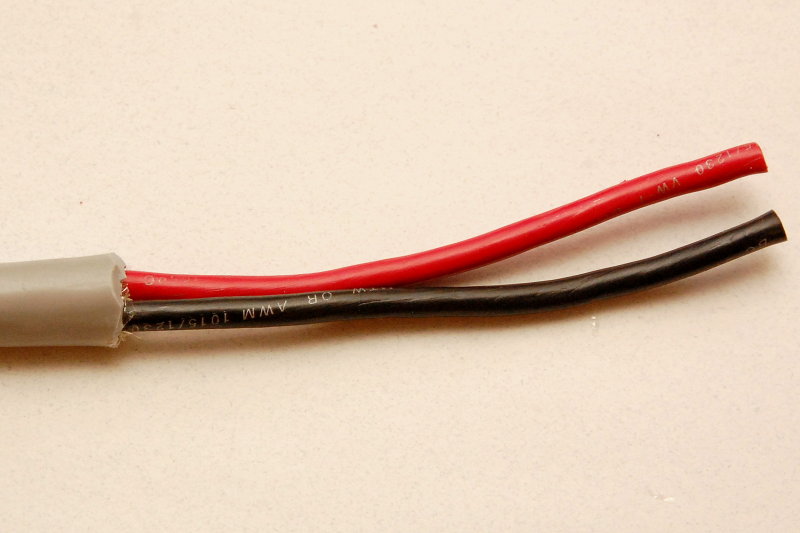
On boats I will occasionally use a two conductor un-tinned round cable such as an SO type wire for the external connections to the solar panel, but most often a tinned marine grade wire is what I use. This is a UV Stabilized round 10/2 AWG.
Inside the solar MC4 terminal the use of tinned wire is not as critical as with open style crimps. I almost always use 10/2 or 8/2 wire from the panel to deck if using MC4’s. Ocasionaly I wil use dedicated single conductor PV wire. Once through a deck-gland, such as those made by Scanstrut, and into the vessel, you can switch to a larger GA wire in order to minimize voltage drop on longer runs from the PV to the battery bank.
In this image I’ve stripped back the outer jacket of the wire exposing the inner 10GA conductors.
Slide Heat Shrink Over Cable
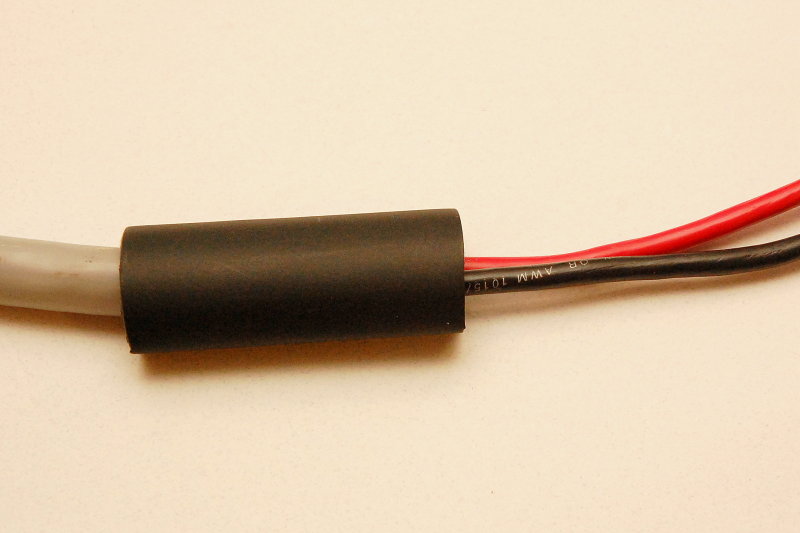
To give the wire a nice finished look and feel I slide some adhesive lined dual-wall heat shrink over the wire. Be sure to do this before you install the MC4’s.
Slide MC4 Parts Over Cable
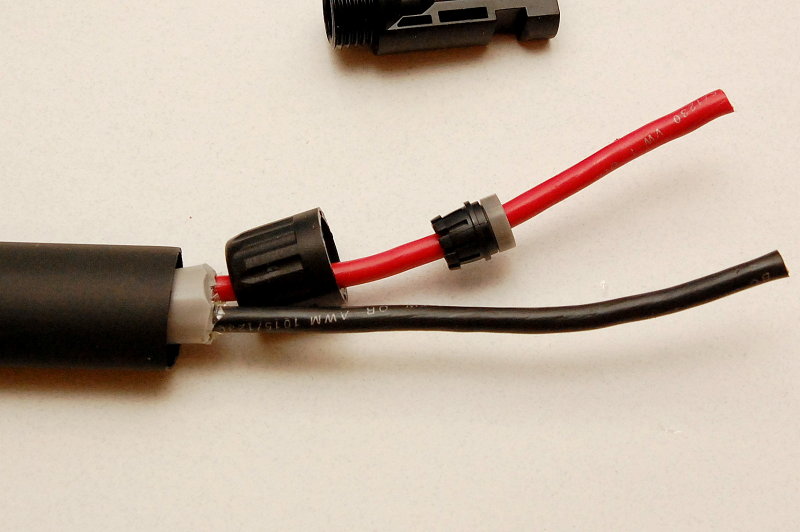
Next, slide on the compression nut, compressing clamp and watertight seal, in this order.
Strip The Wire

Now strip back about 1/4″ +/- of wire being very careful not to damage any strands.
Check Your Strip-Depth

Insert the stripped wire into the MC4 crimp terminal and check your strip depth.
I prefer to have the stripped wire extend very slightly into the barrel of the terminal a bit. This ensures it does not fan out when crimped, and create issues when inserting it into the plug.
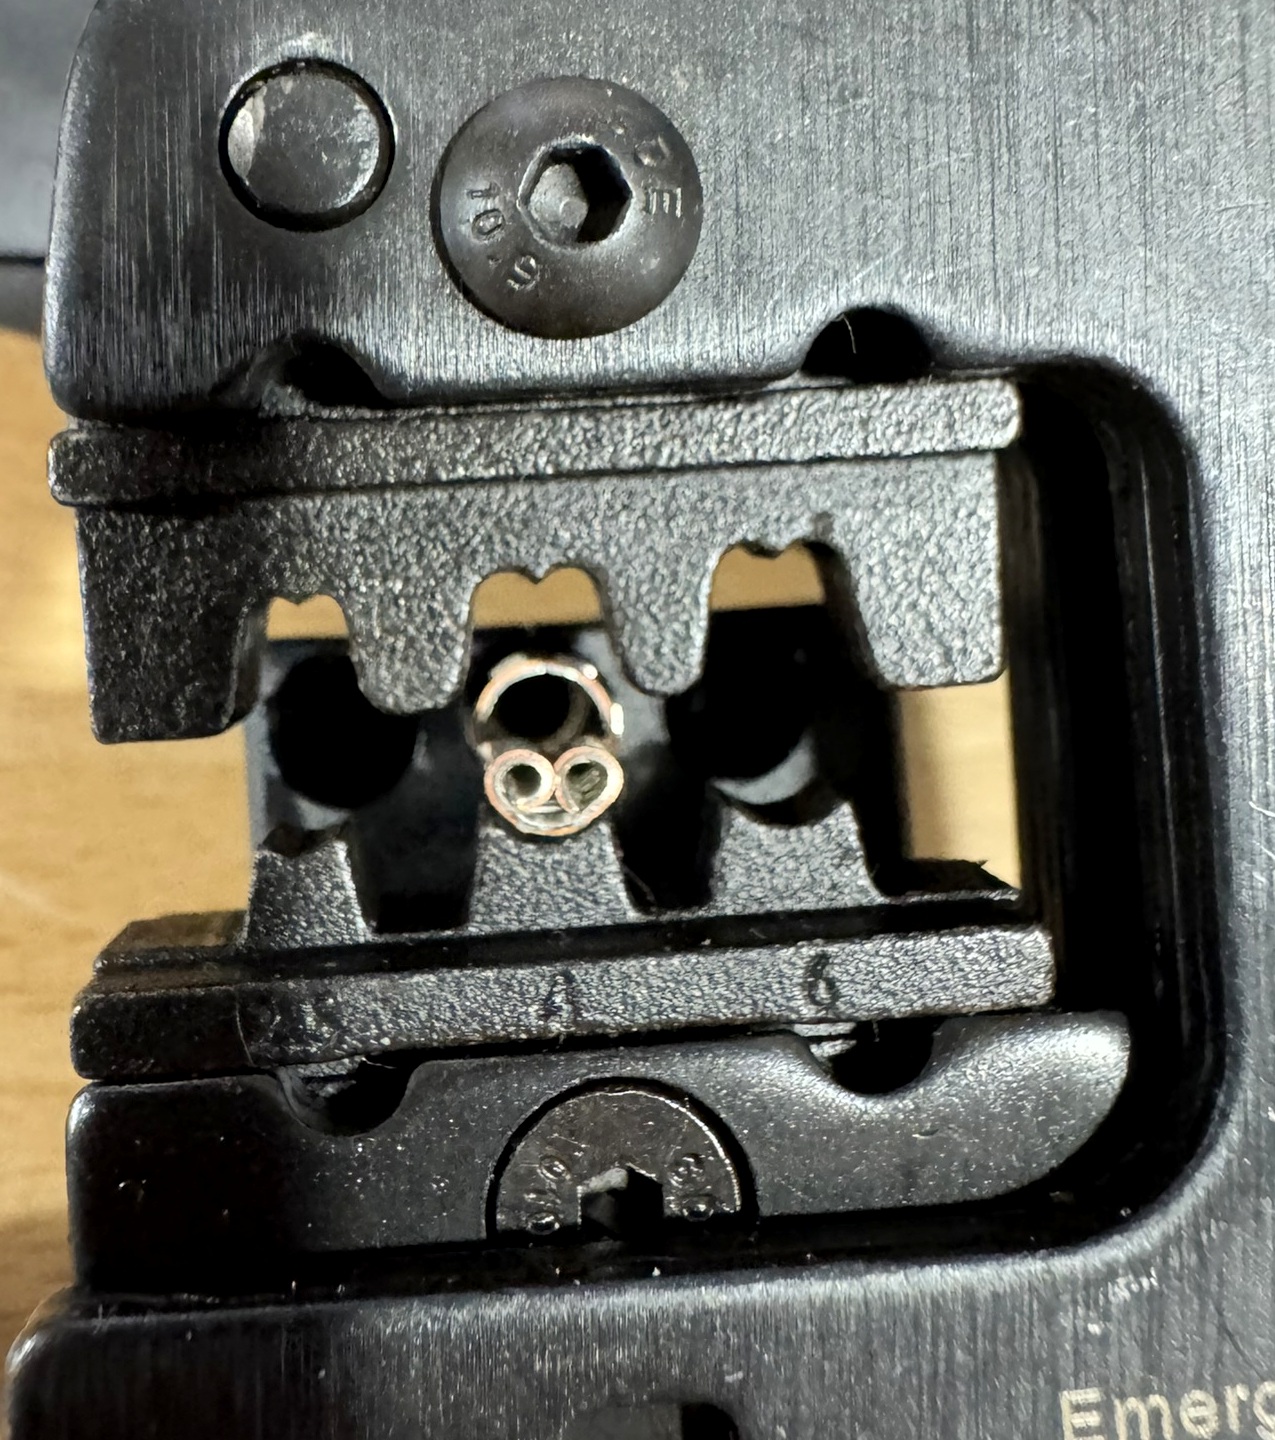
Properly executed Crimp
You’re now ready to place the terminal into the crimp tool dies. The open wing-ends of the terminal face up towards the butt cheeks so it can be rolled over and formed to execute the crimp.
TIP: It helps to compress the crimp frame just a click or two. This will hold the terminal as shown and you can then insert the wire and finally squeeze the handle to complete the crimp. Professional level MC4 crimp tools such as those by Staubl, Rennsteig and others, use a locator that holds the terminal for you.
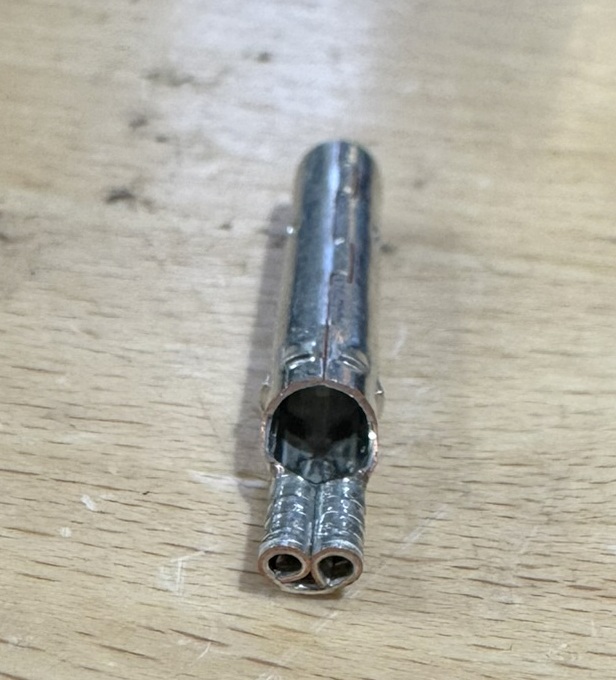
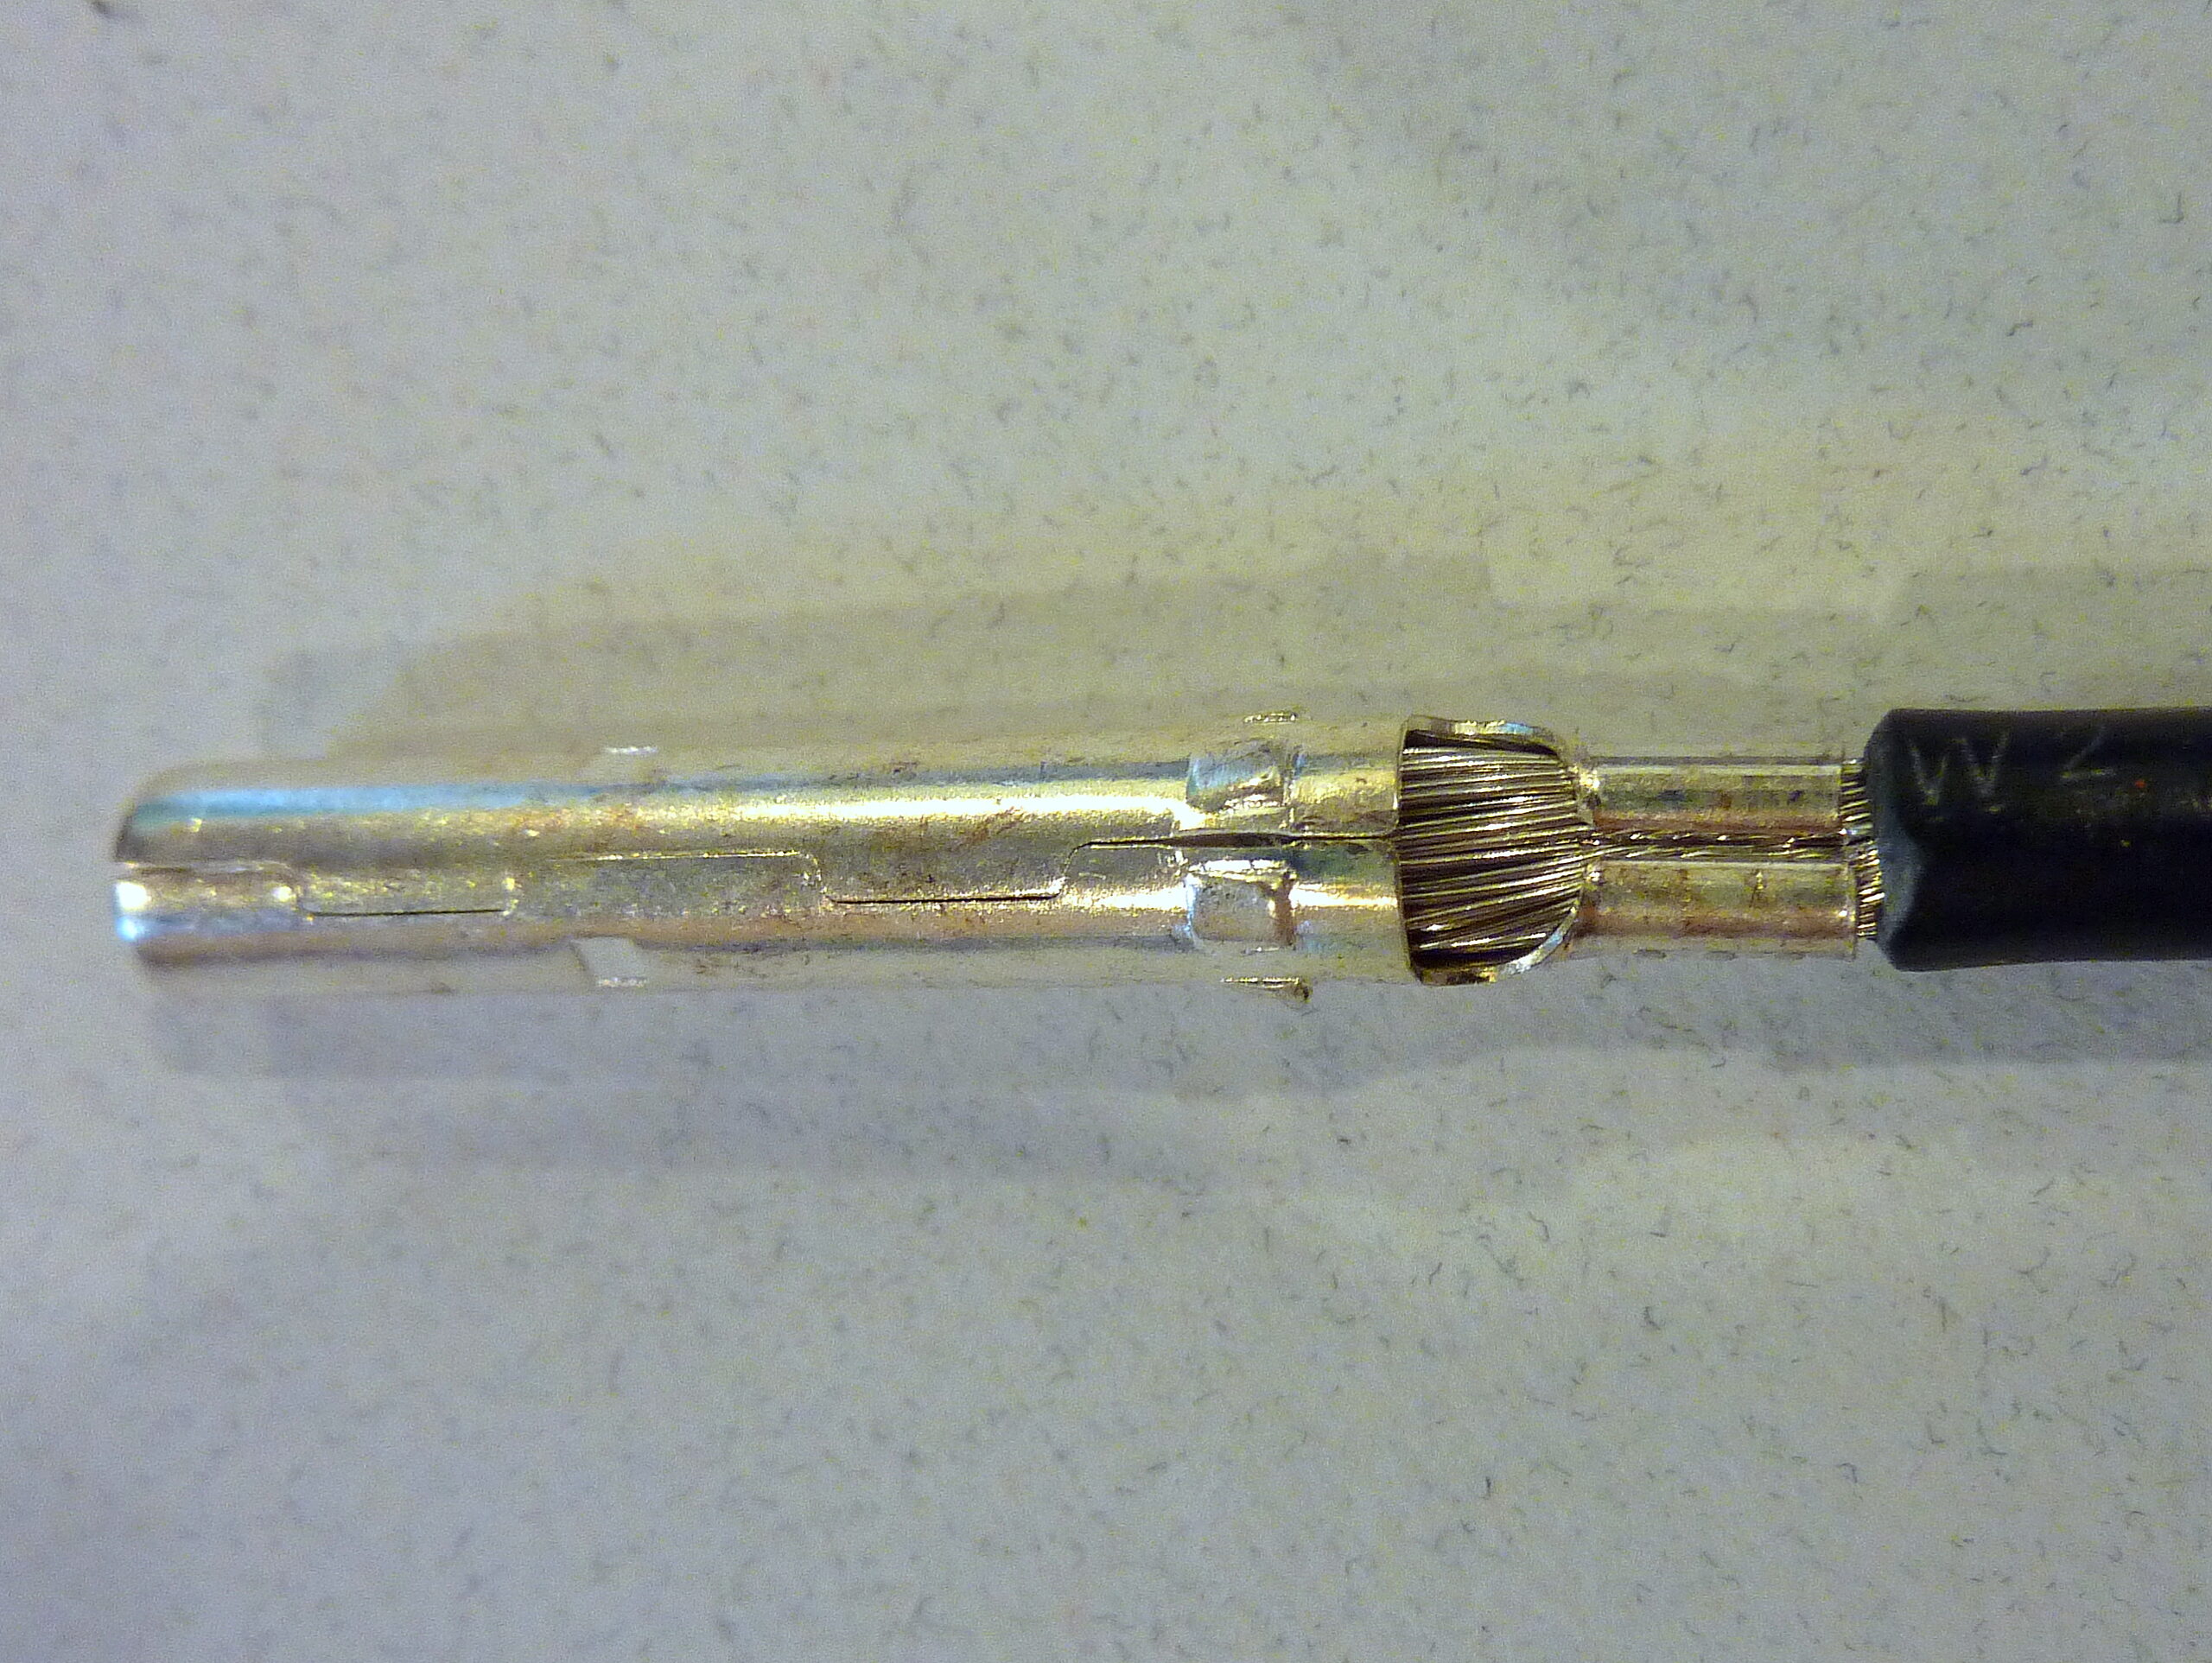
Crimped MC4 Terminal
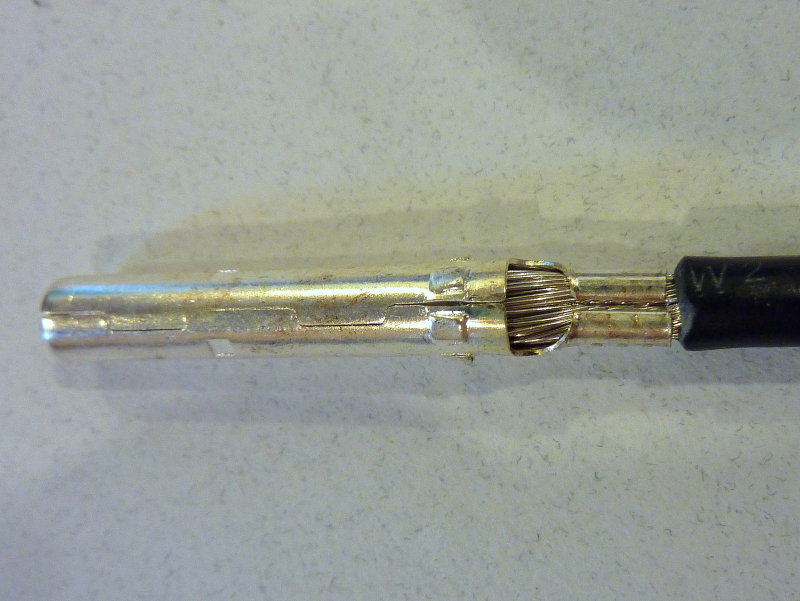
Even non-pro-level MC4 crimp tools can make a decent & suitably strong crimp. This picture illustrates why I like to see the stripped wire extend into the barrel slightly. If it does not extended into the barrel of the terminal it can “fan out” and make inserting it into the plug a bit difficult.
Insert the Terminal Into the Plug Body
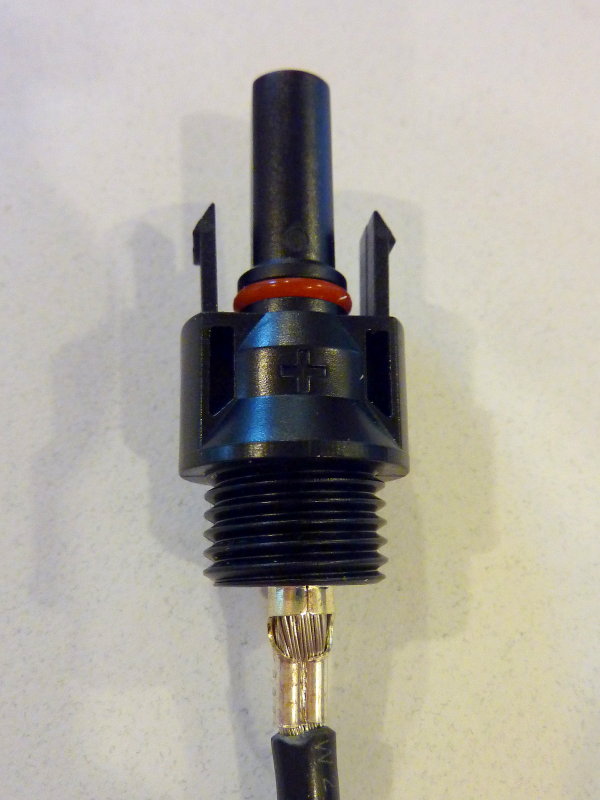
Once you’ve crimped the wire to the terminal you can then insert the terminal into the MC4 plug body. Keep pushing until you feel or hear it click.
Push it in Until it Clicks
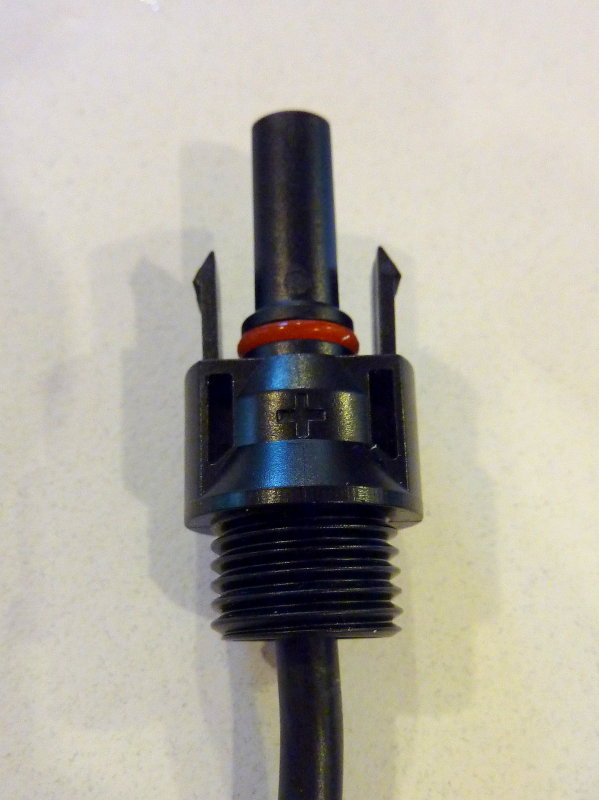
Keep pressing the crimped terminal into the plug body until you feel it “click” into place. With some cheap knock off MC4 terminals this is less obvious than with good quality MC4’s.
Don’t worry about mixing up the terminals and plug bodies because male & female pins will not fit into the wrong plug bodies.
Bear in mind that solar panels ship with the female plug shown here, marked +, on the positive output lead from the solar panel. This means the positive wire on your boat will get the corresponding male plug not another female plug.
The problem with knock-off connectors is it’s a full blown crap-shoot as to what you are getting in terms of quality. It’s not just about the internal connector pins however. We’ve seen numerous knock-off MC4 terminals fail by becoming brittle due to UV exposure, many in as little as three-months use, in the marine environment. They literally get to the point where the plastic is crumbling. We have never once seen or had this happen with a genuine Stäubli Multi-Contact branded MC4. Yes, the Stäubli Multi-Contact brand of terminals cost more, but they are the real deal. As far as our testing shows, there are really only two legit players in the solar connector market. Stäubli Multi-Contact (they invented it) & Amphenol TheRich Solar terminals are about the most reliable know-offs we’ve seen.
Slide Sealing Gland Into The Plug Body

Once the terminal has been clicked into place, slide the sealing gland, and compression gland, up the wire and into the plug. The gray colored sealing gland (not all brands use gray) should be in the terminal as shown here.
Thread On Compressing Nut & Tighten
Thread the nut on finger tight then just snug it up, as shown, using the MC4 tool.
Finished MC4 Terminal
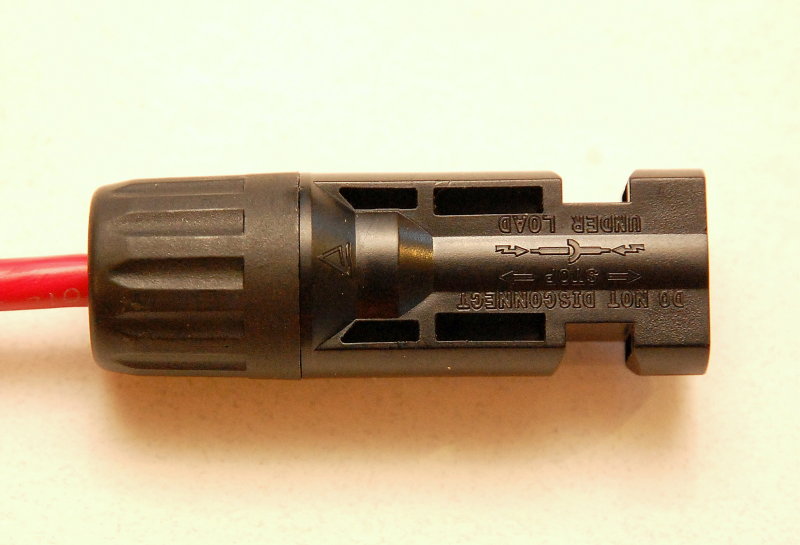
Here’s the finished MC4 connector.
Good luck & happy boating!
Knock-Off MC4 Fails
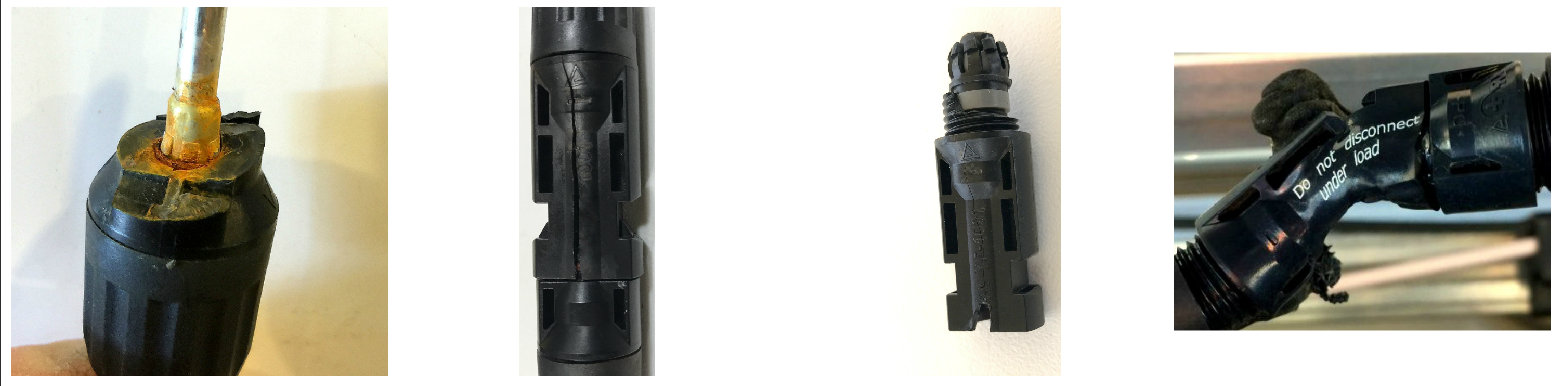
Just a reminder that a cheap imitation MC4 terminal is not guaranteed to be the same quality as the genuine Multi-Contact brand. Professional installers insist on Multi-Contact, Amphenol or AMP/TE Connectivity branded connectors. As a DIY the Rich Solar MC4’s have an okay track record.
Buy MHT Recommended Solar Products- Amazon
Good luck & happy boating!
Let’s Keep This Site Running!
Like what you saw or read? Would you like to see more articles like this? Is so feel free to donate, support the site and keep it growing. I am trying my hardest to keep this information FREE. If you liked it, learned from it or I saved you some money feel free to make a small donation, that’s all I ask.
Hi, link http://compassmarine.mysimplestore.com/ gives me a 404.