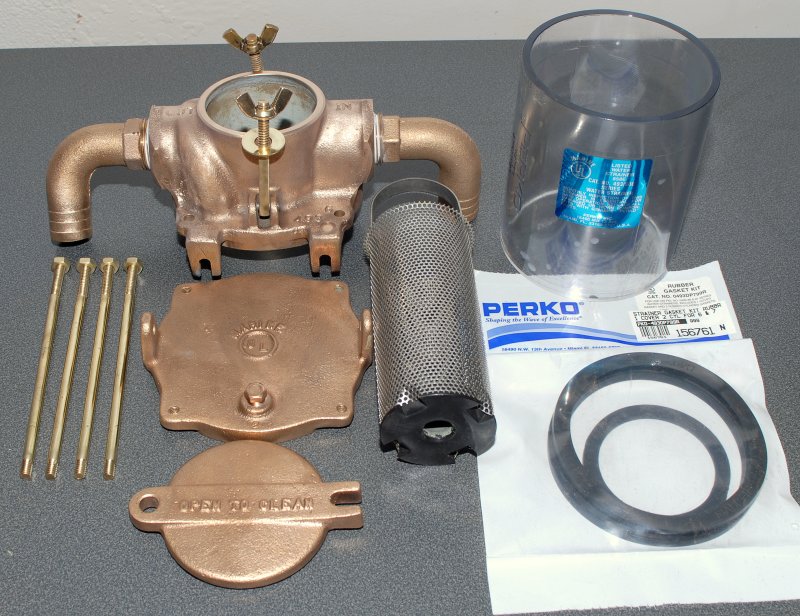
All The Pieces
In Maine we get long winters, and it gives us plenty of time to do projects, projects many owners, in other parts of the country, may put off until a failure point is reached. The lowly sea strainer is one of those devices no one ever thinks to rebuild, repair or replace, but they should.
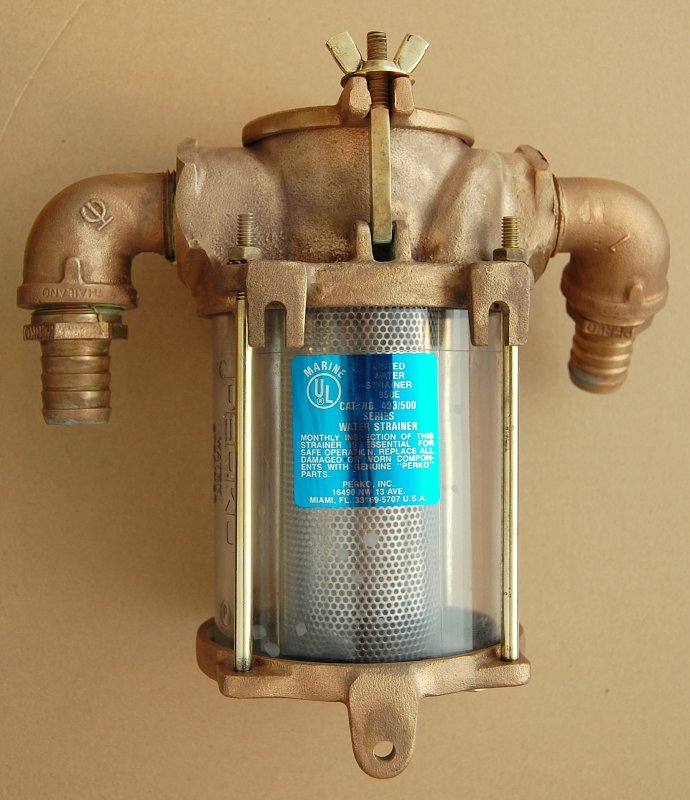
For years I have used these solid cast bronze sea strainers from Perko. I also use & install the bronze strainers made by Groco. Unlike some Perko products this particular item is very well designed, hefty and will last a lifetime with only the occasional rebuild consisting of three gaskets. I find it to be one of if not the best built strainers on the market today and have gone to the trouble of installing them on almost every boat I have personally owned and on customers boats where and when the owners budget allowed for it. Fortunately this boat came with one already installed.
For this project I wanted to clean all the bronze pieces, polish the sight-glass and replace all three gaskets. For cleaning I used a stainless wire wheel brush in my bench grinder. The stainless wire wheel I use most often is made by Weiler. I also utilized my drill press with wire wheels and Scotch-Brite wheels on my Dremel tool. For polishing the sight-glass I used Novus #2 & Novus #1, but any clear plastic polish will work.
Here you can see all the pieces disassembled and a new gasket kit, which is readily available from Hamilton Marine in Portland, ME.
Old Elbows & Hose Barbs
When we bought our current boat I was ecstatic that it already had a bronze 1″ Perko strainer but not so thrilled with the configuration of the elbows. During this rebuild I took the opportunity to replace them with proper one piece bronze sweeping elbows. I prefer as few threaded fittings in my system as possible and with this one upgrade I lost two.
Sweeping elbows, these are gradual turning 90’s, also allow more eel grass and weed into the strainer without clogs occurring before the strainer basket.
Teflon Tape & Pipe Dope
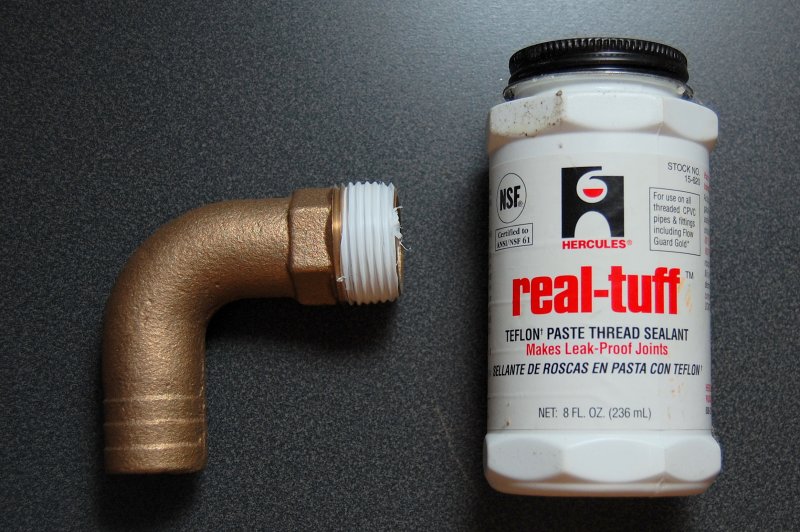
This is one of the new sweeping bronze elbows. I like them for two reasons.
1- They are smooth walled and have a smooth radius bend. Because of this a snake can be run down through them to clear out an intake hose that has become clogged with weeds.
2- I lose an entire threaded connection.
In this photo I have wrapped the threads with Teflon tape, and before insertion, I also coated the Teflon tape with Hercules Real-Tuff pipe dope. Good pipe fitters very often use both tape and dope together. I learned this in my early 20’s when I was a manufacturers rep in the hydronics industry actually selling to wholesale distributors a product line which included Teflon tape and pipe dopes.
Tape + Pipe Dope
Here the sweeping bronze elbow is ready to be installed.

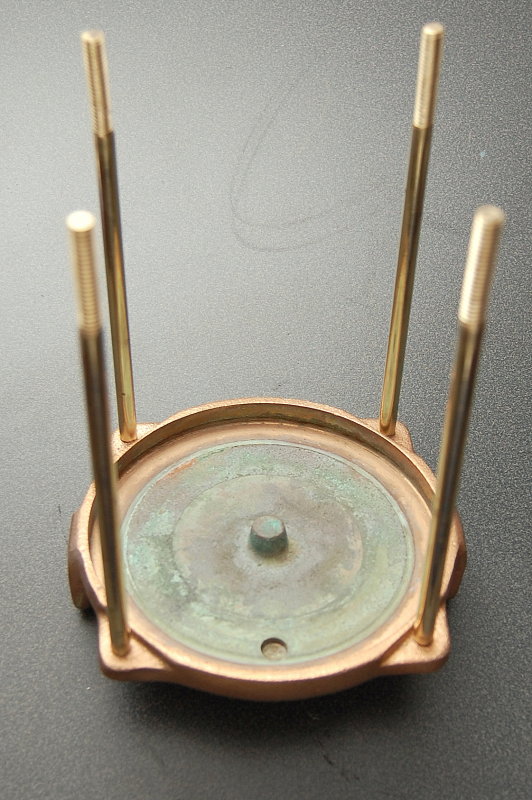
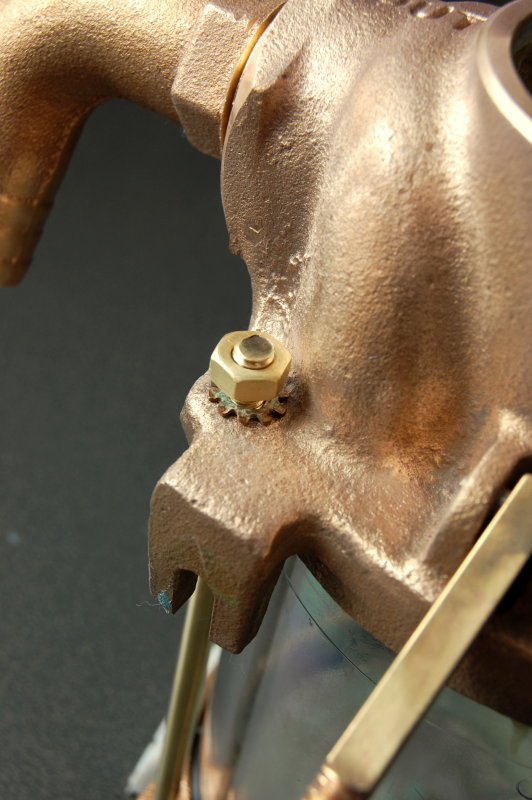
Install Compression Rods
I didn’t photograph taking it apart but you do get the benefit of seeing how to put it all back together.
IMPORTANT: If your compression rods are showing any signs of corrosion or wasting replace them!
The first step is to install the four compression rods. Simply thread them into the base casting finger tight. To snug them up use two of the nuts tightened against each other, with a washer in-between. Tighten the nuts on the top threads. Put a wrench on the top nut and take about a half to quarter turn beyond finger tight. You don’t need to over tighten them just snug them up a little.
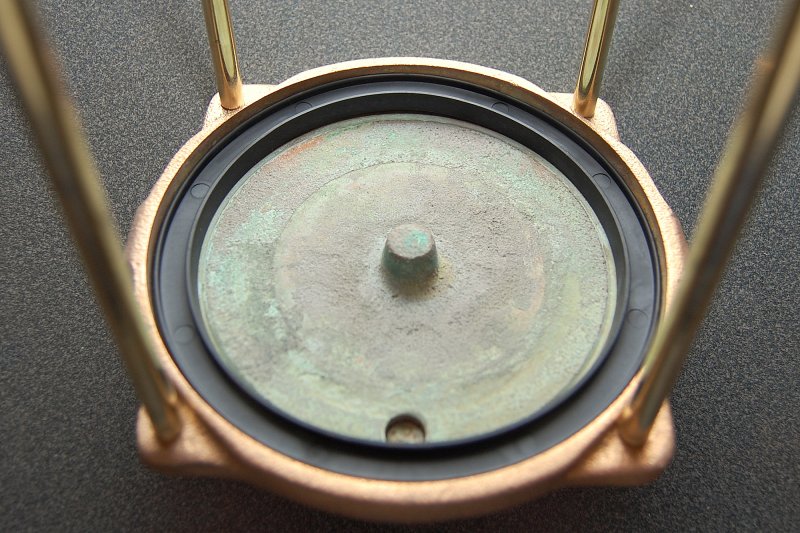
Instal Bottom Gasket
Before installing this gasket I had pre-cleaned the surface. To install the gasket simply set it into the base casting. The slot in the gasket material should be face-up to accept the sight-glass cylinder.
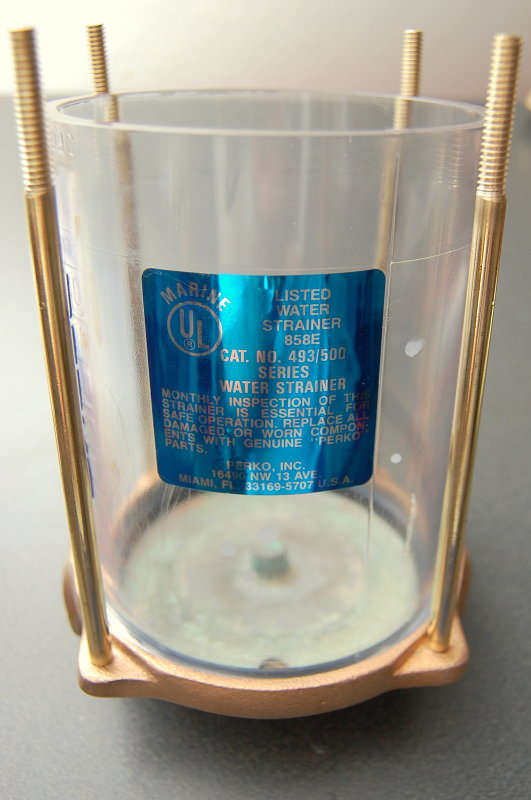
Install Sight Glass
To install the sight-glass cylinder simply set it into the slot in the gasket. Be careful and be sure the sight-glass has not bent or deformed the gasket in any manner before proceeding to the next step..
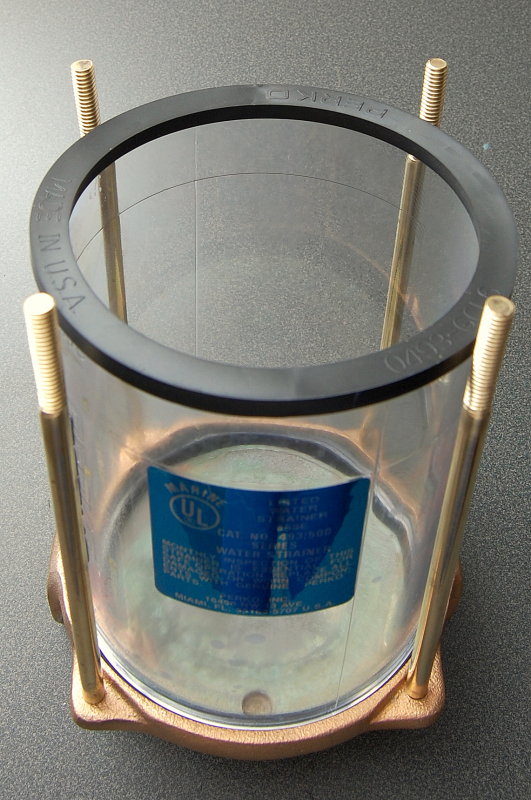
Install Top Gasket
Installing the top gasket is as simple as installing the bottom gasket and again the slotted side of the gasket faces the sight-glass cylinder.
Install Top Casting
To install the top casting simply place it over the compression rods and set it into place. You may need to align the rods slightly, with your fingers, before it will drop into place.
Flip the strainer over and check the gasket before proceeding to ensure it’s properly seated in the top casting as well as around the sight-glass cylinder.
Install Nuts & Washers
This is just as easy as it sounds. Simply drop the washer into place then make all four nuts finger tight. Once they are all finger tight use a cross-torquing pattern, like you would use on lug nuts, to tighten and compress the strainer and gaskets.
Torque each nut evenly and just a little at a time, but do not over tighten. The nuts do not need to be cranked down, just tight enough to compress the gaskets and make a water tight seal. Again, torque the nuts evenly in a cross or star pattern similar to tightening lug nuts on a car.
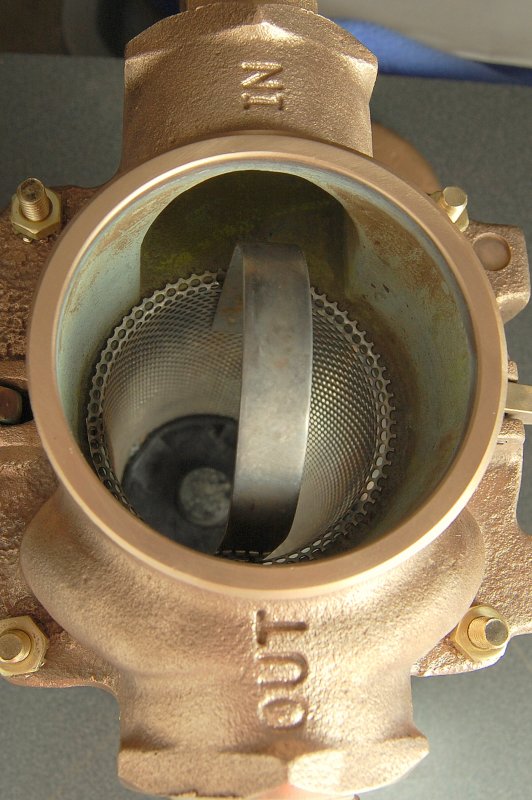
Incorrect Orientation of Strainer Basket
My one and only complaint about this strainer is that the strainer basket can be inserted incorrectly.
In this orientation the handle of the strainer basket blocks and catches any weeds coming through the hose.
Leaving it this way, and closing the lid, can cause a back up in the elbow or inlet instead of letting the weeds pass to the internal strainer basket as it is designed to do.
If you look closely you can see how the inlet hole is blocked by the basket handle. This orientation is a no, no..
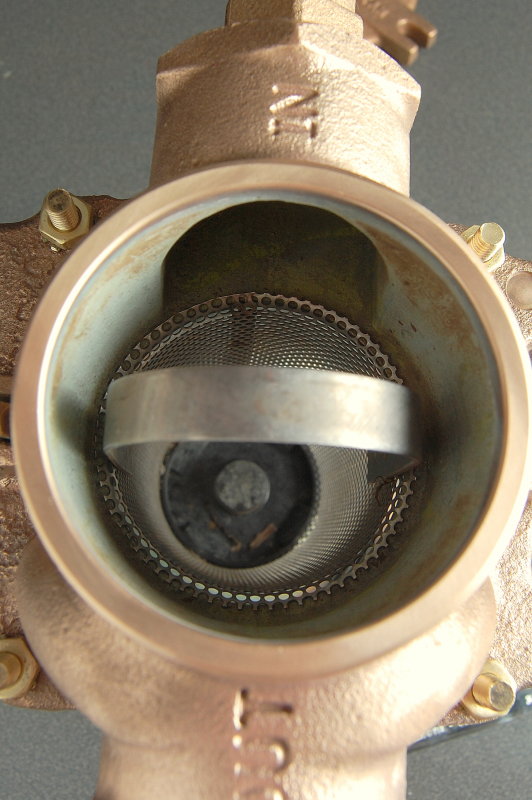
Correct Orientation of Strainer Basket Handle
In this photo any debris getting sucked it will flow into the basket and will not be blocked by the handle of the strainer. This is the correct orientation for the strainer basket handle to be in before closing the lid.

Install Cap Gasket
The last step is to insert the new cap gasket into the cap. Simple as it gets…
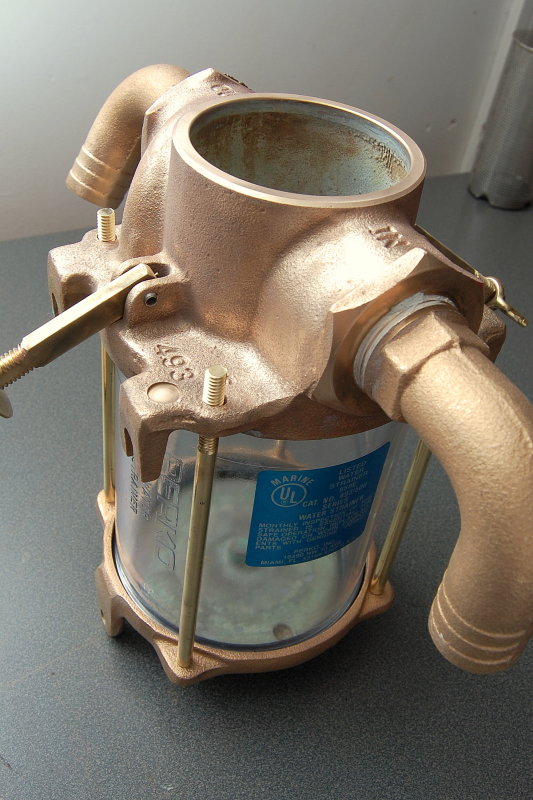
The Completed Project
This is the cleaned & rebuilt Perko strainer ready to be re-installed in the boat. Even with the cleaning and polishing of the sight glass, and the installation of the new elbows, this project took less than 2 hours.
Good luck & happy boating!

Let’s Keep This Site Running!
Like what you saw or read? Would you like to see more articles like this? Is so feel free to donate, support the site and keep it growing. I am trying my hardest to keep this information FREE. If you liked it, learned from it or I saved you some money feel free to make a small donation, that’s all I ask.