Start by Drilling a Hole
Many readers have asked me how to install stronger, flanged seacocks without also drilling extra holes in your hull for the bolts that hold the flange. It can be done, as you will see below.
Though this method is going to be slightly less robust, than through bolting, I would have no qualms about using this method on my own boat. I do admittedly through bolt on my own vessel but this is out of personal preference.
Don’t get me wrong this is still a very robust installation, if done with care & patience, and it is stronger than the hundreds of thousands of vessels out there with noting more than a valve threaded to a thru-hull.
This is also a good option for those owners with cored hulls, where thin external skins are to thin to take the countersink depth of the bolt head.
This article already assumes you’re using GPO-3 polyester/fiberglass or G-10 epoxy/fiberglass sheet for the backer blocks, and have already made the circle/donut. It also assumes you are utterly opposed to through-bolting your seacocks to the hull or physically can’t due to external skin thickness on a cored hull..
For tapping the backers I recommend a thickness of about 5/8″ for your GPO-3 or G-10. In testing I have exceeded 1000 pounds of direct pull on 1/2″ home made polyester fiberglass board. G-10 and GPO-3 are far stronger than my home made fiberglass sheet and the extra thickness yields even more strength. In testing with G-10 just one single 5/16″ X 18 thread bolt, drilled & tapped into 1/2″ G-10 far exceeds the ABYC strength requirements for seacocks..
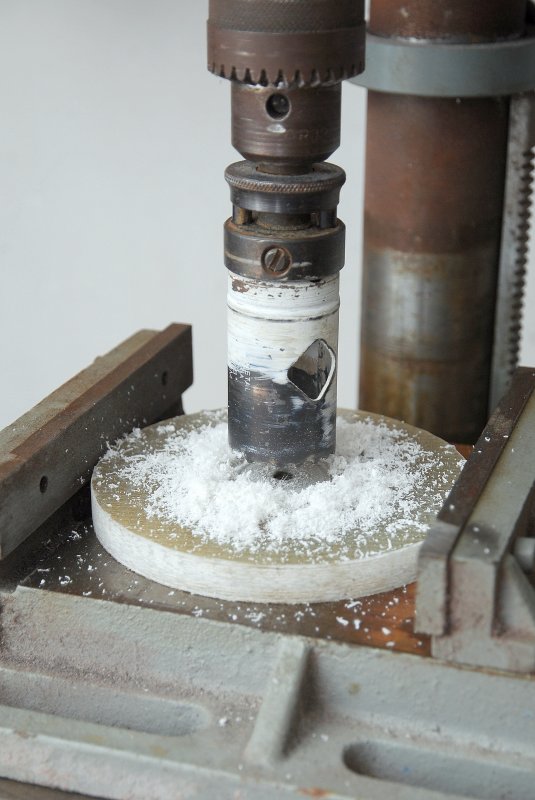
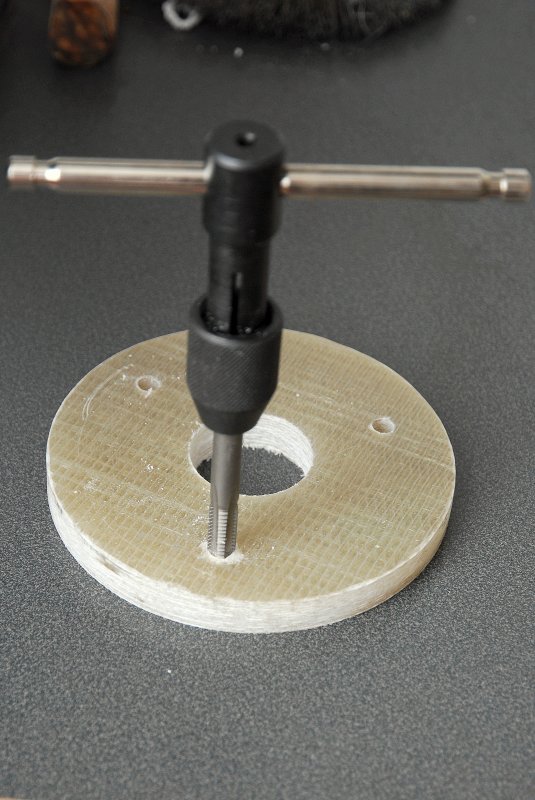
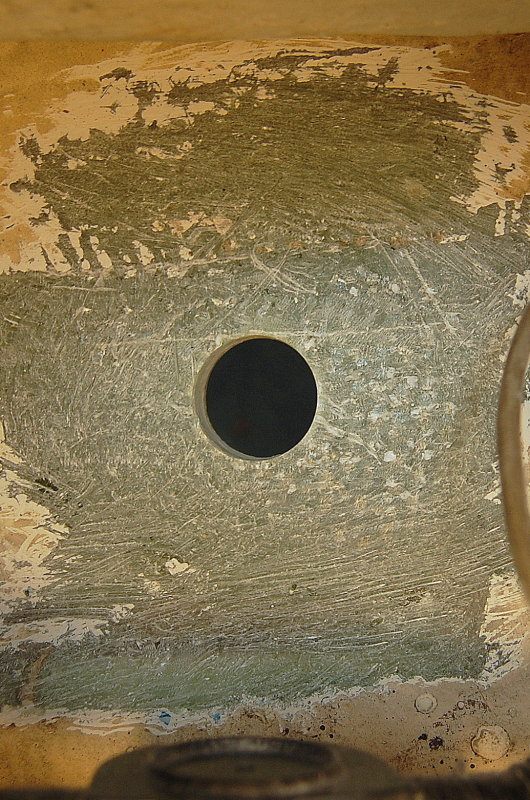
Unlike the other method, where you glass the backing plate to the hull first then drill the hole for the thru-hull, with this method you drill the thru-hull hole first. To do this project a drill press is strongly recommended.
A Perfectly Centered Hole
By using the pilot hole you made the original circle with you will automatically have a perfectly centered hole in the backing plate.
Be sure to use a hole saw as close to the OD size of the thru-hull as is humanly possible. There should be very little room between the threads and the fiberglass.
Please be aware that working with G-10 or even GPO-3 board is like working with steel. It eats & dulls tools for lunch.

Make A Shim
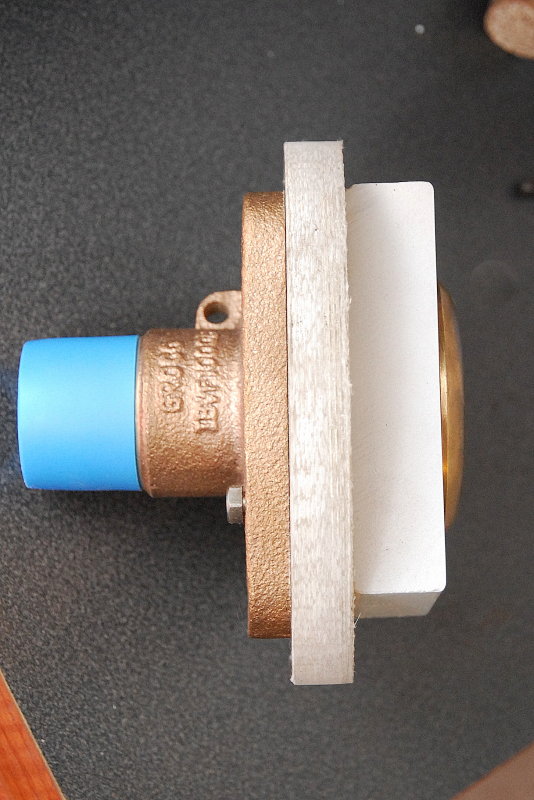
Before you drill and tap the backer block you need to tighten the flanged adapter to the backing block using the thru-hull. Because you’re missing the thickness of the hull you will need to create a spacer that takes the hulls place.
I used some PVC exterior trim lumber and drilled the same diameter hole as in the backing block. Then all I did was center & tighten the flange and thru-hull together with the backing plate and hull thickness dummy spacer sandwiched in between.
Clamp & Drill
This is the most critical step and why you really should be using a drill press. Because you are literally drilling and tapping a piece of 5/8″ fiberglass or epoxy sheet, the threaded holes must be perfectly centered in the flange holes, and they must be 100% vertical or a perfect 90 degrees to the backing block..
I made my dummy spacer square, and wider than the head of the thru-hull, so I was able to clamp it in my drill press vice. I can not stress enough how important it is to make perfectly vertical holes that are perfectly centered in the holes of the flange or seacock. There is absolutely no wiggle room here. Mess this up and you just wrecked the backing block..

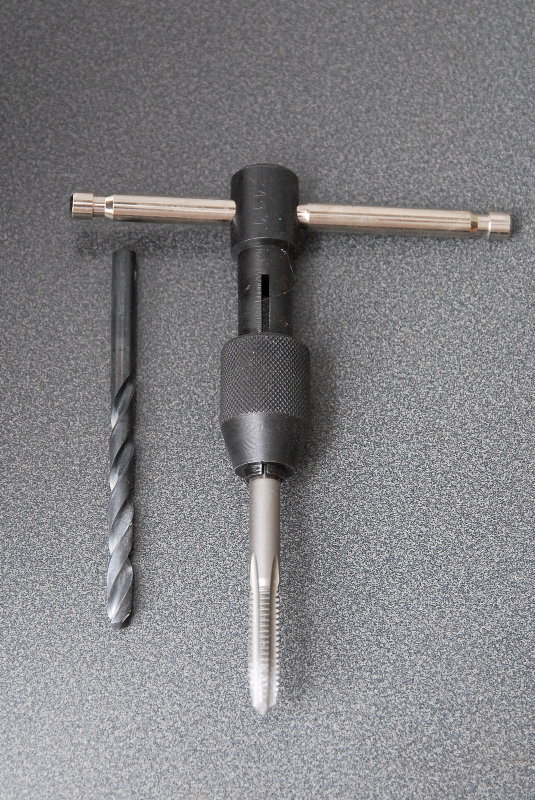
Drill & Tap
Please don’t cut corners on the quality of your tap and always use the proper size drill for the tap you are using.
This is an “F” drill for a 5/16″ X 18 thread tap. You could also use a 17/64″ drill with a 5/16″ tap.
IMPORTANT: Fiberglass or epoxy sheet is susceptible to off-center tapping so be careful to not work your tap crooked or wobble your tap side to side. It will make the tapped hole bigger than you want. Practice in a scrap piece of fiberglass first if your not comfortable with this.
Once tapped through use an air gun to blow the flutes of the tap out. Do this before reversing it out of the fiberglass.
Tapping The Backing Plate
This is fairly straight forward but remember to tap this perfectly straight. Avoid over tapping, multiple tries or passes. Each pass will remove more material, once in, once out.
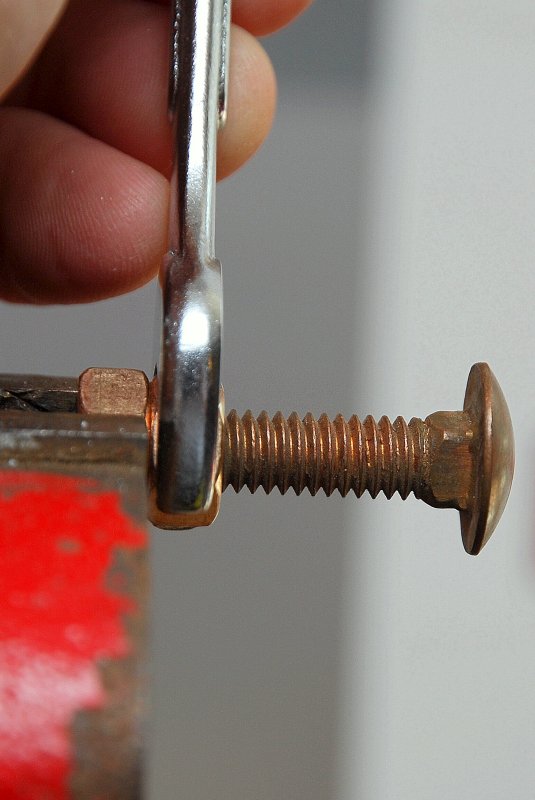
Cutting The Studs
Silicon bronze threaded rod is expensive but silicon bronze carriage bolts are cheap. Simply install two nuts onto the bolt and clamp only one of the nuts in the vice while tightening the other back onto it. This essentially locks the bolt into the vice so you can cut it without it spinning or moving.
Why Studs?
IMPORTANT: The reasons for using studs or even epoxy captured nuts, if the backer is thick enough, is for future removal. During removal the studs or bolts into epoxy inset nuts can be removed fully and the seacock can be peeled off with a guitar string or pried at an angle without the studs interfering. With fully captured non-removable bolts, it makes future removal and nightmare project.
Picture yourself trying to remove a seacock in the future with three captive bolts and you can’t get under it with a guitar string or to even rock it back and forth due to the studs being permanently in place. You can also accidentally mar, gall or damage the threads and then the bolt snaps or strips out and begins spinning in the substrate with no way to fix it other than MAJOR surgery. The reasons for drilling and tapping for a stud or burying a bronze nut in the plate, are more about the future and less about the now.
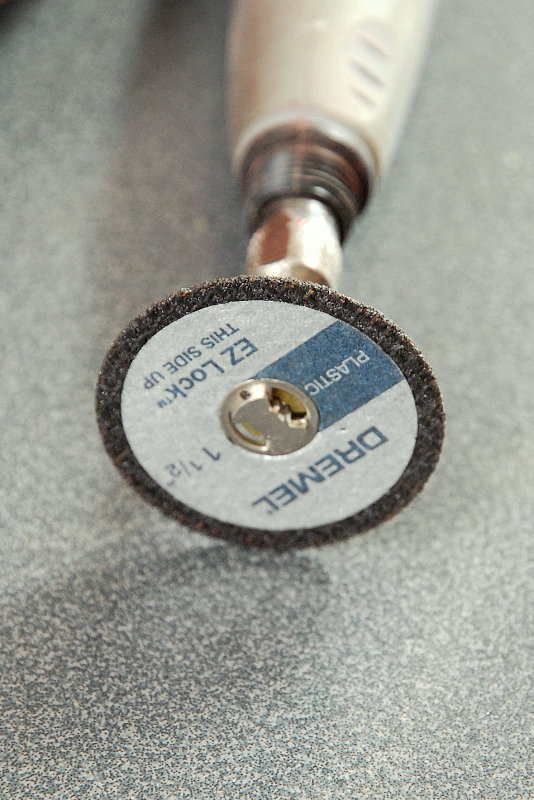
Cut Off Wheel
Though this 1 1/2″ Dremel cut-off disc says “Plastic” it is my favorite tool for cutting bolts or threaded rod, and it works equally well on stainless or bronze.
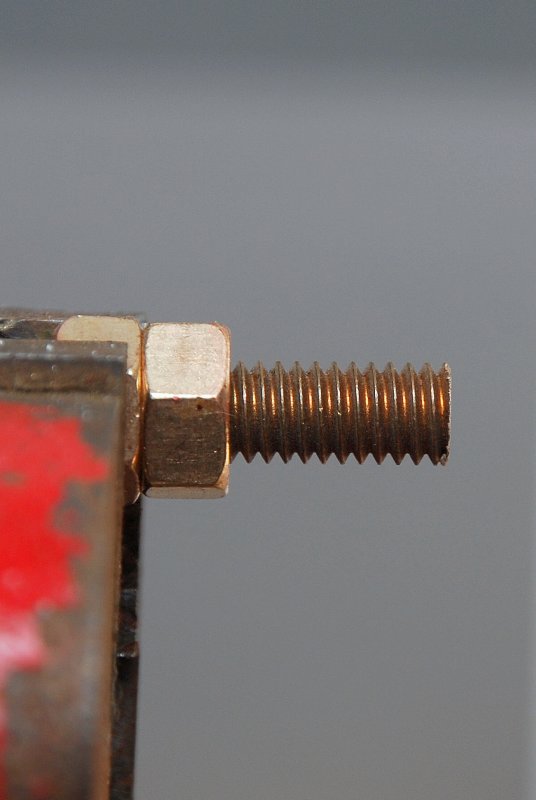
Cut Off The Head
As you get good with the Dremel you can make some amazing bolt cuts with threads that work as good as factory. Of course you could use a hack saw too but the Dremel is nice & fast. Always chase the fresh cut with a thread die.
Finish The Threads
Once I have cut the bolt I then clean the cut end on my bench grinder with a brass wire wheel. This one looks almost as good as the factory end and performs the same too.


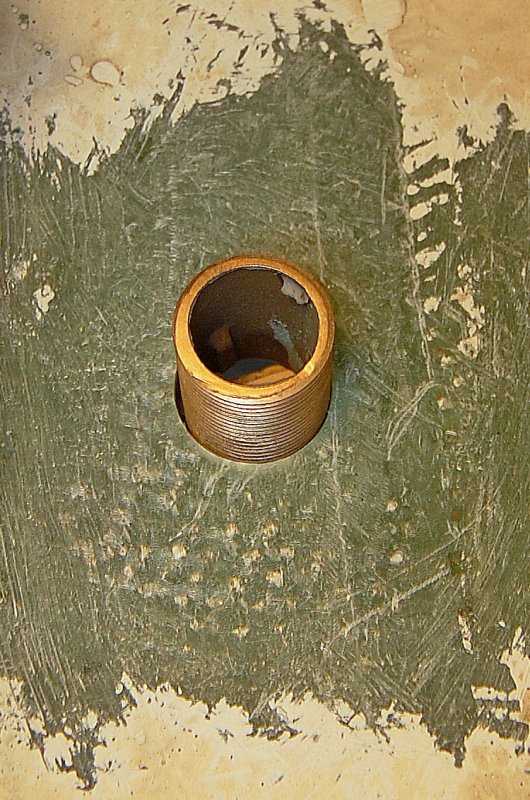
Insert Studs
With the studs made you simply thread them into the backing block. If you got a little aggressive with the tap it’s not the end of the world. Mix up some slightly thickened epoxy and apply with a syringe into the hole, wax the stud and thread it in with the thickened epoxy and let it cure. This will create a nearly perfect thread interface between the stud and backing plate. Even with a good tap I still dip the stud into epoxy, coat the inside of the hole and thread it in.
IMPORTANT: If using the epoxy trick I just mentioned please wax the stud well or you won’t get it back out once the epoxy has cured.
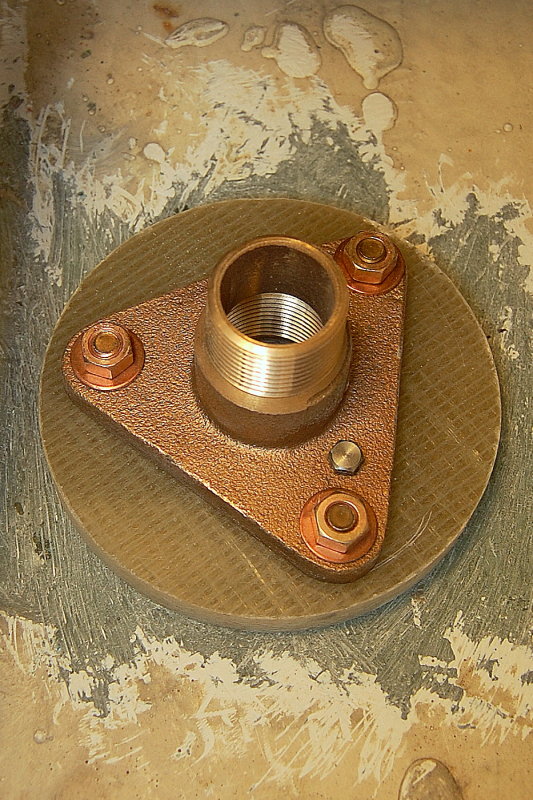
Install Flange or Seacock
Once the studs are in simply drop the flange over it put on the nuts. You’re now ready for a dry test fit in the hull.
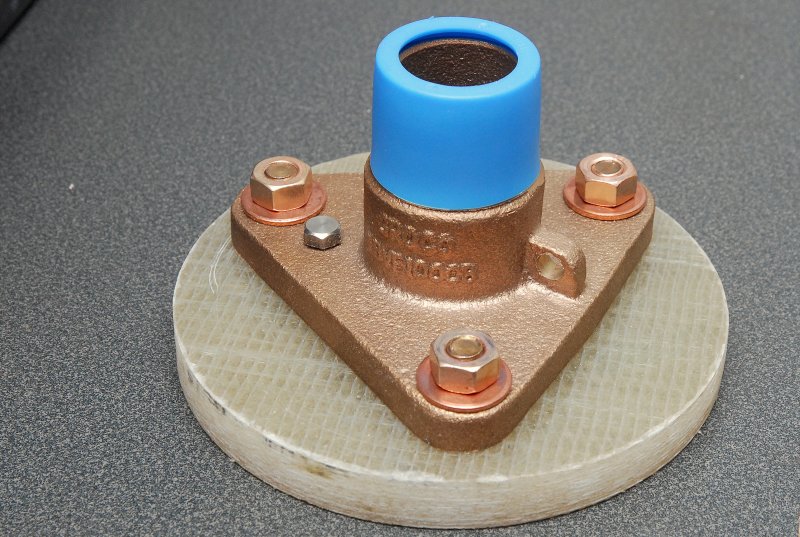

Side View
This photo shows a side view of the assembly. The hull & sealant are the only pieces missing.
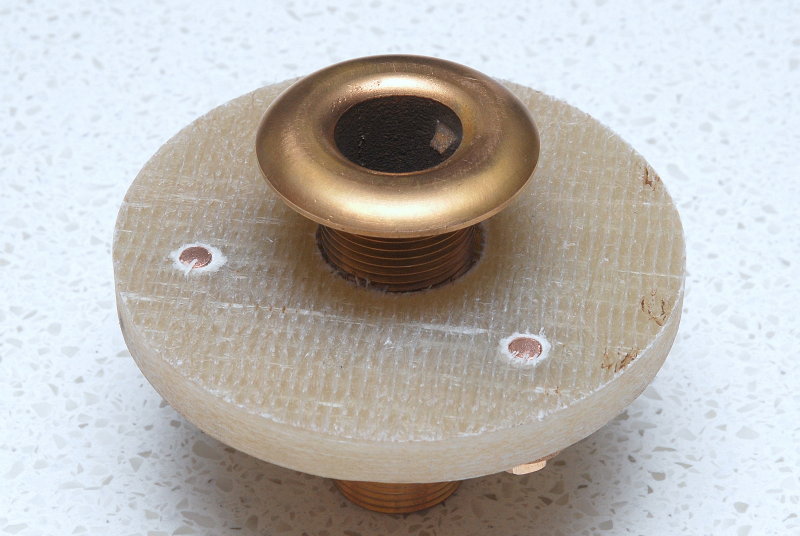
Bottom View
Here you can see the bottoms of the drilled & tapped studs.
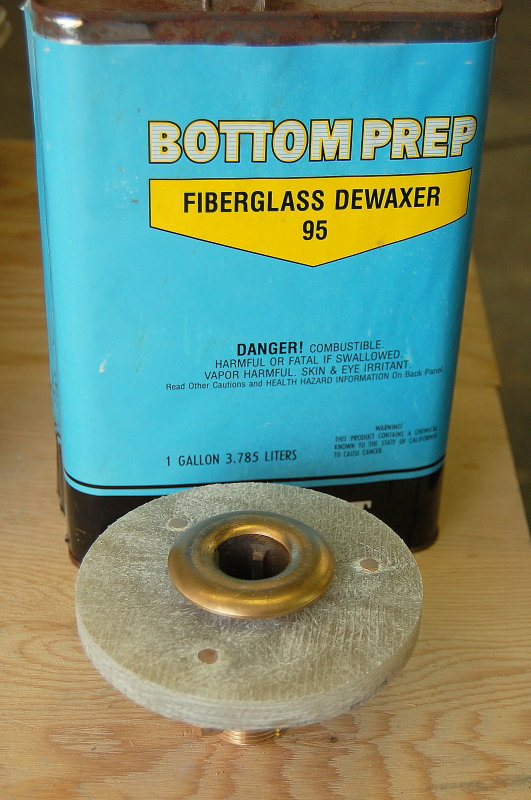
Don’t Forget to De-Wax
You’ll want to de-wax the backing plate. Polyester finishing resin has added paraffin to aid in the cure process and this won’t yield a good secondary bond if the wax has not been removed. This wax, and the wax coating from what you laid it up on, id not using GPO-3 or G-10, must be removed prior to installation or nothing will adhere well.
Over the years I have found the dedicated, but overly priced, cocktails of chemicals sold by Pettit or Interlux as de-waxers definitely do work. I only wish I could figure out what the chemical mix is because I bet I could mix it up for considerably less than what they sell it for.
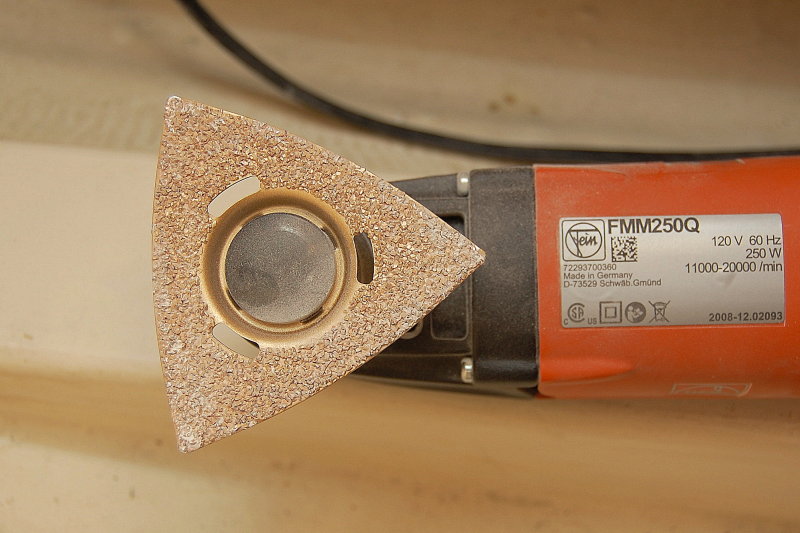
Aggressively Sand
For good adhesion you really need a clean surface with nice deep scars and surface irregularities. For this I use a Fein Multi-Master and the Carbide Triangular Rasp attachment. This is a hard, carbide tipped sanding attachment. It produces about 5 times the sanding performance of 40-grit paper, but won’t load up with residue. It also LASTS for a long time, years actually, because it’s carbide.
If you don’t have a Fein, or other multi-tool, don’t worry as about any wire wheel brush on a drill will do a similar job or 36 grit discs on an angle grinder..
Sand The Hull
Before you begin sanding the hull you should remove any surface wax. Gelcoat, like polyester finishing resin, is also an air inhibited cure so any gelcoat on the interior of a hull has a waxy surface. In order for proper adhesion any interior gelcoat needs to be removed.
This are still needs a bit of sanding to get rid of the rest of the gelcoat.
Dry Fit
In order for your backing block and through hull to fit properly you really need to perform a full dry test fit. It took about four tries to get the thru-hull to sit flush on the exterior of the hull due to some irregularities on the interior that needed to be sanded out.
IMPORTANT: The two planes, internal and external, must be parallel under both the backing block and the thru-hull head for a proper fit and this can take some considerable fitting, sanding & grinding.

Installation
Once your dry fit is confirmed parallel, and all sides of the thru-hull head sit flush, on the hulls exterior, you will need to do one more round of de-waxing of both hull and backing block.
After that is done you need to wax both the flange (not the backer block) and the thru-hull fitting with copious amounts of mold release wax, butchers wax or even Collinite. The wax should be a paste type carnuba.
After you have waxed it cut a scrap board to length and wedge the thru-hull into place. If you are on gravel or dirt lay a board on the ground to wedge the upright board against.
Contrary to popular belief you really do not need two people to install a thru-hull, especially if you can be a little creative.
View From Inside
Here is the waxed thru-hull ready for the resin mix, backing block and flange.

Mix Your Resin
For illustration I choose to make a formula to show the consistency better. Whether epoxy, polyester or vinylester all should be plenty strong for this application. Epoxy is considerably stronger than polyester resin, in a secondary bond, and is what I personally use.
My mix for illustration consisted of chopped strand fibers, West System 406 Coloidal silica or Cabosil, some West 404 and polyester resin. The same mix can be made with epoxy. When I shot this I was not ready to lay it up so used the less expensive polyester resin because it was going to waste anyway.
I like making my own “cocktail” of putty because it gives me more control over consistency and how it fills & fillets. Kitty hair is another product I sometimes use but it will not fillet as well as your own custom mix will.
For a catalyst in the illustration I used some red dyed MEK-P. I like dyed MEK-P so you know you have it thoroughly mixed.
Wear rubber gloves and apply a thin coat of the mix to both the hull and backing block, then slather a large amount onto the backing block and thread it onto the thru-hull about three threads. I then used vise grips to grip the flange to prevent it from spinning and went out side the boat and used my step wrench to tighten down the thru-hull and seat the backing block.
Note: Epoxy will yield a much stronger bond than polyester resin but even polyester should give you about 500 PSI adhesion. ABYC standards call for the seacock to support a 500 pound static load for 30 seconds at the inner most hard fitting or hose barb. Remember that 500 PSI is per square inch. Your backing block is considerably larger than 1 square inch…
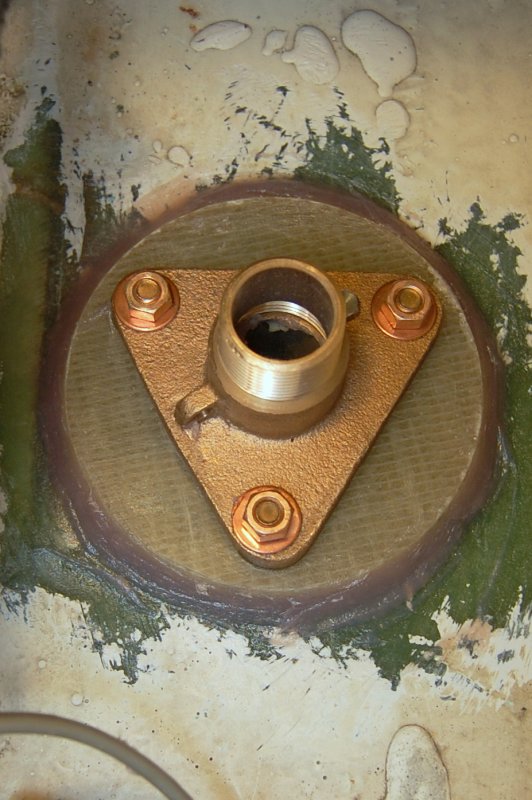
Installed
Here is the tapped fiberglass backing block installed and ready for curing. Let it cure overnight and in the morning go remove the thru-hull, and the flange, then clean them of the wax.
The last step after de-waxing the thru-hull and flange is to bed them with underwater rated marine sealant and install the seacock, hose barb and hose.
You now have a life long backing block, with replaceable studs, and no extra holes in your hull. Simple and easy to do.
Good luck & happy boating!