The Wire That Caused Years Worth Of Expenses
So I get called to winterize a new customers boat and it has already been hauled to their house and needs to be winterized on the hard. Not an issue, I do this all the time. Except on this 39F morning the Westerbeke motor does not want to start. I ring the owner and ask if their are any tricks to start this particular motor which he has not keyed me in on?
It is then I get the story about his glow plug solenoid failing over and over and over and that he’s replaced glow plugs too and perhaps that is the issue.
I also hear about how much money he has laid out over the years to try and solve this issue. I find his story odd because I too own a Westerbeke and the only time I had an issue with glow plugs was when I fried them using a Lithium battery bank which has a higher voltage than lead acid. I stupidly used my normal ten second push interval, which was fine for lead acid, but not for Lithium. Clearly my own fault.
I do know that Westerbeke solenoids are a rather cheap intermittent duty product but they should easily last more than a year. I take a look and yes he has brand new glow plugs and a brand new Cole Hersee heavy duty solenoid. At least the last tech put in a good solenoid… Time to investigate.
Trouble Shooting:
#1 I pull out my test leads and jump from the positive feed to the energizing coil of the solenoid. Sure enough I hear a loud click, as I should. This means it is working right? NO!!
What you can’t hear is the relay un-click because the circuit can’t pass enough current to hold the solenoid closed. It momentarily worked but immediately failed once the current tried to load up the circuit.
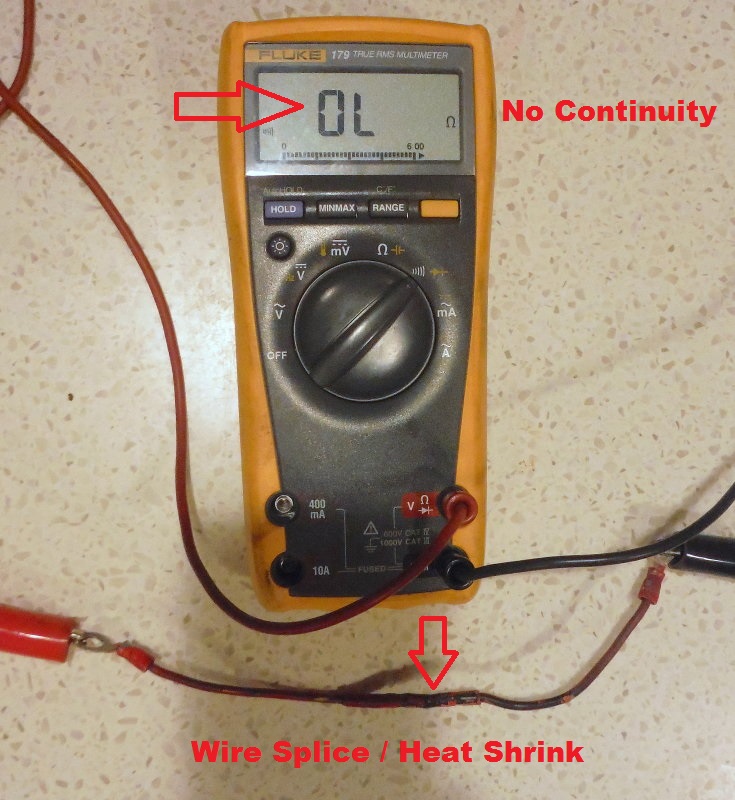
#2 I set my Fluke clamp meter to in-rush and clamped it around the glow plug feed wire. I then energized the coil with the positive test lead.. Sure enough I capture a transient spike of 19.6A. I then repeat the test with the in-rush turned off and I see a blip on the screen, then zero amps DC. The negative side of the circuit simply can’t pass current.
This little test tells me the solenoid is not staying closed when energized to do so. The test lead on the positive side is known good, so the solenoid should remain closed, but it won’t.
#3 The only other option, in this circuit, is the small 6″ ground wire from the relays coil to the engine ground. I slap a test lead on the coils negative side, and ground it to the engine block, to rule out the 6″ wire. I then repeat the test and the glow plugs stay energized. The solenoid works perfectly. Good glow plugs and a perfectly good solenoid.
#4 Diagnosis? Bad 6″ neg jumper wire from the coil to engine block. This is a simple $2.00 fix. Unfortunately this owner had spent in-excess of $1000.00 over the years “fixing” this problem.
So what’s the moral of the trouble shooting story?
NEVER, EVER, EVER ignore the negative side of the circuit when testing DC circuits. This test took all of about four minutes yet three or four solenoids later, a set of glow plugs, and LOTS of money wasted all because a 6″ wire could not pass current sufficiently and did so intermittently.
This is simply poor trouble shooting 101…
Was This The Culprit..???
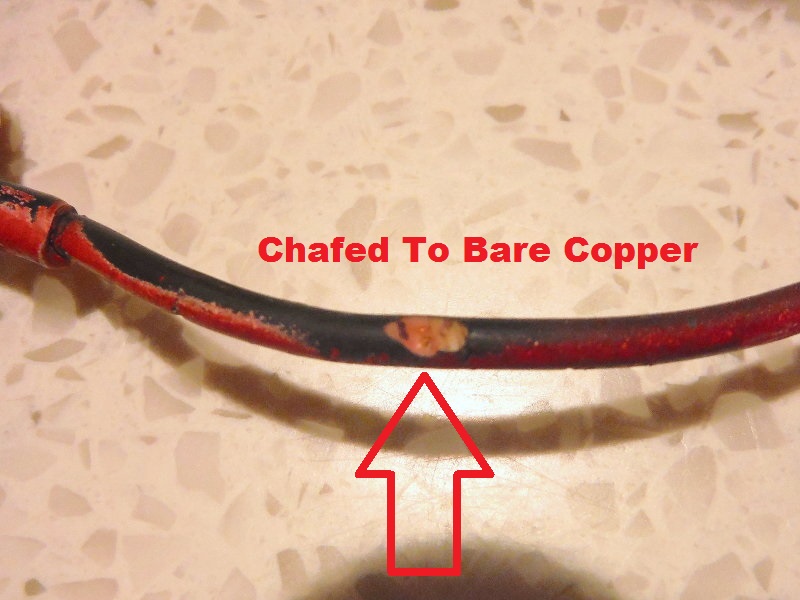
Today while cleaning my work bench that pesky wire was staring me in the face. Bored of cleaning, and with a little ADHD going on, I decided to see why it would not pass current. During the external examination I noticed where it had been chafing on something and was down to bare copper. D’oh…!
This looks bad, and if it was a positive wire could have meant a dead short. Unfortunately this was not the cause. It was just the result of a vibrating engine and improper wire support. But, but, but boats don’t vibrate…… Right…….? Wrong!!
Fuc#ing Solder !!!!!!!!!!!!!!!!!!!!!!!!!!!!!!!!!!!!!!!!
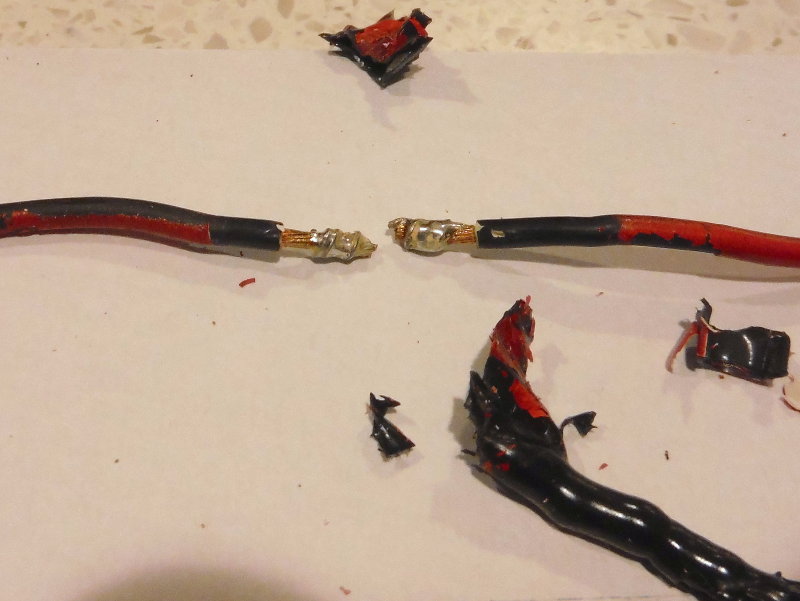
After realizing the chafing was not the cause of the problems I carefully cut away the heat shrink. What it revealed was no surprise. A failed solder joint…
Who knows why this wire splice was here, I certainly don’t, but this is EXACTLY why ABYC E-11 states:
“Solder shall not be the sole means of mechanical connection in any circuit.”
For Christ sake this was a 6″ piece of black wire with two ring terminals this did not require a soldered splice. Fixing this properly costs less than $2.00. Why some folks insist of Rube Goldberging everything they touch is absolutely beyond me. My blood freaking boils when I see $hit like this and the resulting outcome & expense for the current boat owner.
What else did the previous owner of this boat Rube up that will rear its ugly head on the current owner…? I am fairly certain there will be more…. Arghhhhh….
Despite a heavy layer of thick heat shrink over this soldered splice, the soldered splice STILL fractured due to the solder creating a hard spot in the wire. Apparently the heat shrink was enough to pass the coils low current for a period of time, after the solenoids were replaced, and the wires freshly wiggled. Eventually the cracked splice opened enough and once again would fail to pass current.
To the previous techs, taking the owners money, replacing the solenoid was the answer, and it worked, for perhaps an hour….
If proper trouble shooting practices had been employed to begin with, when this first happened, this owner could have saved close to four figures…. Ouch!
Unfortunately this went on like this for years and because the previous owner had “spray painted” much of the engine this wire looked factory untouched. A closer inspection revealed a thick area of heat shrink, in the middle, hiding the Rube-ness inside..
We had two factory crimped terminals that still pass current just fine. We had ONE solder splice that failed and caused an owner to spend close to $1000.00 over the years sorting this BS out..
I will say this yet again, if you don’t know how to solder, DON’T..!! Oh and always use good trouble shooting practices…