Ferrule Crimping Tools
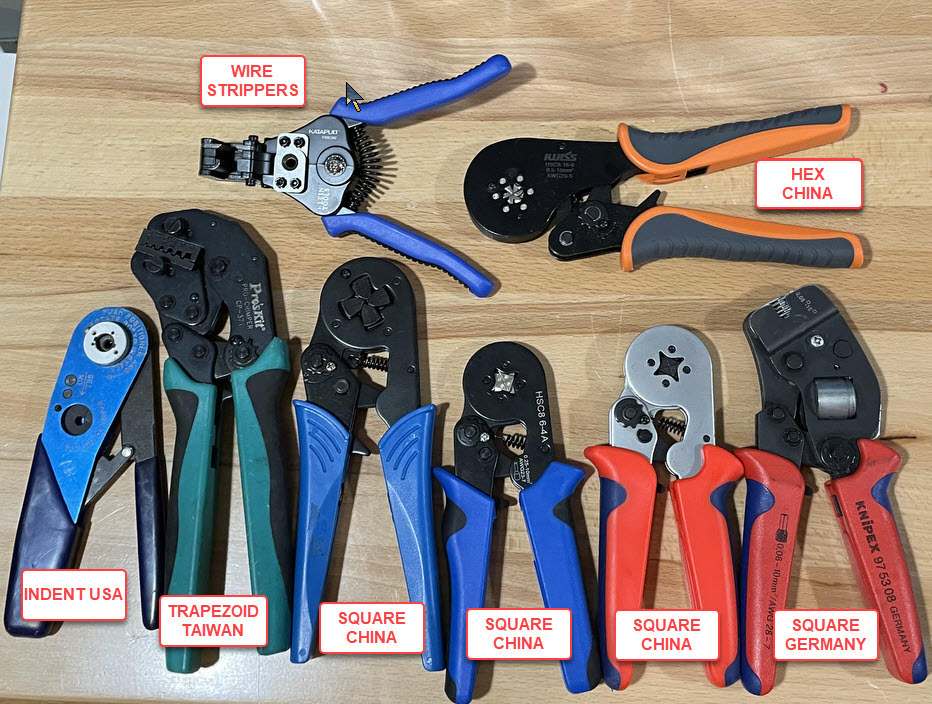 Left to Right; DMC USA, PRO’s Kit (Taiwan), Baomain (China), Inexpensive (China),Inexpensive (China), Knipex-Rennsteig(Germany)
Top; Klein Katapult (Taiwan), Iwiss (China)
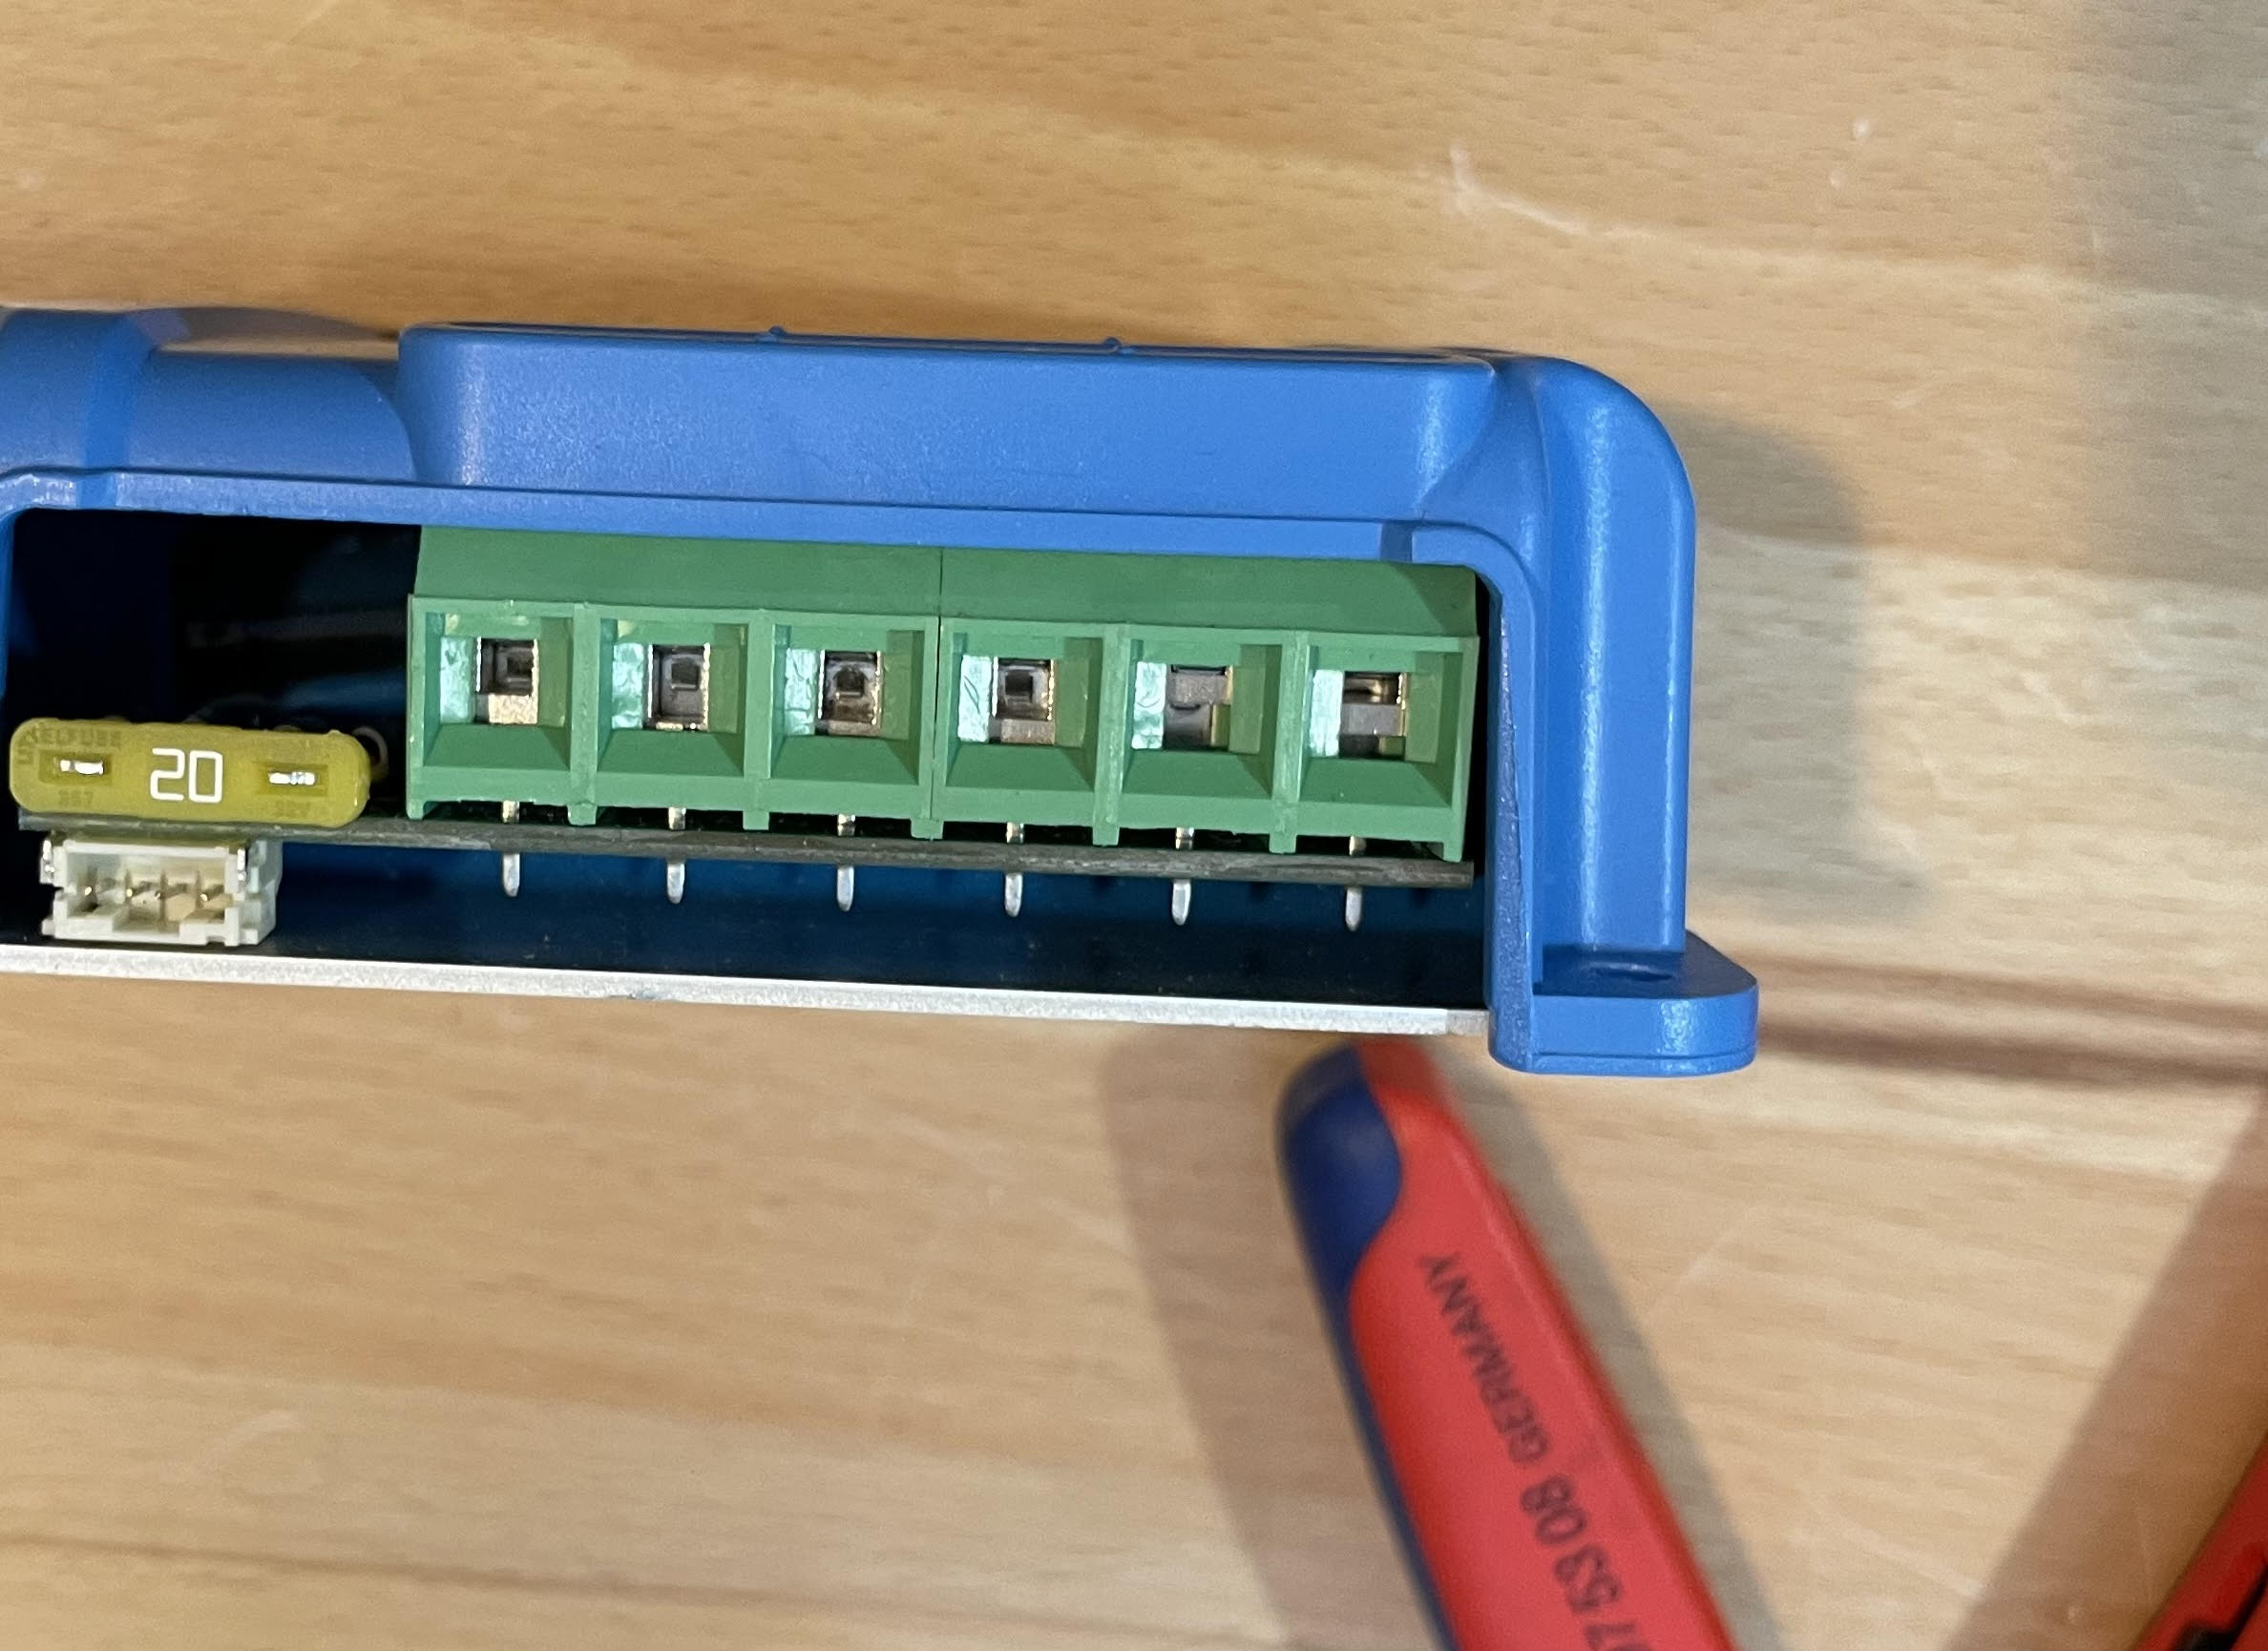
Like any boat project doing it correctly requires the right tools. I will say it again,”When you DIY the tools are free!”Today more and more manufacturers are including PCB (printed circuit board) mounted terminal strips that clamp on the bare wire. Some of these terminals use set screws impinging directly on the wire.These PCB terminal strips are ok so long as you terminate the bare wire first.
Just Don’t Be This Guy
What Ferrule tools/products do we recommend?
The tools/supplies in the link below are the ones that were worth recommending.
BUY MHT RECOMMENDED FERRULE SUPPLIES – AMAZON
Bare Wire vs. Terminated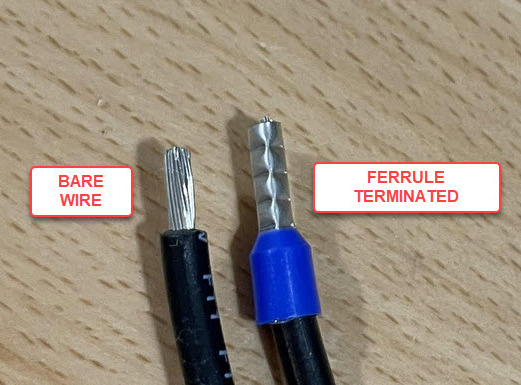 Why use Ferrules?
Insertion issues
Once the insulation is removed and stranded wire begins to unravel this can make insertion tedious especially in tight areas. More often than not an errant wire Strand does not make it into the clamping mechanism and this can create a real possibility of a dead short.
Exposure/Corrosion
Once you strip the insulation off of the wire corrosion/oxidation starts to set in especially on a boat. Eventually this leads to increases in resistance and can lead to a fire.
Wire Displacement/ Splaying
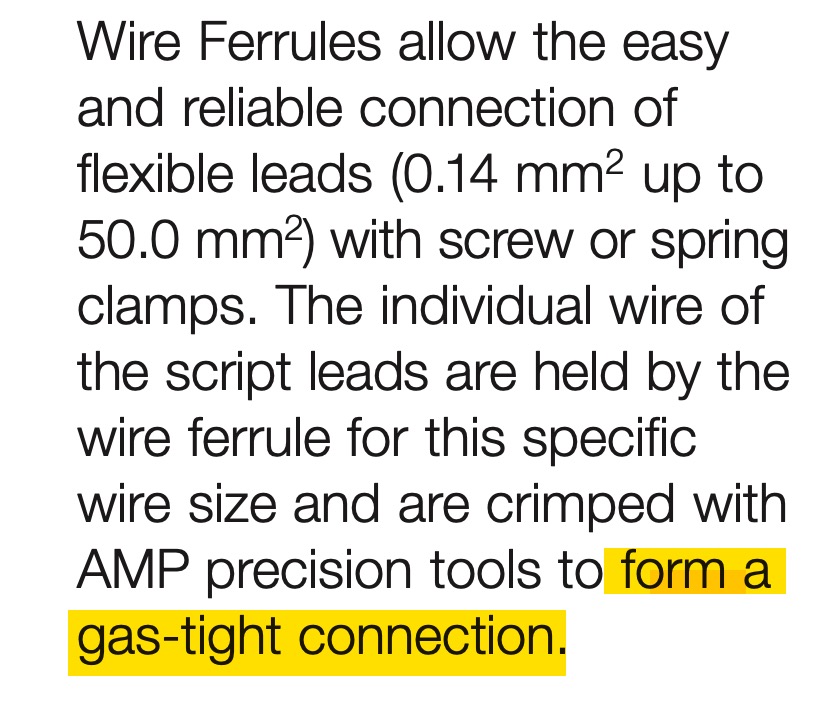
Finely stranded marine wire in clamping terminals will continue to splay and very often requires a re-torque. On the first tightening the wire compresses but the strands can continue to nest meaning the wire can become loose. By using a Ferrule you’ve compressed the wire into a “gas-tight” bundle minimizing corrosion.
All Ferrule Tools Are Not Equal
I am pretty sure you can guess which tools from above perform best. As you read this article you will see the differences. But don’t fret some of the inexpensive tools can get you by. As a DIY you do not need to fork over$200.00+/- for a Molex, Daniels (DMC), Amp or Knipex . We also own a hex Molex..
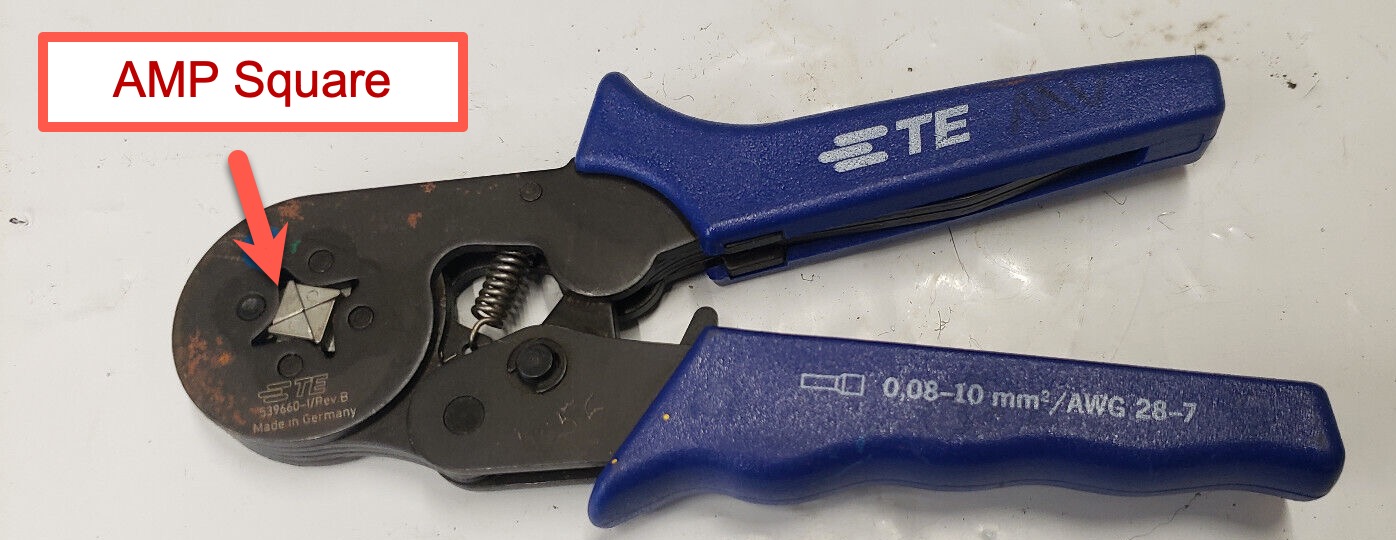
The Amp tool must be up at our farm as I tore the shop apart and can’t find it but I did find a photo I had taken. This Amp and the Knipex are both German made and are my go-to Ferrule crimpers. This does not mean you need to spend $300.00 on the Knipex or $400.00 on the AMP.. As can be seen from the rust our AMP tool is well used.
PCB Mounted Terminal Strips
The Victron terminal strip accepts a square crimp not hex..
This does not meet ABYC standards. It would also use a hex not square.
The Problems
- Manyt of these PCB terminal strips are not specifically designed to clamp finely stranded marine wire
- Unless you re-torque after tightening the wire continues to compresses/nest/splay and become loose.
- Once the wire gets loose it can create high-resistance which leads to fires.
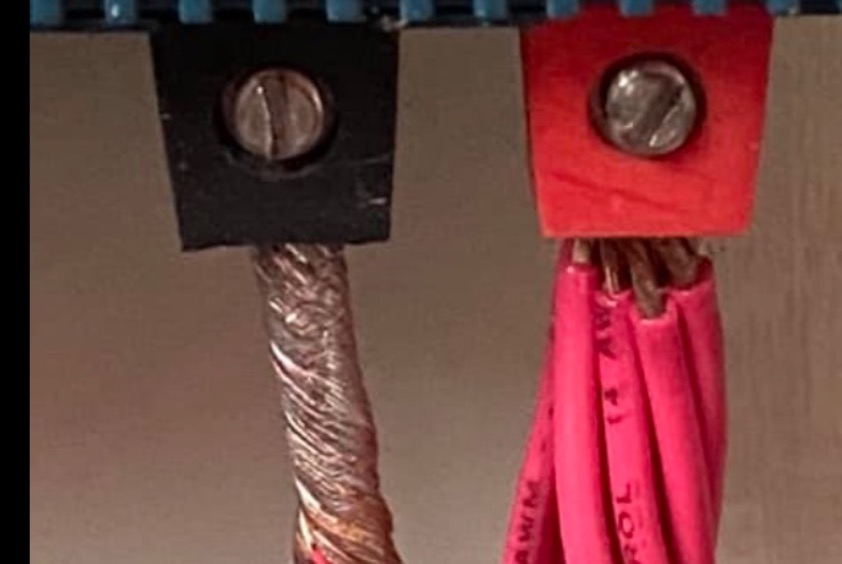
What a high resistance / loose terminal looks like
This is not the fault of the product but, it is the fault of the installer! This could have caused a boat fire.
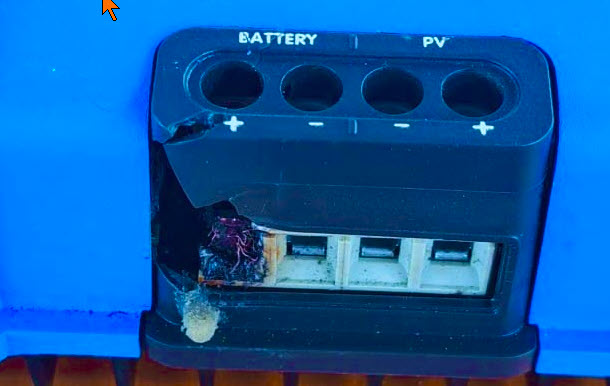 Image Courtesy: Boat Electrical Systems
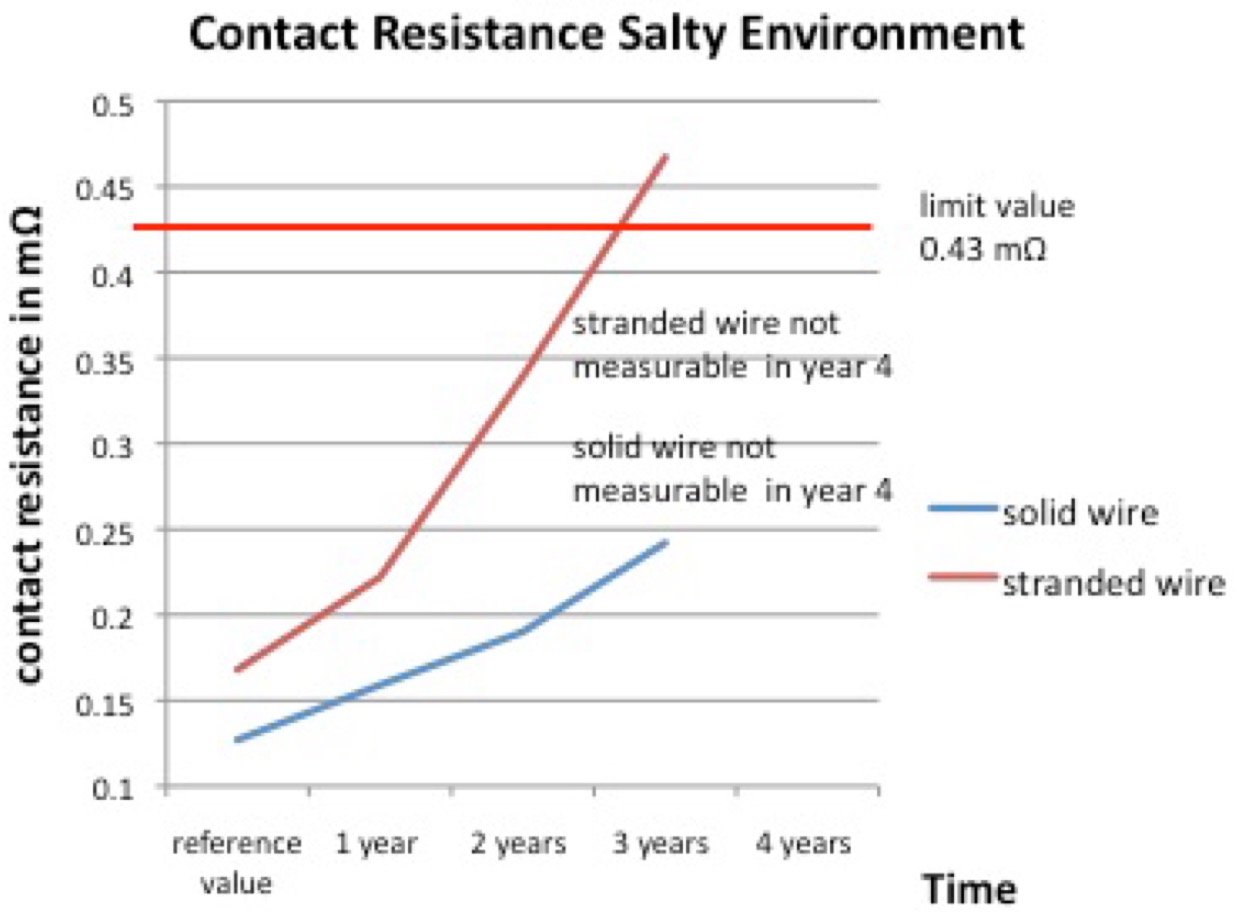
Ferrule vs. Bare Wire Salty environment
The German manufacture Weidmüller has tested ferrule vs. no Ferrule in a salt spray chamber. By “solid wire” they mean ferrule. As can be seen over the long haul the ferrule terminates wire wins.
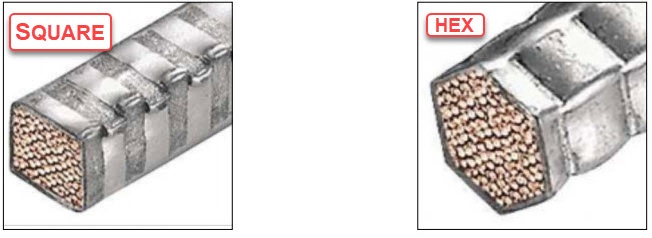
Choose the right Ferrule crimp style
Square opening PCB terminal blocks use square crimping tools round opening PCB terminal blocks use Hex Style. The IWiss tool in the first photo is hex all others are square.
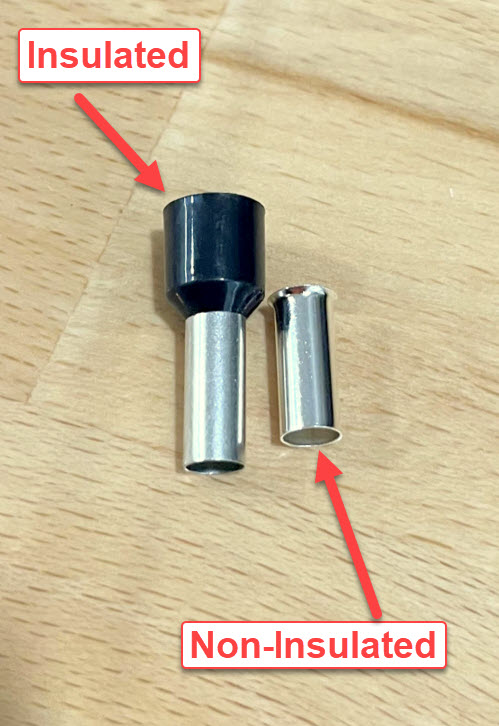
Insulated or Non-insulated
Do You Need Square or Hex
There are also a few tools that use this type of die set.
These work well for smaller gauges but they work poorly as we get upwards or 14AWG or larger. The tool/die Below are made by Pro’s Kit a good quality Taiwanese manufacturer.
What About the ABYC
The ABYC does not yet require the use of Ferrules unless trying to fit more than one wire into the clamping mechanism and even then it is a suggestion not a requirement. below are some key points to ABYC E-11.
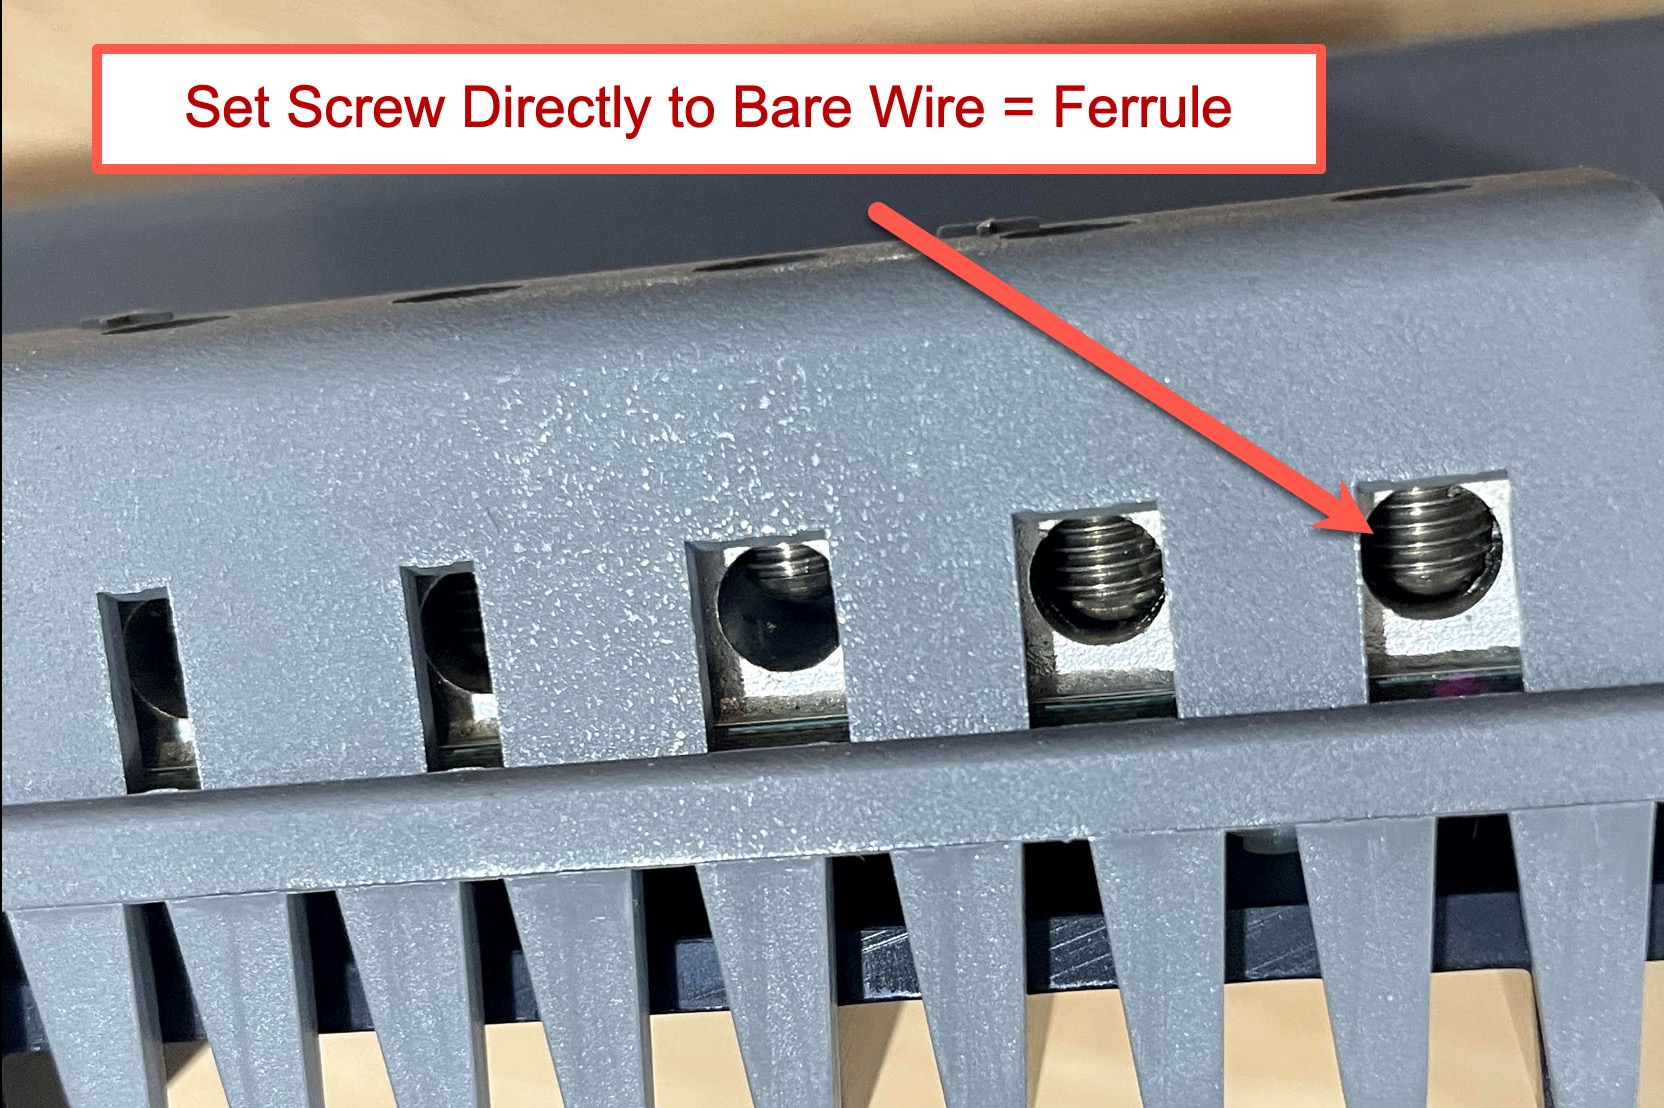
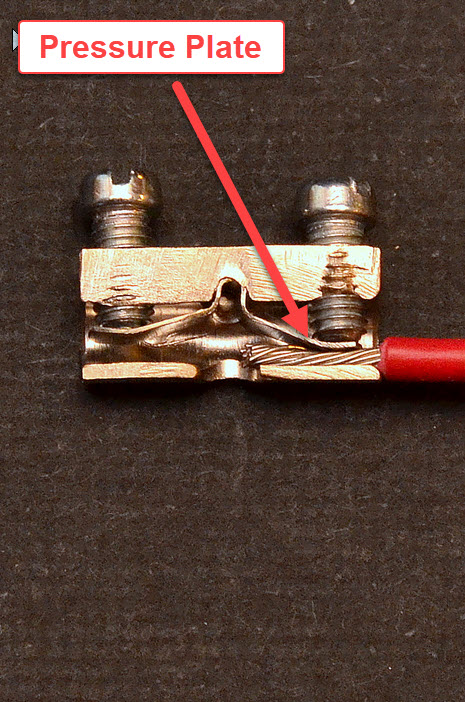
If a terminal block uses only a set screw with no intervening pressure plate a Ferrule should be used. What does this mean? Below is a marine quality “Eurostrip” that we’ve cut in half to show what is inside. Note the “Pressure plate that stops the set screw from directly impinging on the wire. Sadly Eurostrips like this are hard to find.
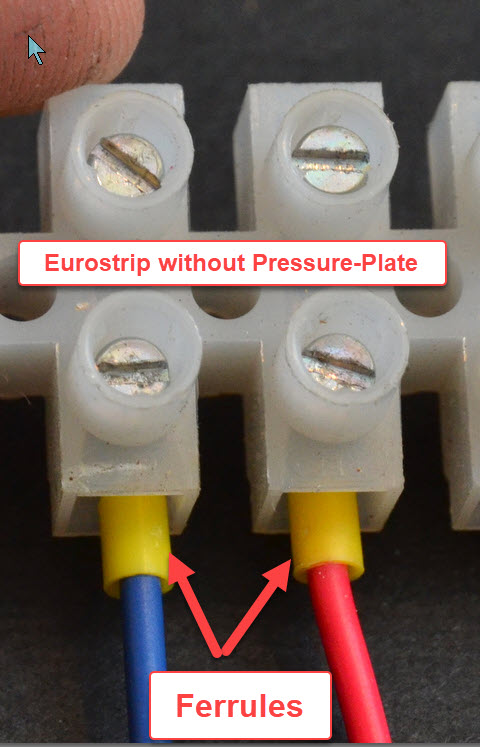
For a Eurostrip that lacks a pressure plate Ferrules should be used
There are other options too
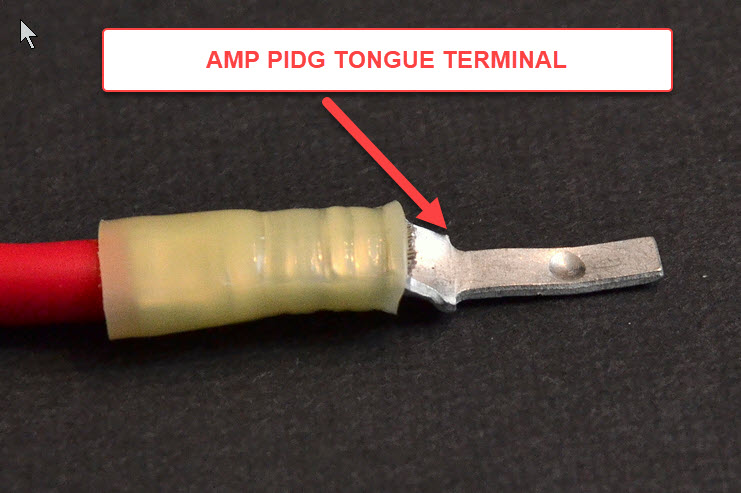
In the image below we can see what an unprotected set screw can do to solid tin plated copper. Now imagine what it can do to finely stranded marine wire. The terminal pictured below is an AMP PIDG tongue terminal they are also called PIN terminals. Be careful with Pin terminals and be sure they fit width wise into your terminal block.
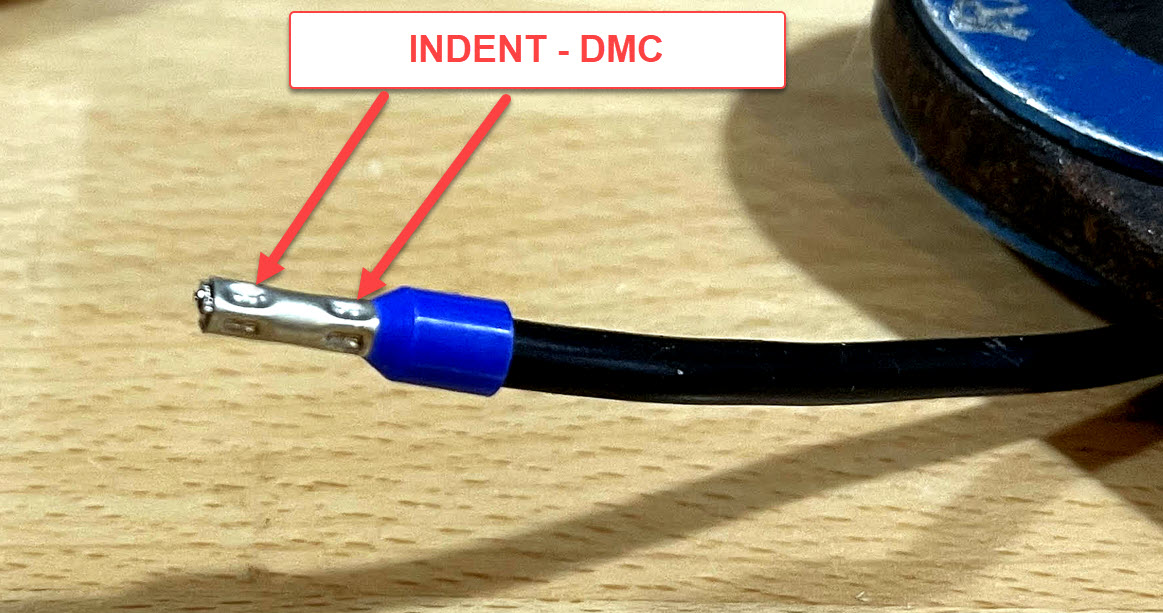
 What About Indent Crimp Tools?
The DMC indent crimper is insanely expensive as they are Aeronautical certified /grade tools. Nice to have if you’re a pro but not necessary for a DIY.
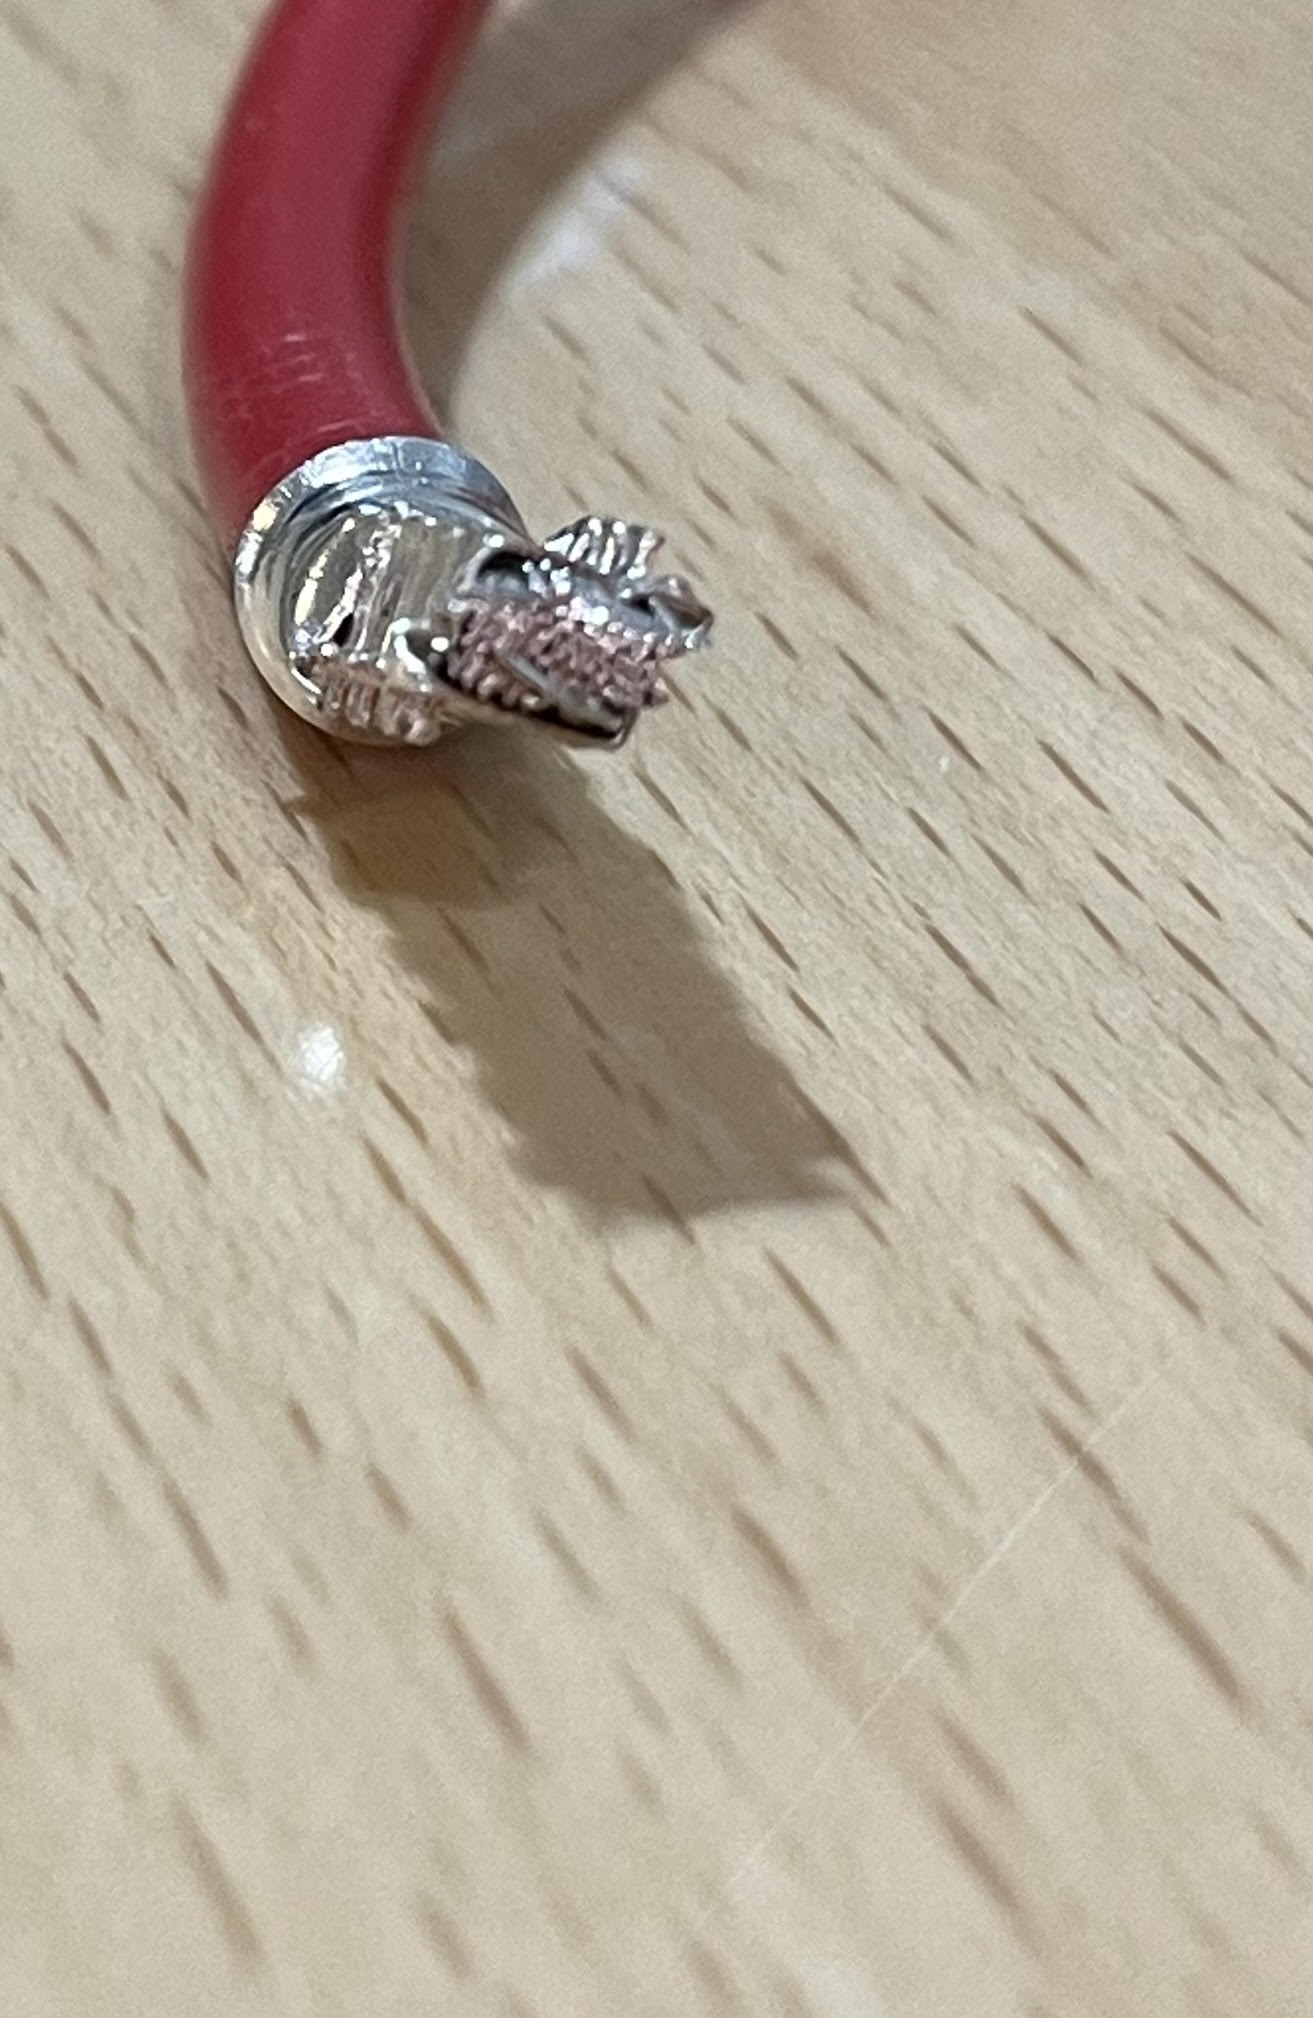
Buy Only Tin plated Copper Ferrules NOT Aluminum!
Sadly Amazon has subpar aluminum ferrules mixed in so, you need to be very careful when buying (every one of our Amazon links are copper ferrules. The crimp below was made with a subpar aluminum ferrule (sold as copper) and one of the inexpensive crimp tools. Nasty is the only way to describe it.
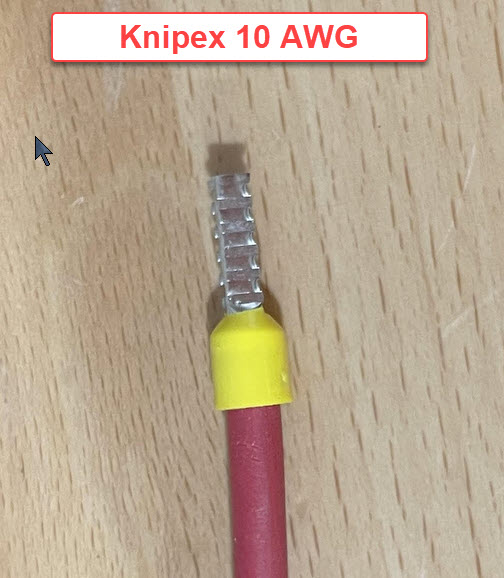
Knipex
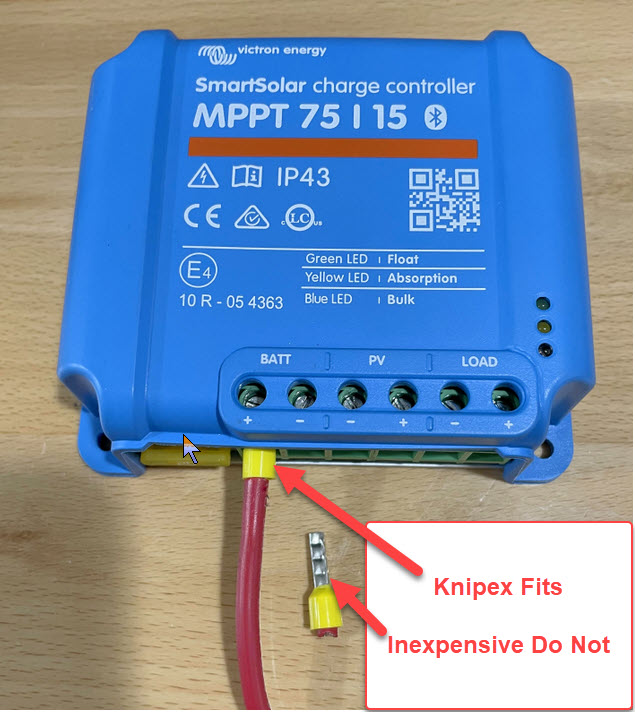
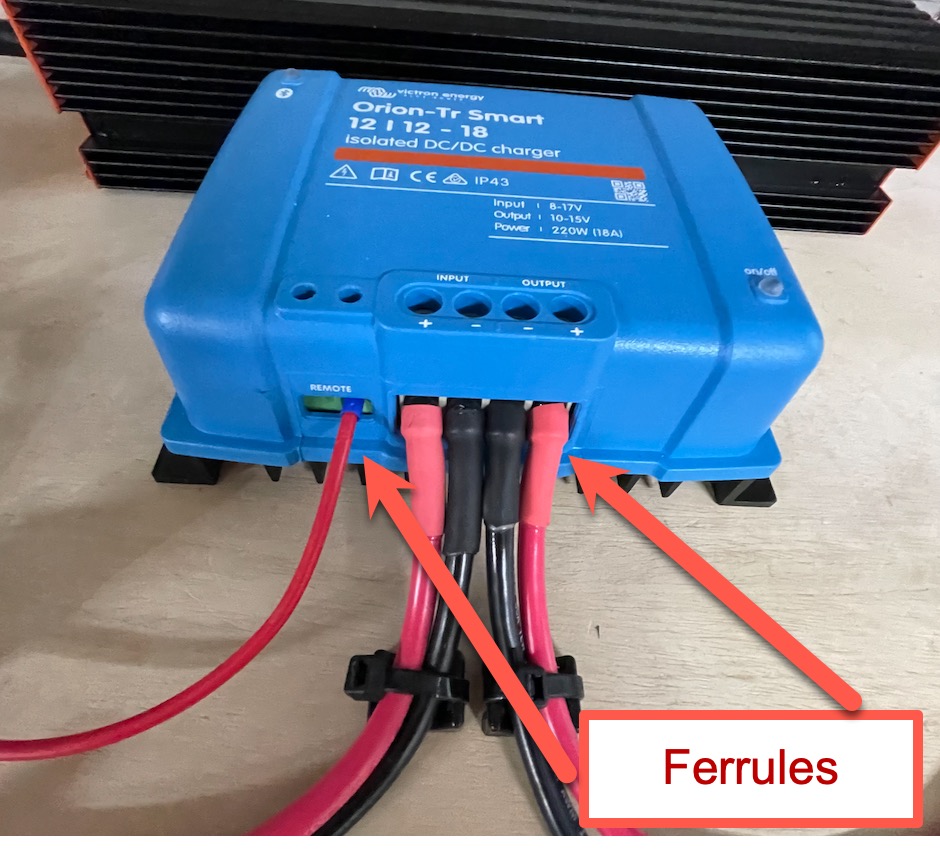
The inexpensive tools don’t really compare to the Knipex but the Knipex is almost $300.00. The Knipex really compresses the wire nicely and allowed a 10AWGwire/ferrule to fit into a Victron 75/15 controller.
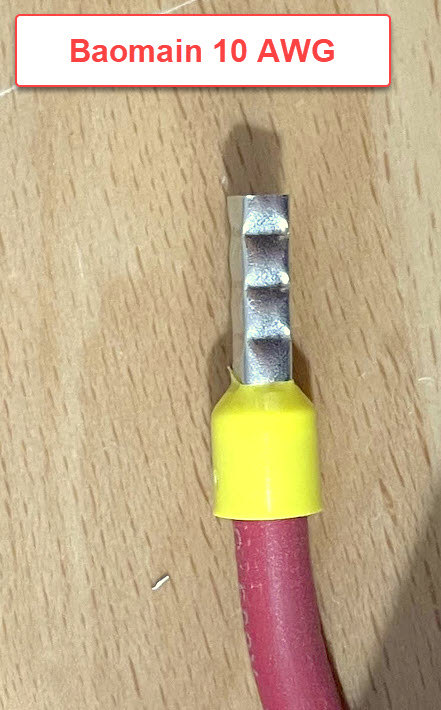
Baomain
Of the inexpensive tools the Baomain makes the best crimps however none of the inexpensive tools could compress the wire/ferrule enough to fit into a Victron 75 /15 solar controller.
When you have tight terminal blocks….
Sometimes the PCB terminal blocks are smaller than is needed for the wire length/voltage drop desired. We find this to often be the case with the smaller Victron MPPT controllers. In a situation such as this a high quality tool may be necessary. It should be noted that Victron uses PCB terminals specifically designed for multi-stranded wire and they do not require ferrules.
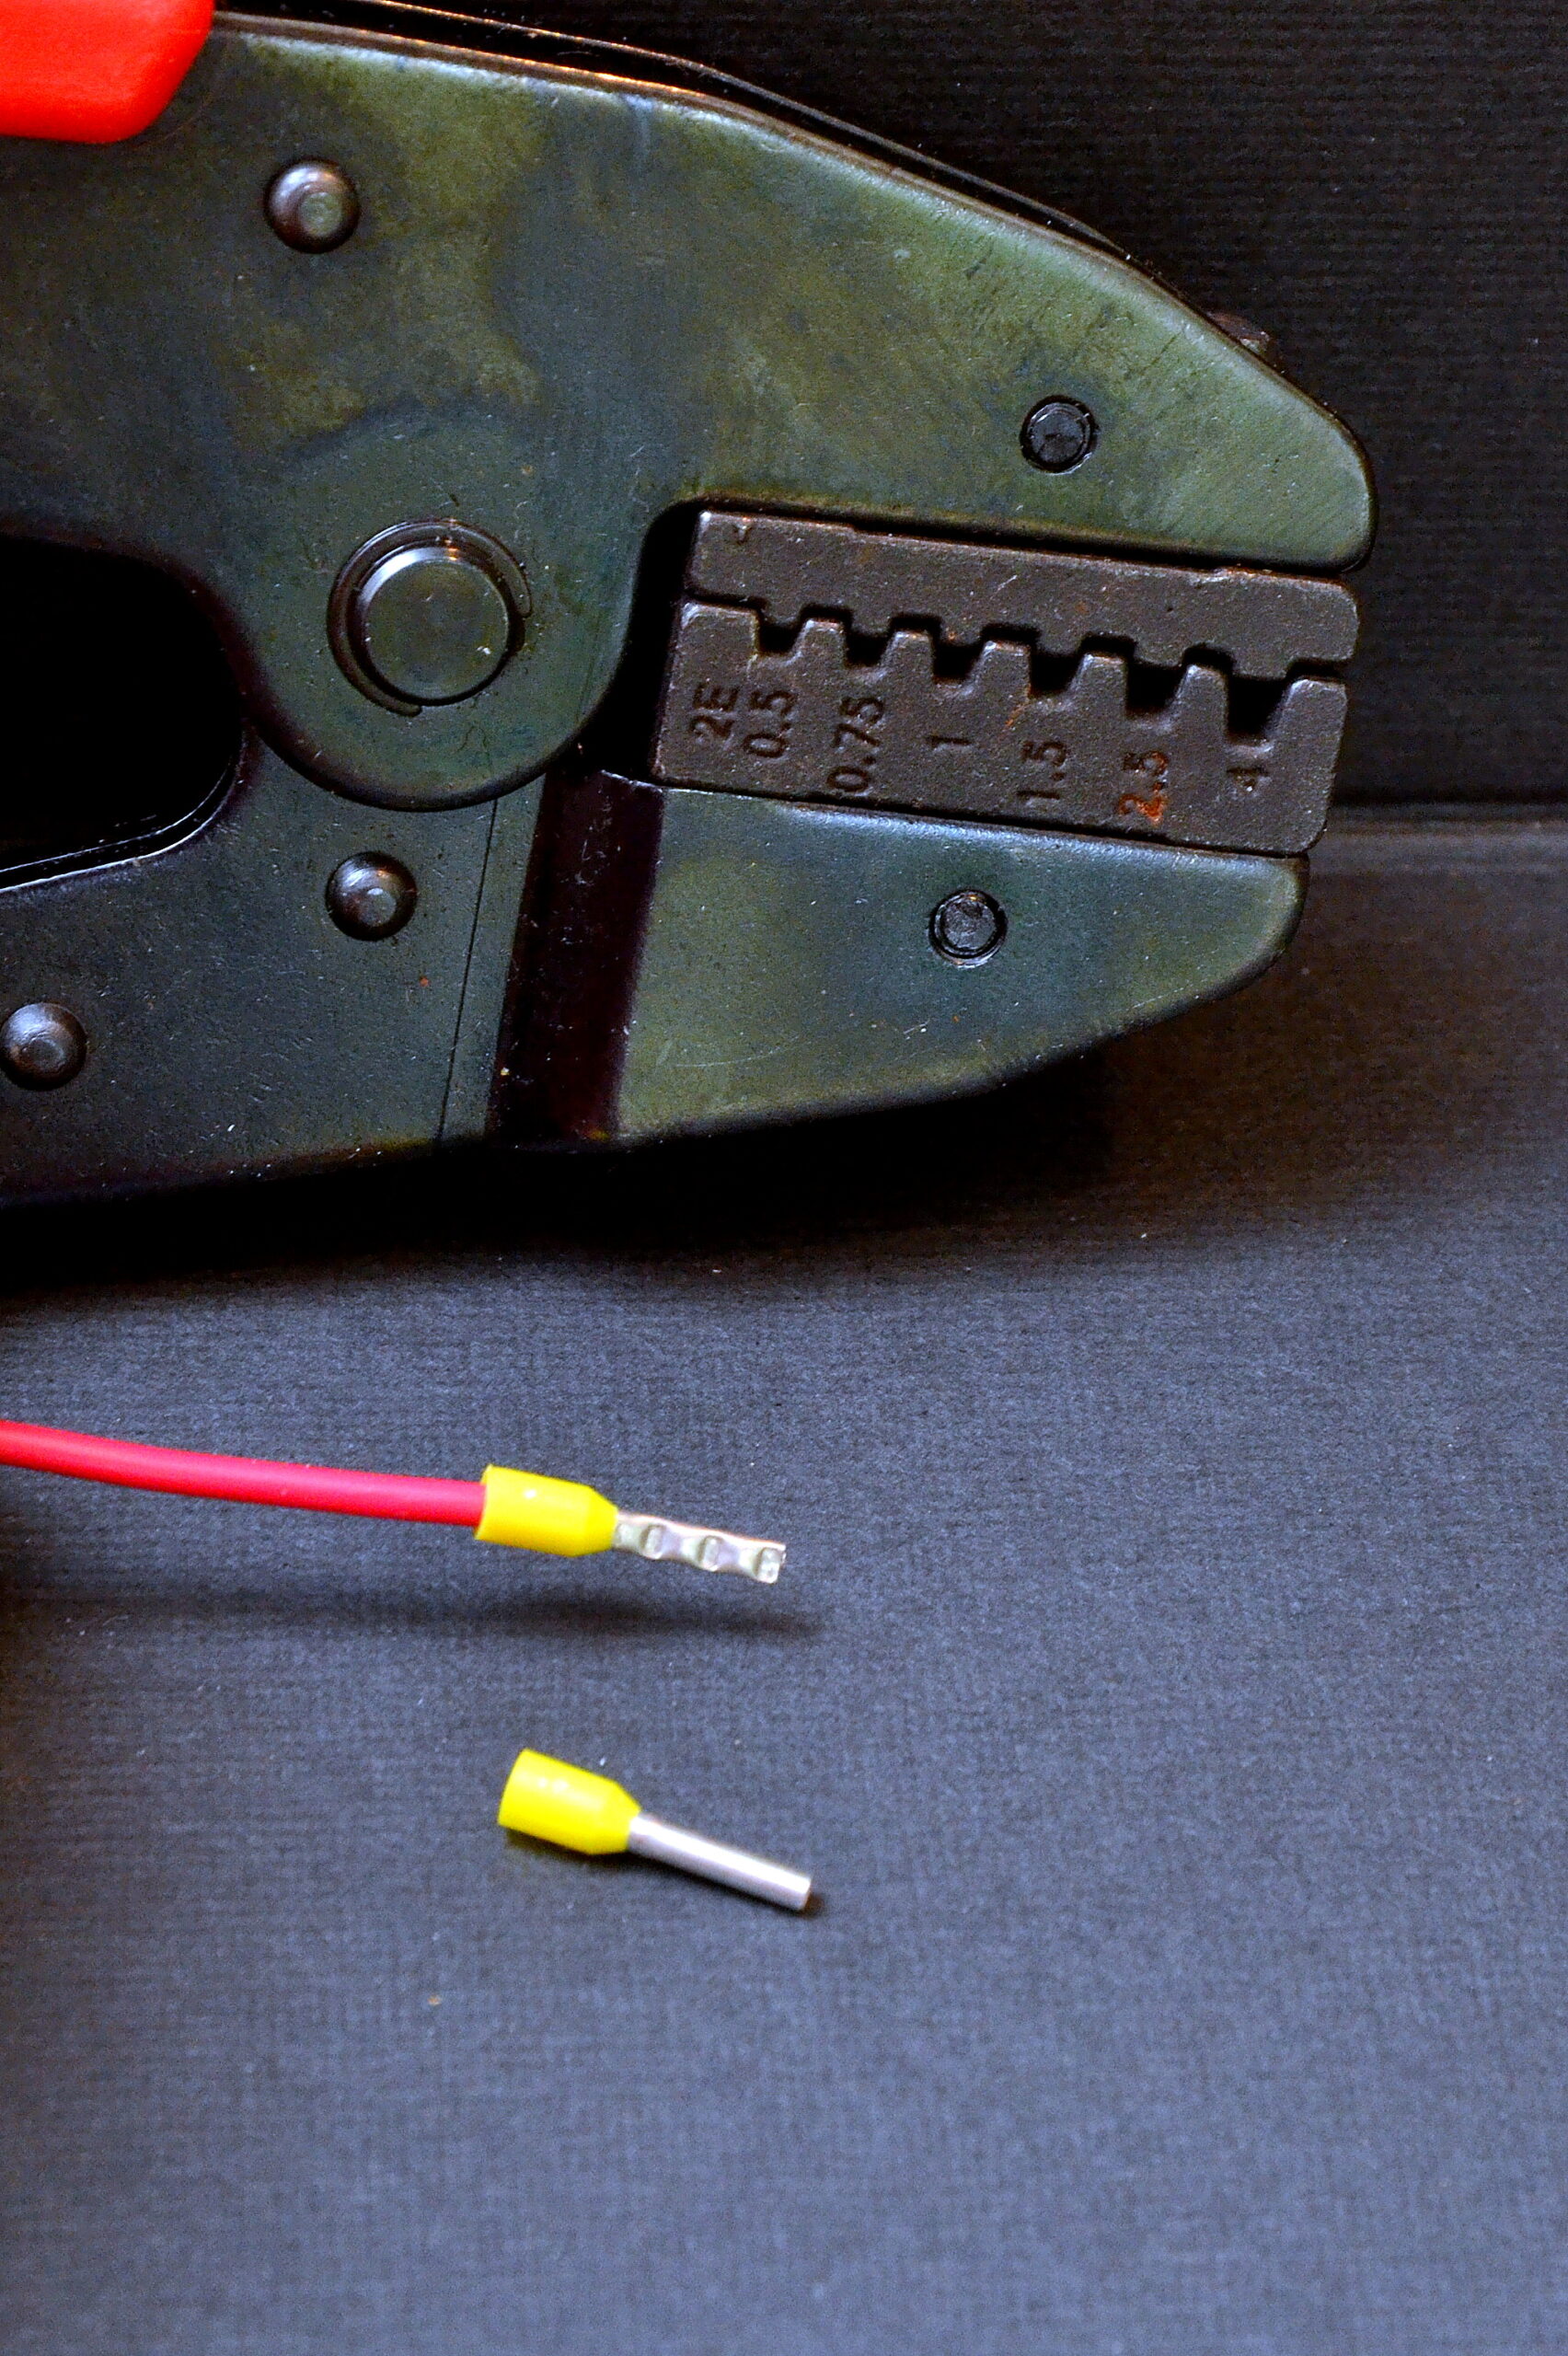
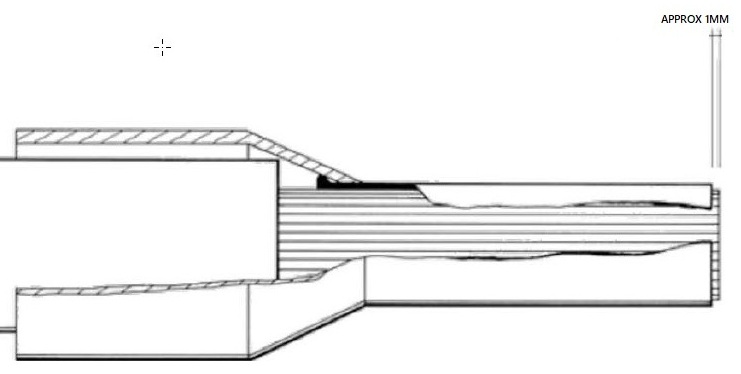
Correct Insertion depth
Installing Ferrules is as easy as it gets.
1- Strip Wire
2- Check Insert depth
3- Insert into crimp tool
4- Squeeze slowly until ratchet releases
Always Use Correct Torque
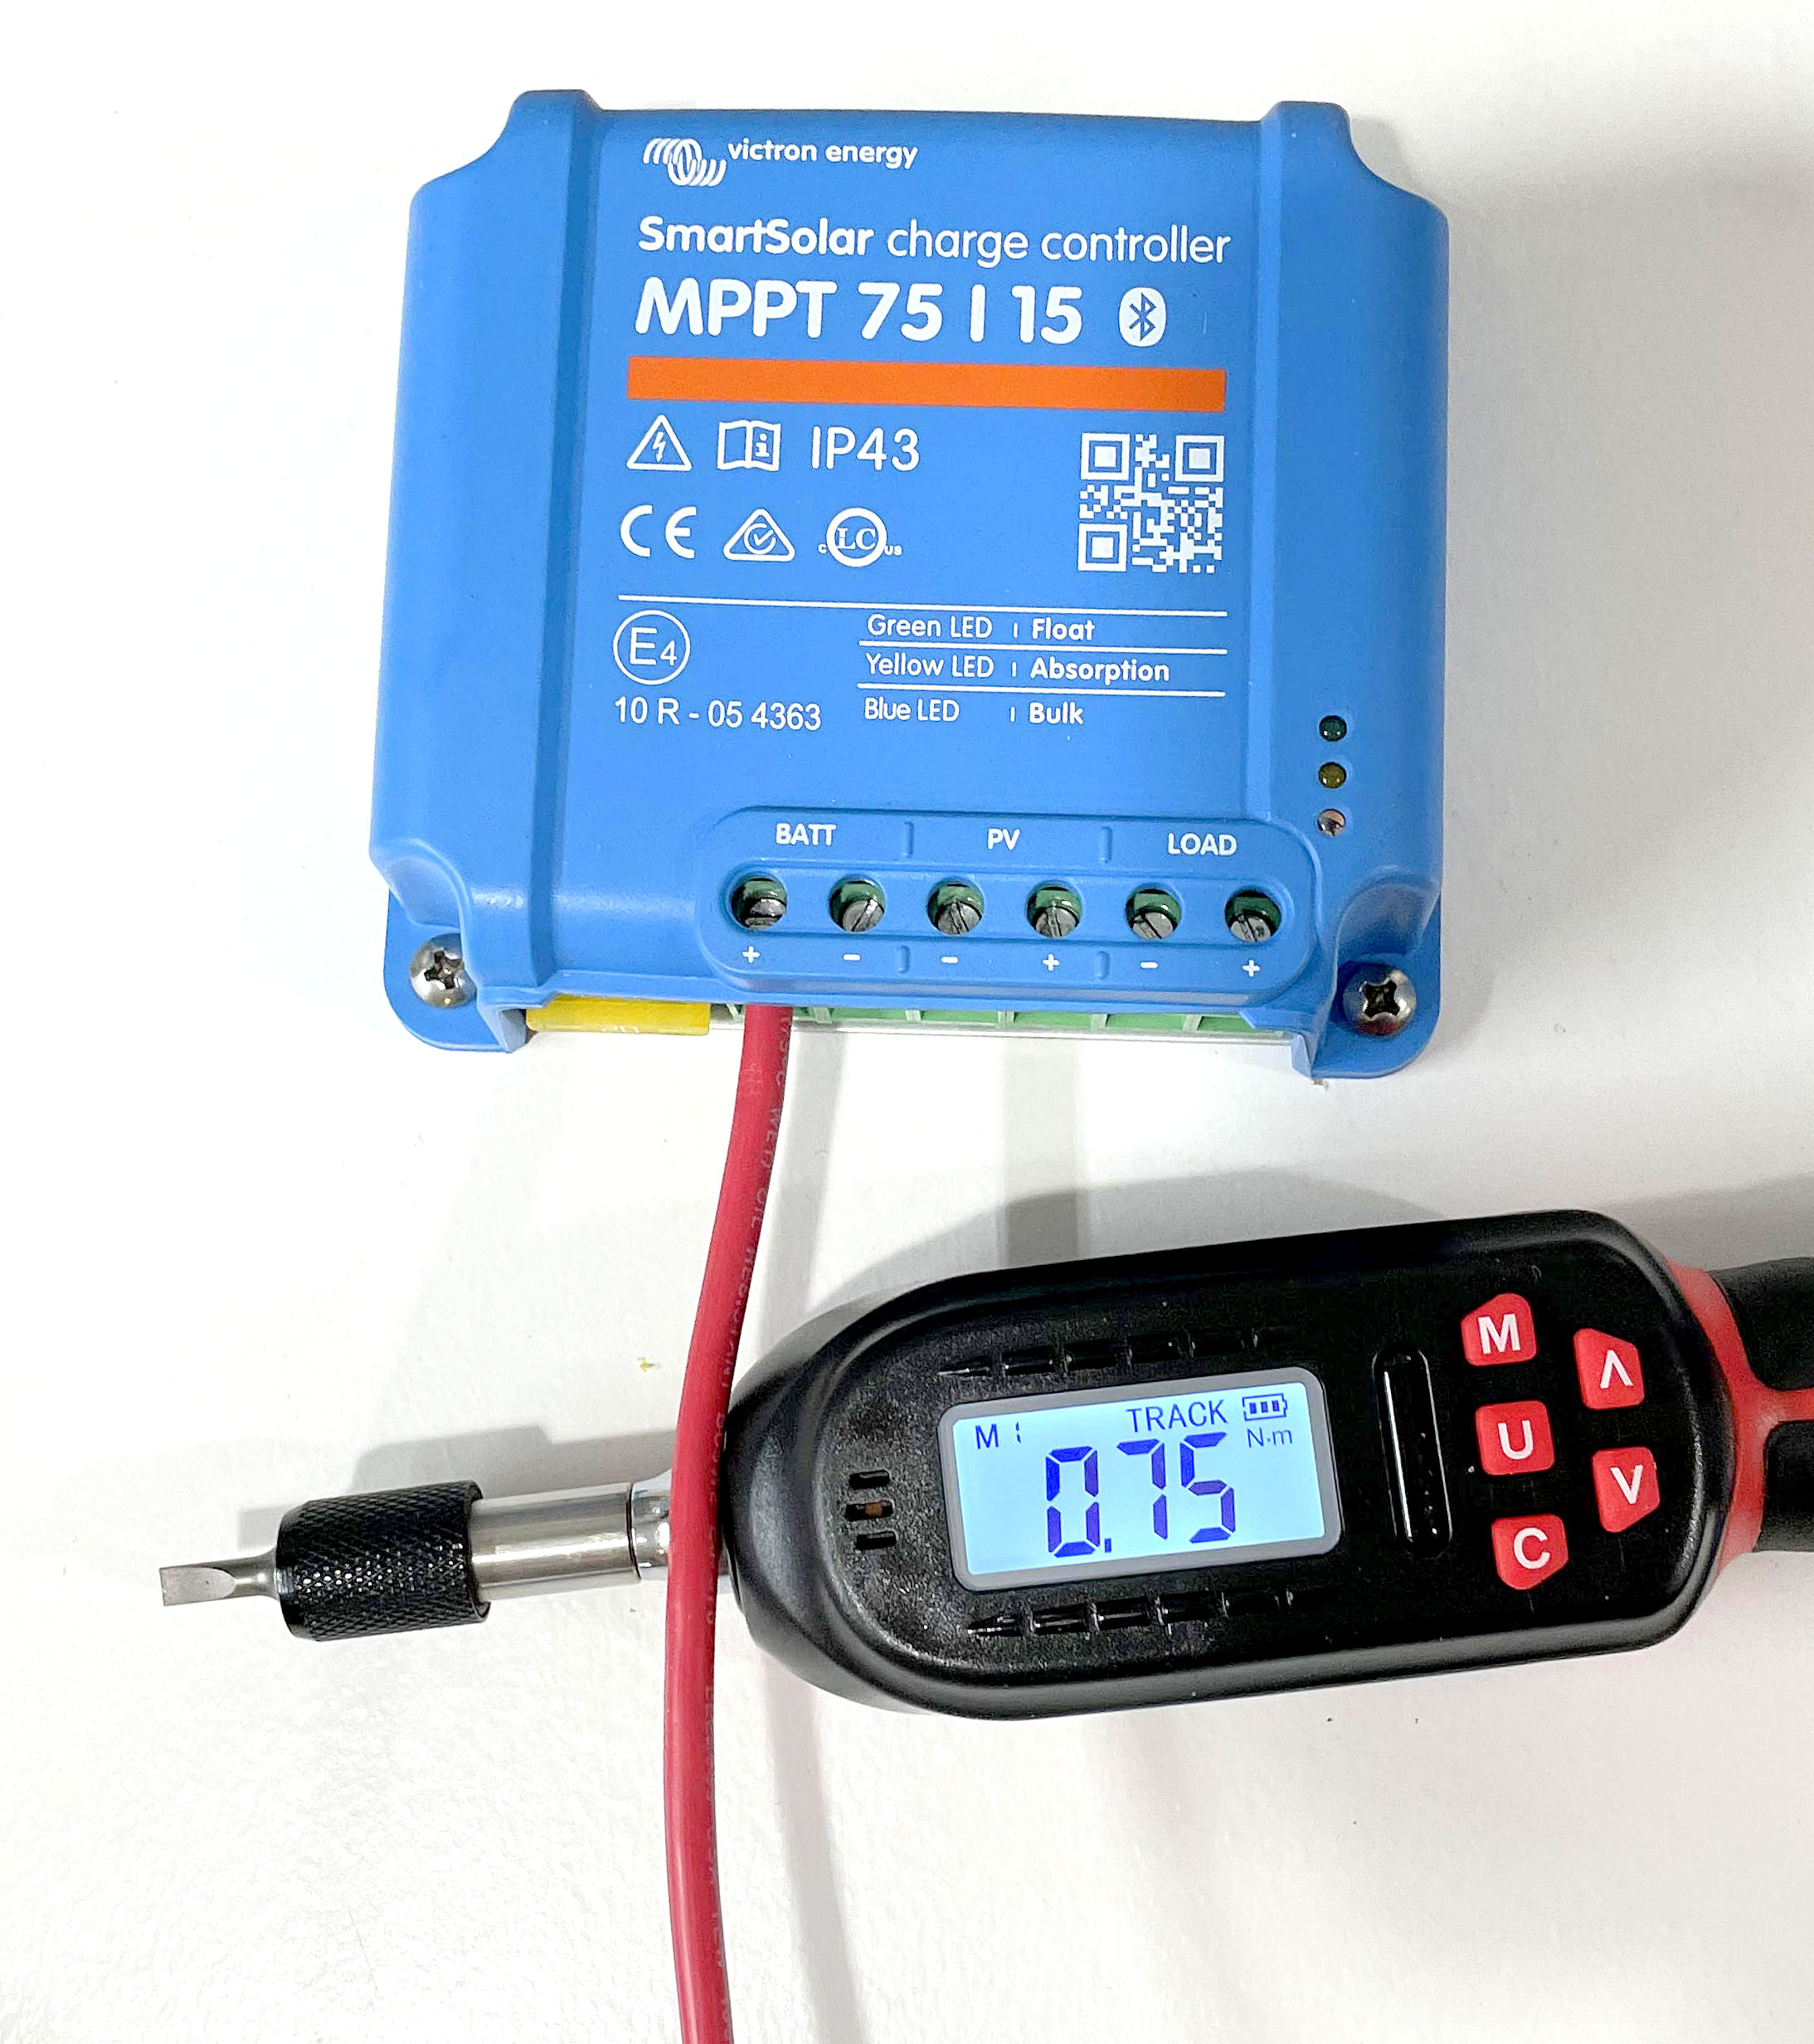
In nearly every situation we’ve come across high resistance with PCB mounted terminal strips the wire could easily be pulled from the terminal block using very light pressure. Manufacturers such as Victron provide the correct torque spec. The one below comes from the MPPT manual for the 75/10 to the 100/20 controllers.

If choosing to use bare wire, and you can if you want the Victron PCB terminal blocks are safe for marine wire, Victron also stipulates marine stranding.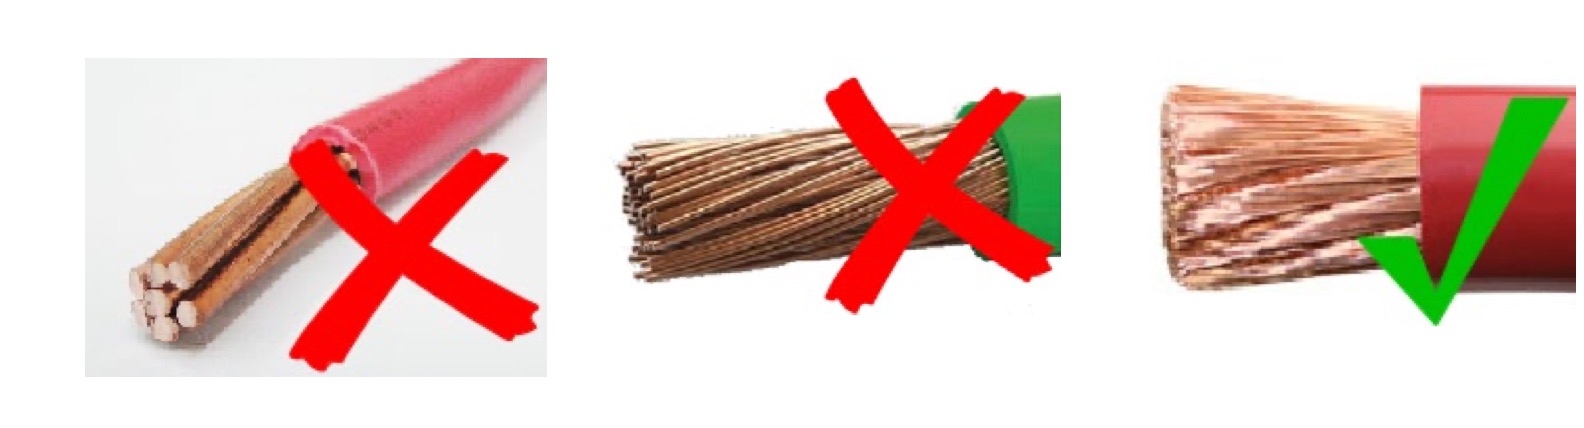
How do you check torque at 0.75Nm?
This is not difficult if you own the correct tool. At Compass Marine Inc. we have a fair number of torque screwdrivers kicking around. It’s how we know that finely stranded wire requires a re-torque. Our Digital torque screwdriver was purchased at Sears but I found one on Amazon that looks identical for a lot less Money (Sears probably re-branded it) . I really prefer our digital one over our non digital CDI torque screwdriver. The CDI is nearly $300.00 and the one on Amazon is less than $80.00. If you break a PCB terminal strip a torque screwdriver will pay for itself instantly
Buy Digital Torque Screwdriver – Amazon
Torque Screwdriver
Below We torqued bare 10AWG Ancor marine wire to 0.75nm. Two hours later it took nearly a quarter turn to hit 0.75nm again. This is enough to eventually create high resistance and this was following torque spec perfectly. If you snug it by feel it could be much worse
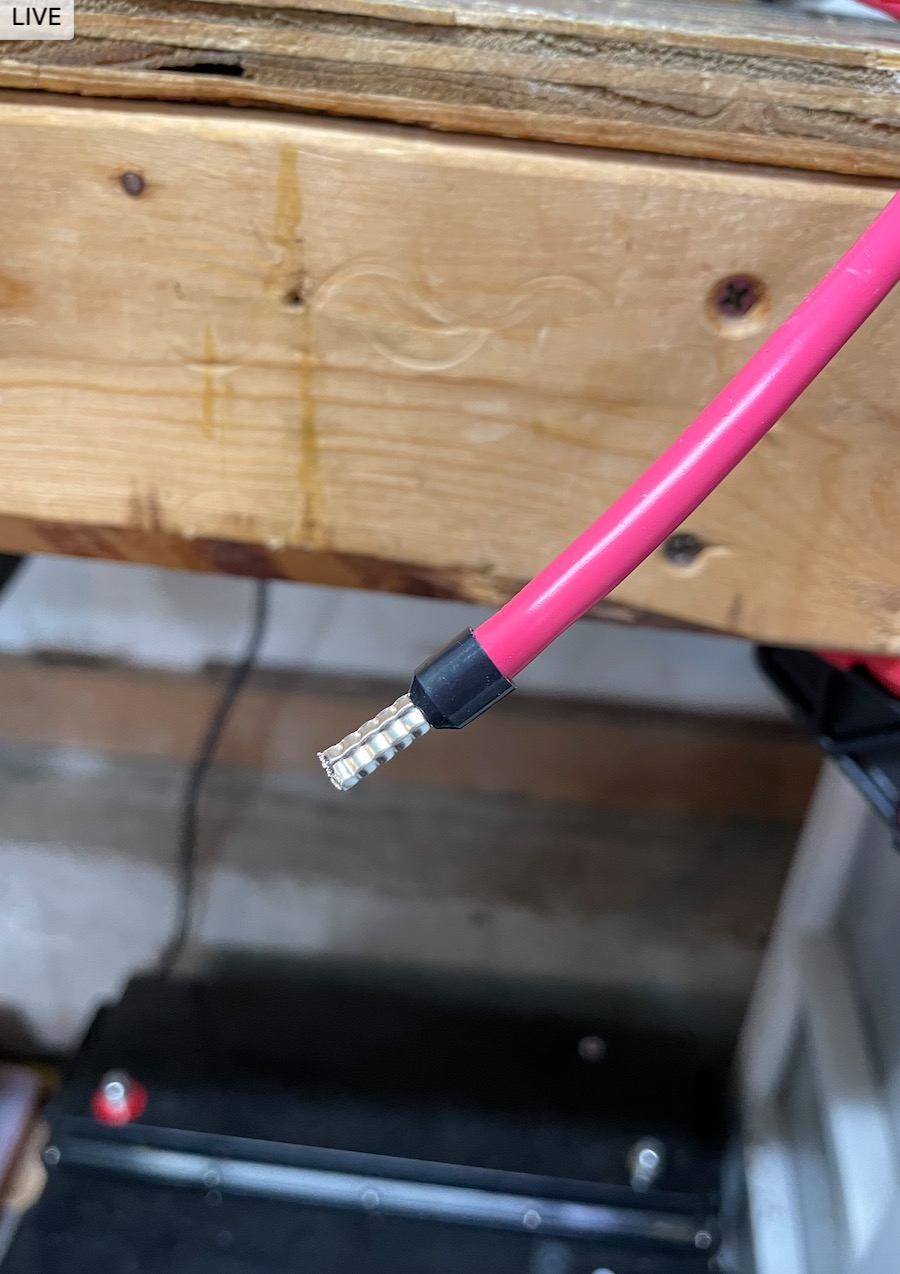
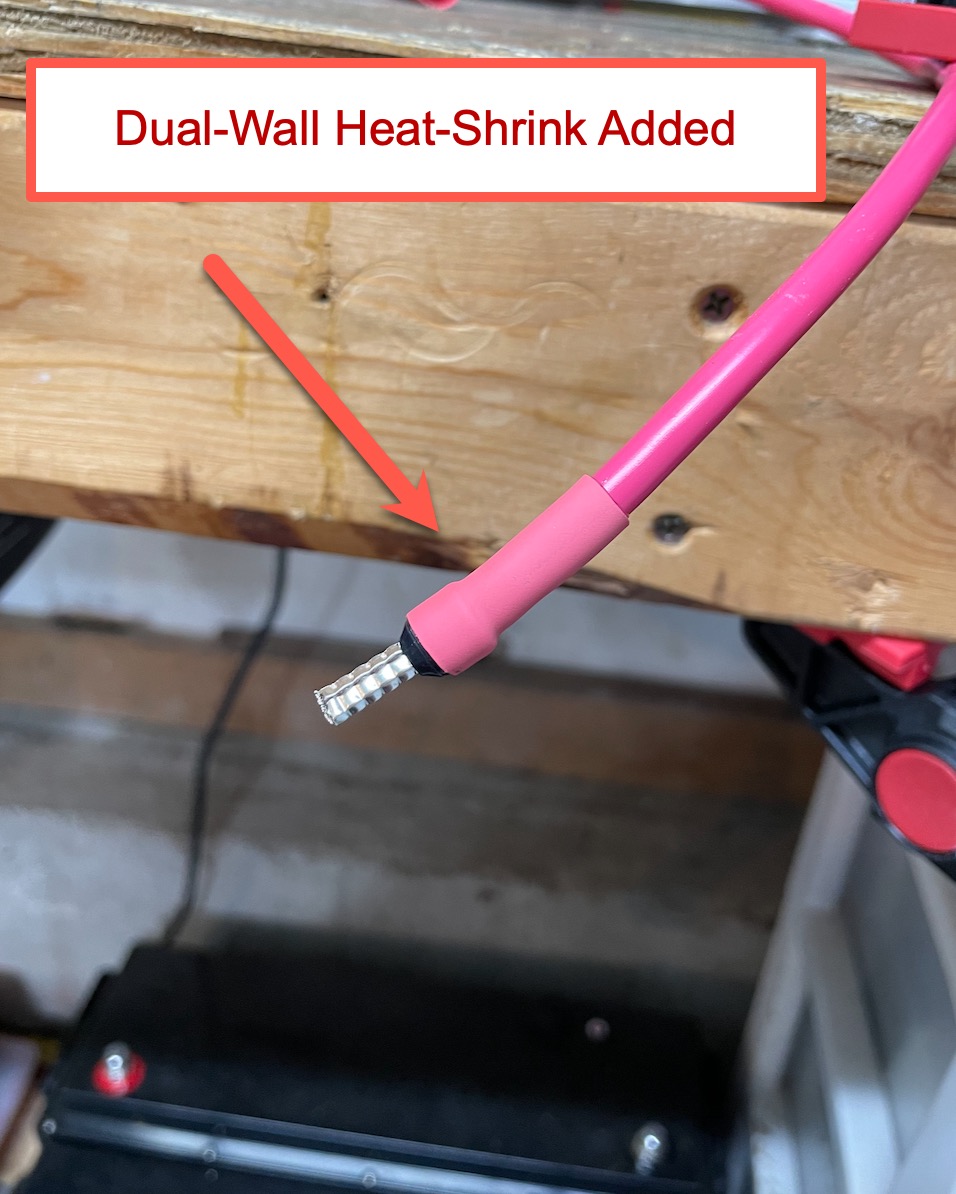
Additional strain Relief
Whether you choose insulated or non-insulated ferrules it is never a bad idea to add a bit more strain relief. Dual-Wall heat shrink= adhesive lined..
Good Luck & happy boating.
Emergency!
We do not want to put this website behind a pay-wall!
Please make a donation, that’s all we ask. Your donations & affiliate purchases are all we have to fund this web site. Please help to keep MarineHowTo.com a FREE source of information!