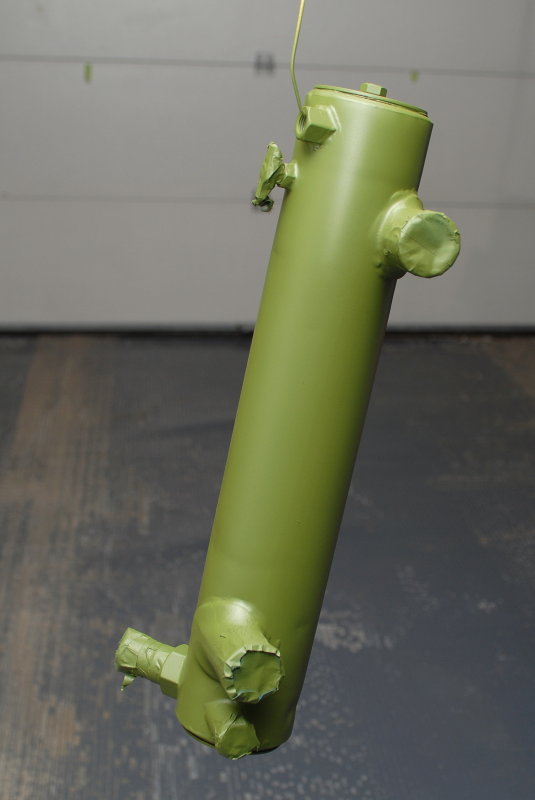
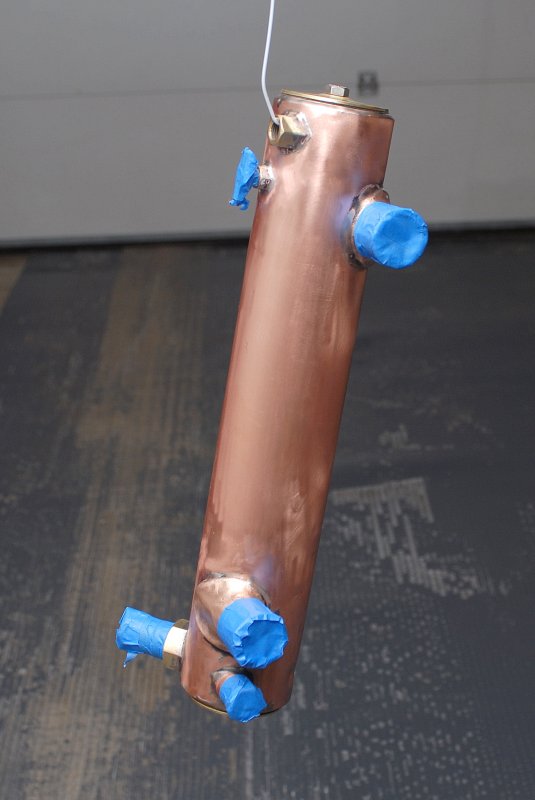
Westerbeke 3″ Heat Exchanger
This is a typical 3″ raw water heat exchanger as found on many Westerbeke an Universal diesel engines.
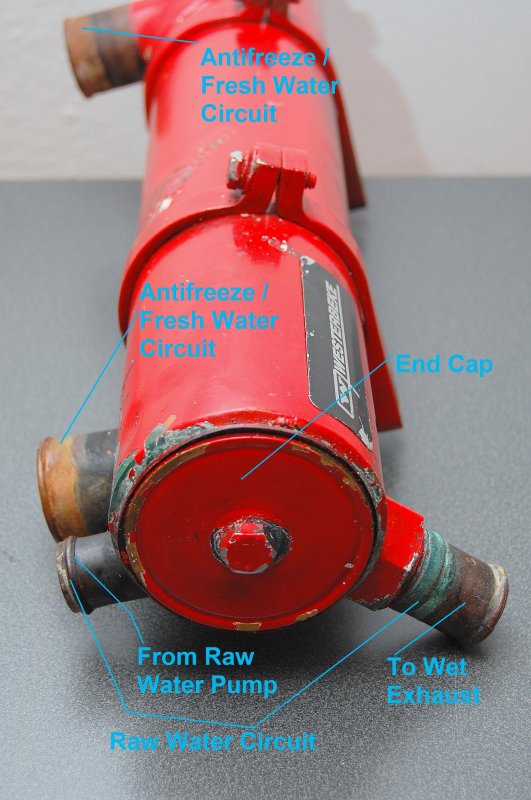
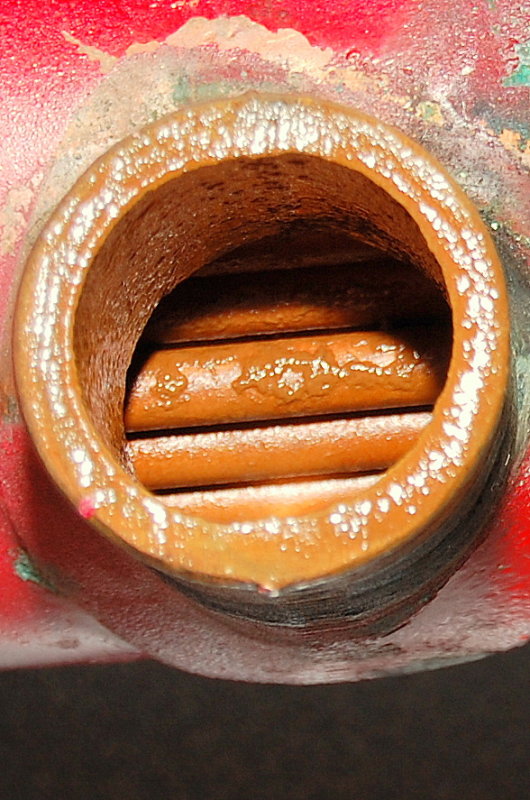
Close Up of End Cap
The end caps on these HX’s are rather prone to leaking, if the gaskets are not replaced on a fairly regular basis. The end caps also provide access to the heat exchangers copper tubes.

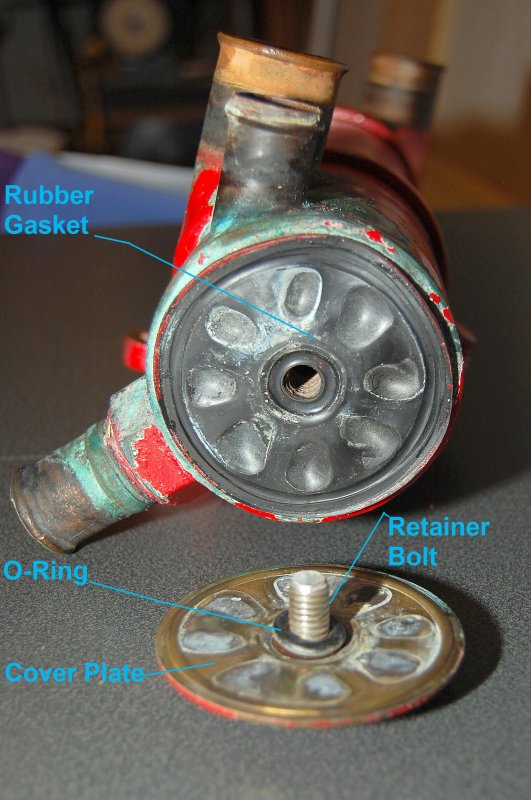
Removal of End Cap
The end cap assembly consists of a brass end cap, a stainless bolt, an o-ring and a rubber gasket. The o-ring and gasket go together as shown.
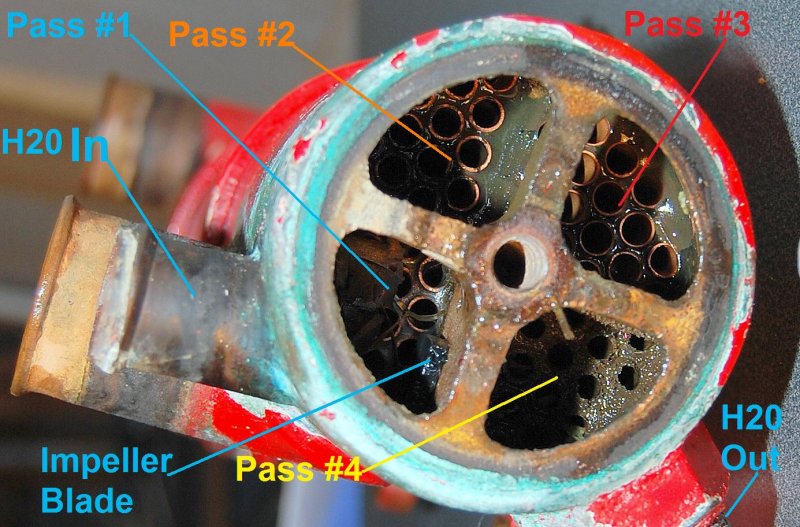
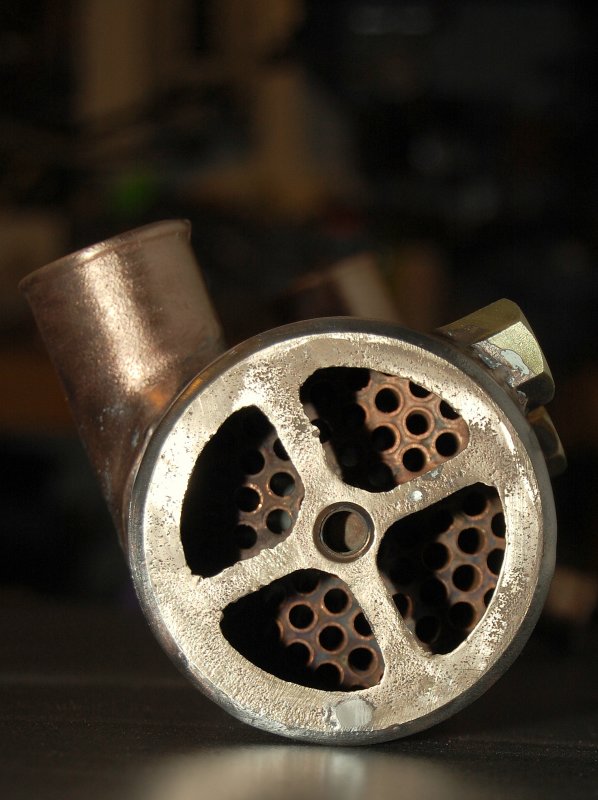
How A HX Works
If you follow the arrows you can see that the HX is broken into quarters and is a four pass heat exchanger.
Raw water enters & then flows to the opposite end, returns to the inlet end, turns and heads back to the opposite end and finally turns back towards the inlet end and finally gets ejected into the wet exhaust system.
If you click on the picture to blow it up you’ll notice a chunk of an impeller blade that took up residence in this heat exchanger.
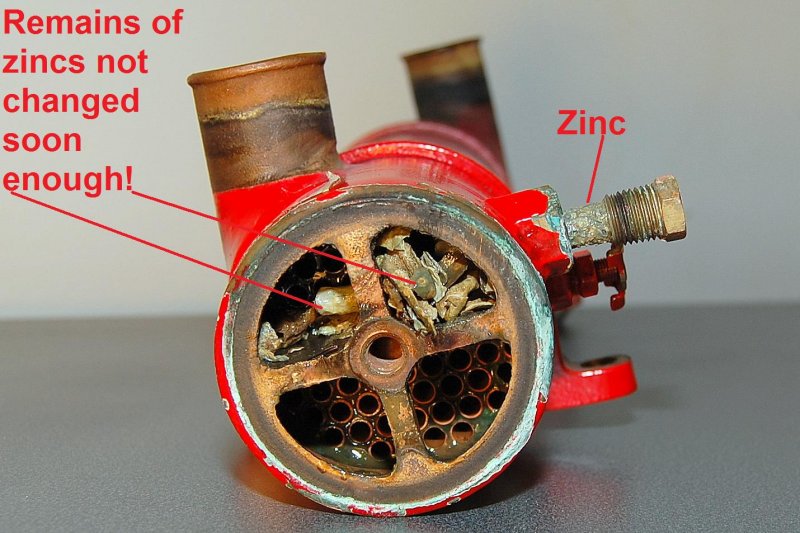
The Zinc End
This is about as good an example as I can come up with as to why you need to change your heat exchanger anode regularly.
Each engine will be slightly different in regards to anode erosion so test it at three, four, six weeks etc. to see which works best for your engine. This is why these heat exchangers have end caps.
By not changing the anode often enough this is what will happen. Chunks will break off the anode which can clog the heat exchanger leading to an over heating engine.
Zinc Pieces
All this crap came out of the anode/zinc end of the HX and was impeding raw water flow. This type of crud can lead to an engine overheat. That Murphy guy will then see to it this overheat will only happen when running a dangerous inlet in 8 foot following seas at 2:00 a.m.. Remember Murphy is always waiting for you…
Don’t let Murphy get you, head him off at the pass and change your HX anode regularly. The anode pictured here was just eight weeks old and probably should have been replaced at about six weeks as it was already shedding & swelling.


HX End Cap Before
Most often the end caps are reusable but they do need to get cleaned up or the gaskets may leak.
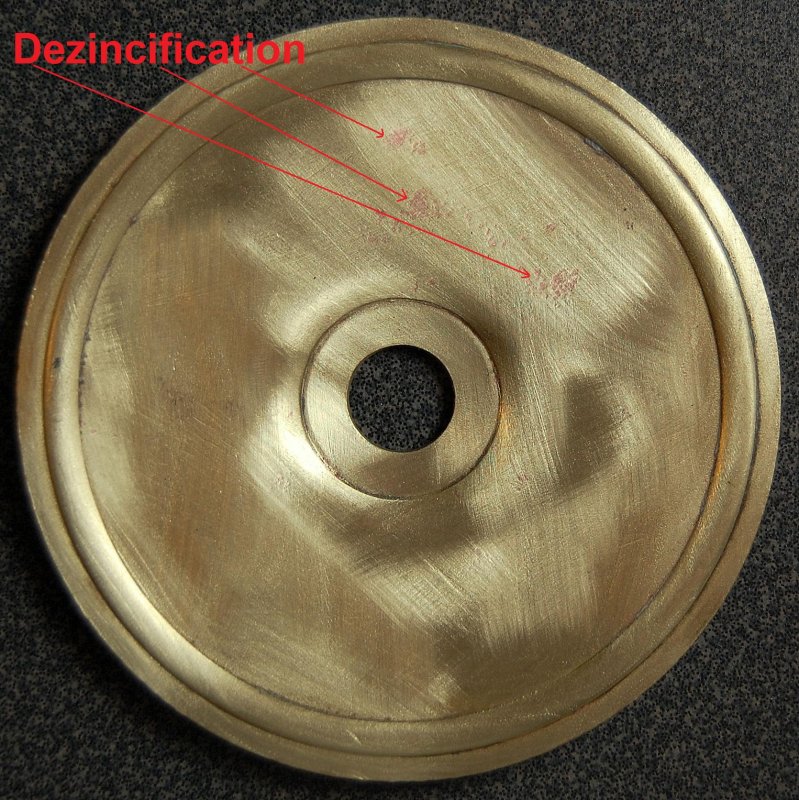
Brass HX End Cap Showing Dezincification
A little burgundy Scotch-Brite will do a great job of cleaning an end cap. Always examine them for signs of dezincification.
Dezincification is the process of the zinc being leeched out of the brass. Brass is often a 60/40 copper/zinc metal. The dezincification process leaves the remaining metal rather brittle and more prone to failure. If you see much more of a pink coppery color, than this end cap is exhibiting, it would be a good idea to replace the end caps.

The HX – Ready For Fresh Paint
This heat exchanger was pressure tested, cleaned inside and out and readied for a new coat of paint. A good auto radiator shop can pressure test it and then clean it all for about $30.00 to $50.00, depending upon your geography. I have a local guy that will do this for $30.00-$50.00. Not really worth my time to even consider doing it myself.
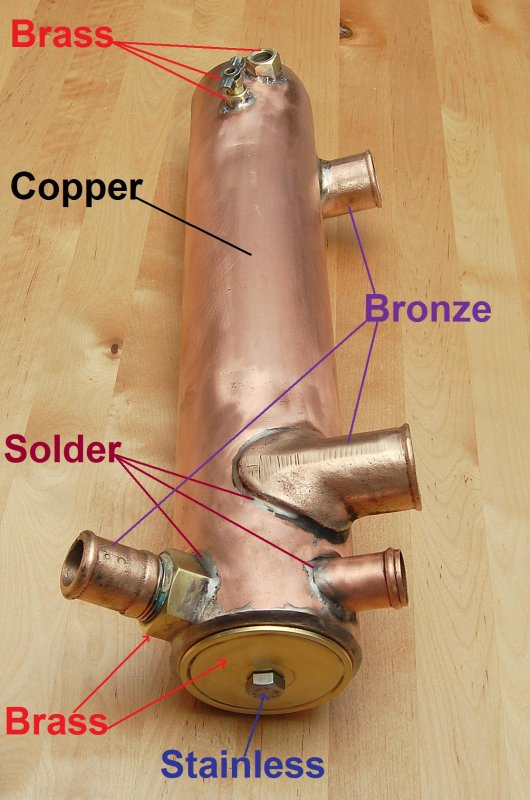
Why Anodes? Dissimilar Metals!
Why do I need an anode in my HX…….????
Your eyeballs are not playing tricks on you. These heat exchangers can have as many as five different metals from all over the galvanic scale.. I call, this a galvanic corrosion stew… The anode, usually made of zinc in salt water, is there with good reason..
All Clean & Boiled Out
This is what the tubes look like after being boiled out…
Dex-Cool Sludge (AKA Death-Cool)
This engine was suffering from Dex-Cool sludge and required a flushing with Rydlyme. If you don’t know what Dex-Cool is feel free to google “Dex-Cool Class Action Suit” and you get plenty of hits. The bottom line here is that in certain engines Dex-Cool may not be appropriate and today’s modern antifreeze formulations should not be mixed. This engine only ever had Dex-Cool used yet in it, never mixed and changed bi-yearly, it still plugged up like this by year 7. This engine no longer runs Dex-Cool and the sludge issues are gone.
Ready For Paint
When painting be sure to mask off the hose adapters. Painted hose adapters can lead to future leaks.
Primed With Zinc Chromate
I’ve tried many primers on copper over the years and settled on Zinc Chromate. Moeller is about the only one left making it in readily available spray cans. The part number for the Moeller Zinc Chromate spray paint is 025472.
IMPORTANT: Zinc Chromate primer is not good for you. Be sure to use it carefully, in a well ventilated area, and please use a respirator.
After the zinc chromate paint the HX your engines color and re-install it.
Good luck & happy boating!