Originally Published 2014
Cutlass Bearing Removal
Every now and then a boats propeller shafting need to be replaced. A replacement can be necessary due to corrosion, bending, wear at the stuffing box, wear a the cutlass bearing or a poorly installed/machined shaft to begin with.
When choosing a shop to do this work you will need to ask specific questions to ensure you are not getting a subpar job. Many, many shops are more than eager to charge you a huge sum of money only to deliver shoddy work that won’t comply with ABYC P-06. Today, shafting work should only be done using high grade alloys such as:
Minimum Grade:
Aqualoy 17 or Aquamet 17
Mid Grade:
Aqualoy 19 or Aquamet 19
Recommended:
Aqualoy 22 or Aquamet 22
Top of the Line: (typically for high power vessels)
Aqualoy 22HS (High Strength)
Choose your shafting shop carefully!
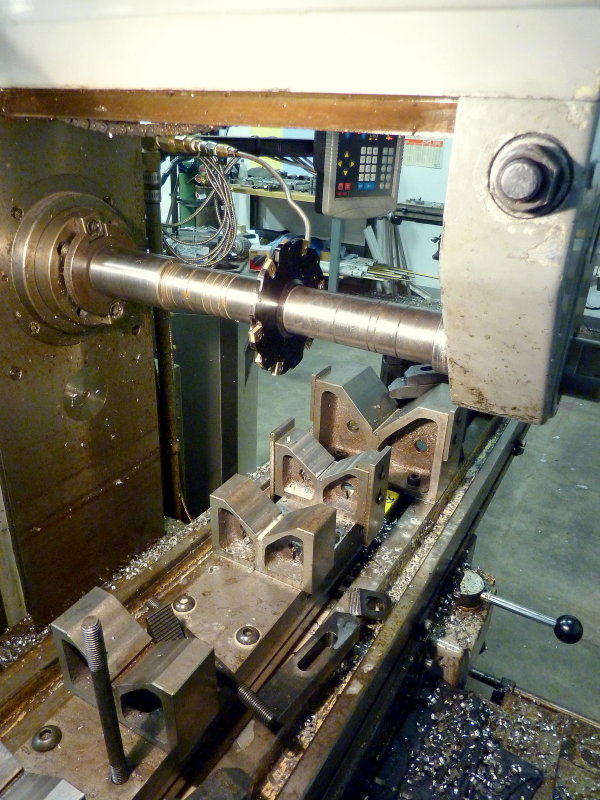
Getting the Shaft Out
On many boats, especially sailboats, removal of the cutlass bearing can help you avoid dropping or removing the rudder. Dropping a rudder is a job easier said than done on many boats. On this vessel, an Ericson 34, the shaft just barely slid by the rudder once the cutlass bearing had been removed. Pressing out the coupling saved many hours of labor time, in not having to drop the rudder to remove the shaft. Of course the shaft for this article was not-reusable due to wear, so we just opted to cut it out.
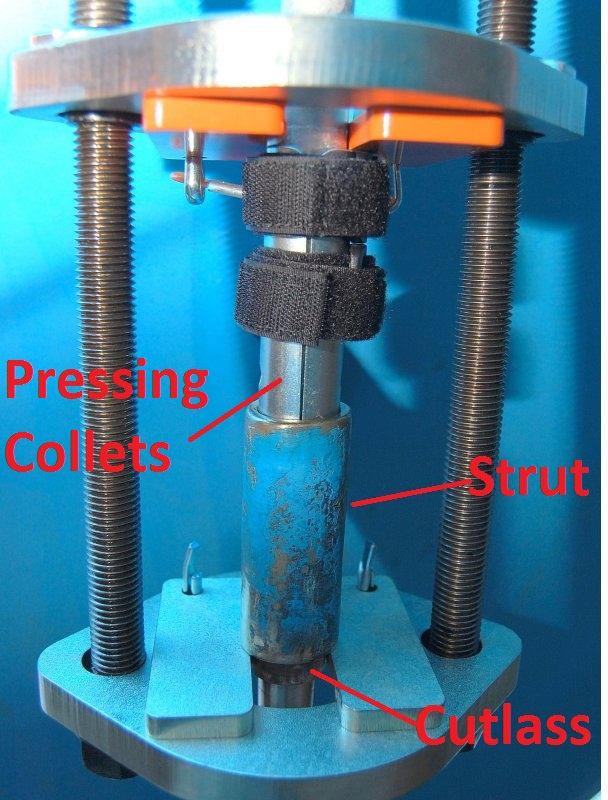
To remove Cutlass bearings Compass Marine Inc. often uses our Strut-Pro tool. These tools are not perfect and cannot always press out a bearing but the success rate is high enough that the tool pays for itself in just one use.
Before the nitpickers come out in full force, the word “Cutless®” is a trademarked brand name of Duramax Marine. I therefore use the alternative accepted generic spelling of “cutlass”, just like Vetus Marine does. This is so as not to infringe on a trademarked “brand name”.
From the Duramax Marine web site: “Cutless® is a registered trademark of Duramax Marine® LLC.”
Cut The Old Shaft Out

If you know the shaft needs to come out, why risk damage to the gear box or gear box flange by trying to press the coupling off the shaft. It’s far easier and far less time consuming to simply cut the shaft out. Cutting this 1″ shaft took all of about 45 seconds to free the it from the flange and we did not risk any damage to the gear box flange in doing so. This article has more detail on removing a coupling as well as all the precautions: Installing a PSS Shaft Seal
Slide-Hammers = NO!
Before you engage a boat yard to do this job, I will type this so it hopefully makes sense; NEVER use a “slide-hammer” to remove a shaft from a coupling if the coupling is attached to the gear box!
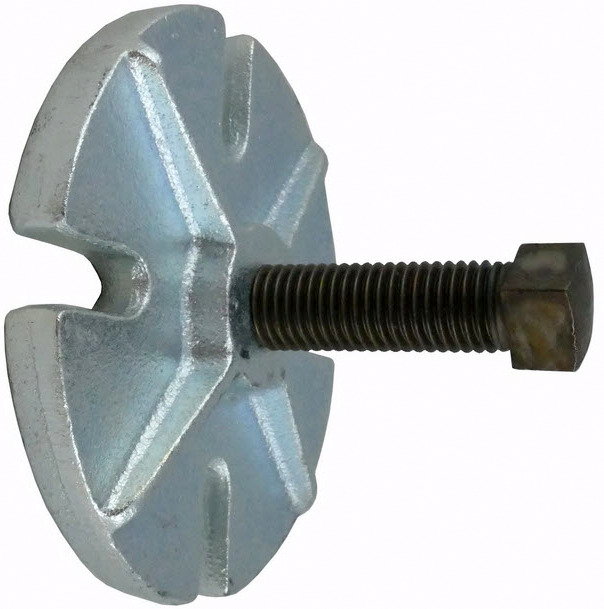
If you want to throw 3k out the window feel free to use a slide-hammer, if not, use safe and proper procedures for removing the shaft from the coupling such as a coupling press tool like the one from Buck Algonquin pictured below.
Yards that don’t care about your boat or gear box, use slide-hammers to remove prop shafts from the couplings even when the coupling is attached to the gear box. Yes, it’s quick & dirty, and the damage to your gear box can largely goes unseen, for a period of time, but DO NOT be fooled by boat yards with slide-hammers and do not allow a yard to use one on your boat.
Let me phrase this another way. Would you go to a dentist who used a Milwuakee Sawzall to remove a tooth?? No, of course not. To those in the know, a dentist with a Sawzall is the same level of ignorance as a slide-hammer. A slide-hammer is the wrong tool for the job. I know many tech-schools blindly teach this, and they are grossly wrong, but you now have the ammunition, and are a better educated boater. It’s your boat, so just say no to slide-hammers!
What’s so wrong about using a slide-hammer?
A slide-hammer is essentially a long piece of metal pipe that threads onto your shaft where the prop nuts go. It’s about 4 feet long and has a heavy metal weight on it. The weight is slid up the bar, towards the prop shaft nuts, and then thrown or “slid” down the bar until it hits the end and SLAMS to a sudden & abrupt stop. The concept is that it breaks the coupling from the shaft when the weight comes to the sudden and abrupt stop. This tool does what it does very well, but that is not the end of the story. The reality is that a slide hammer destroys gear boxes and brinnels the bearings in the process.
The Damage Done is not Always Obvious
The worst part about slide-hammers is this destruction of your gear is not always readily apparent. Because of this boat yards and their workers assume they get away with it and it “works”. Yes, it works, it works to destroy gear boxes. If your boat yard tells you “we do it all the time” please do yourself a favor and find a new yard.
Slide hammers can cause brinneling of the bearings or races in the gear box. The shock loads imparted on the static bearings, by the “slide-hammer”, actually create flat-spots in the races or bearings themselves. Your gear box may appear to work for some time after the slide-hammer event but eventually, the damage rears its ugly head and it’s next to impossible to lay blame on the slide-hammer user as they rarely fail instantaneously.
About twelve years ago I was at a yard when I overheard the yard-boys slamming & slamming & slamming a slide hammer to free a shaft from a coupling. All of a sudden I heard one last SLAM, then a CLUNK and the sounds of metal bits on fiberglass, then “OH $HIT!”…… You guessed it they hit it so hard they blew the case of the gear box apart and destroyed it. They literally cracked the iron gear box wide open. The shaft, after all the beating that finally destroyed the gear box, was still firmly embedded in the coupling.
Caveat emptor on slide-hammers..
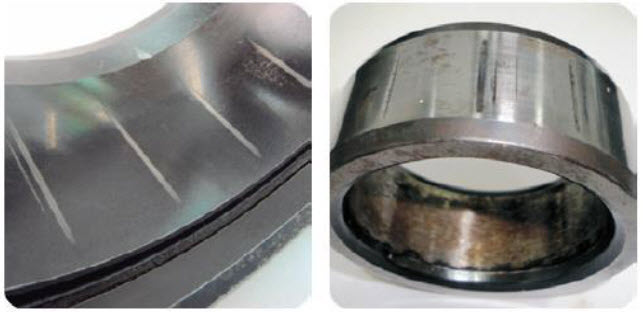
Double Taper Shaft
While many marine shafts, such as those used on many sailboats and small trawlers are a straight shaft at the coupling end, others may be considered a “double taper” meaning the coupling end is tapered just like the propeller end.
As can be seen above, this shaft is a double taper on both ends. Many sailboats however lack the space for a double taper coupling, because double taper couplings are typically longer. Sailboats typically use a “straight coupling”.
The point of this image is to make darn sure you know what type of coupling you’re working on before trying to remove it…
A New Split-Coupling
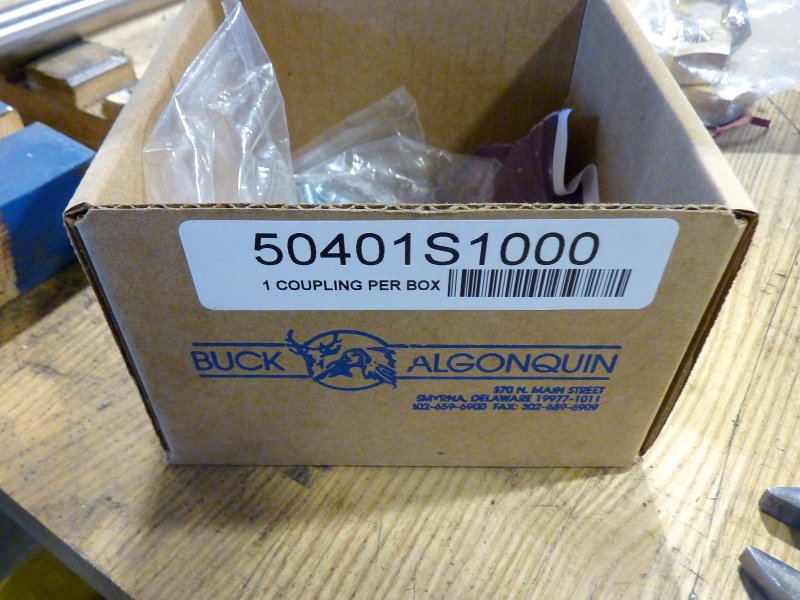
For tight spaces, like this Ericson 34, Buck Algonquin makes a great split coupling. I typically prefer a straight split-coupling to a straight solid coupling but, both work if properly installed fitted and faced. It is these small nuances of a correct prop shafting job, such as fitting & facing, spotting, chamfering corners etc. that matter most what selecting a shafting shop to do your work.
The nice thing about this split-coupling is that it’s no longer than a standard solid coupling and is actually a touch shorter than most. The “S” designates “short”.
This is the new split coupling from the box above. You can see how compact it is on its overall length. If you have a tight fit one of these may be a good choice.

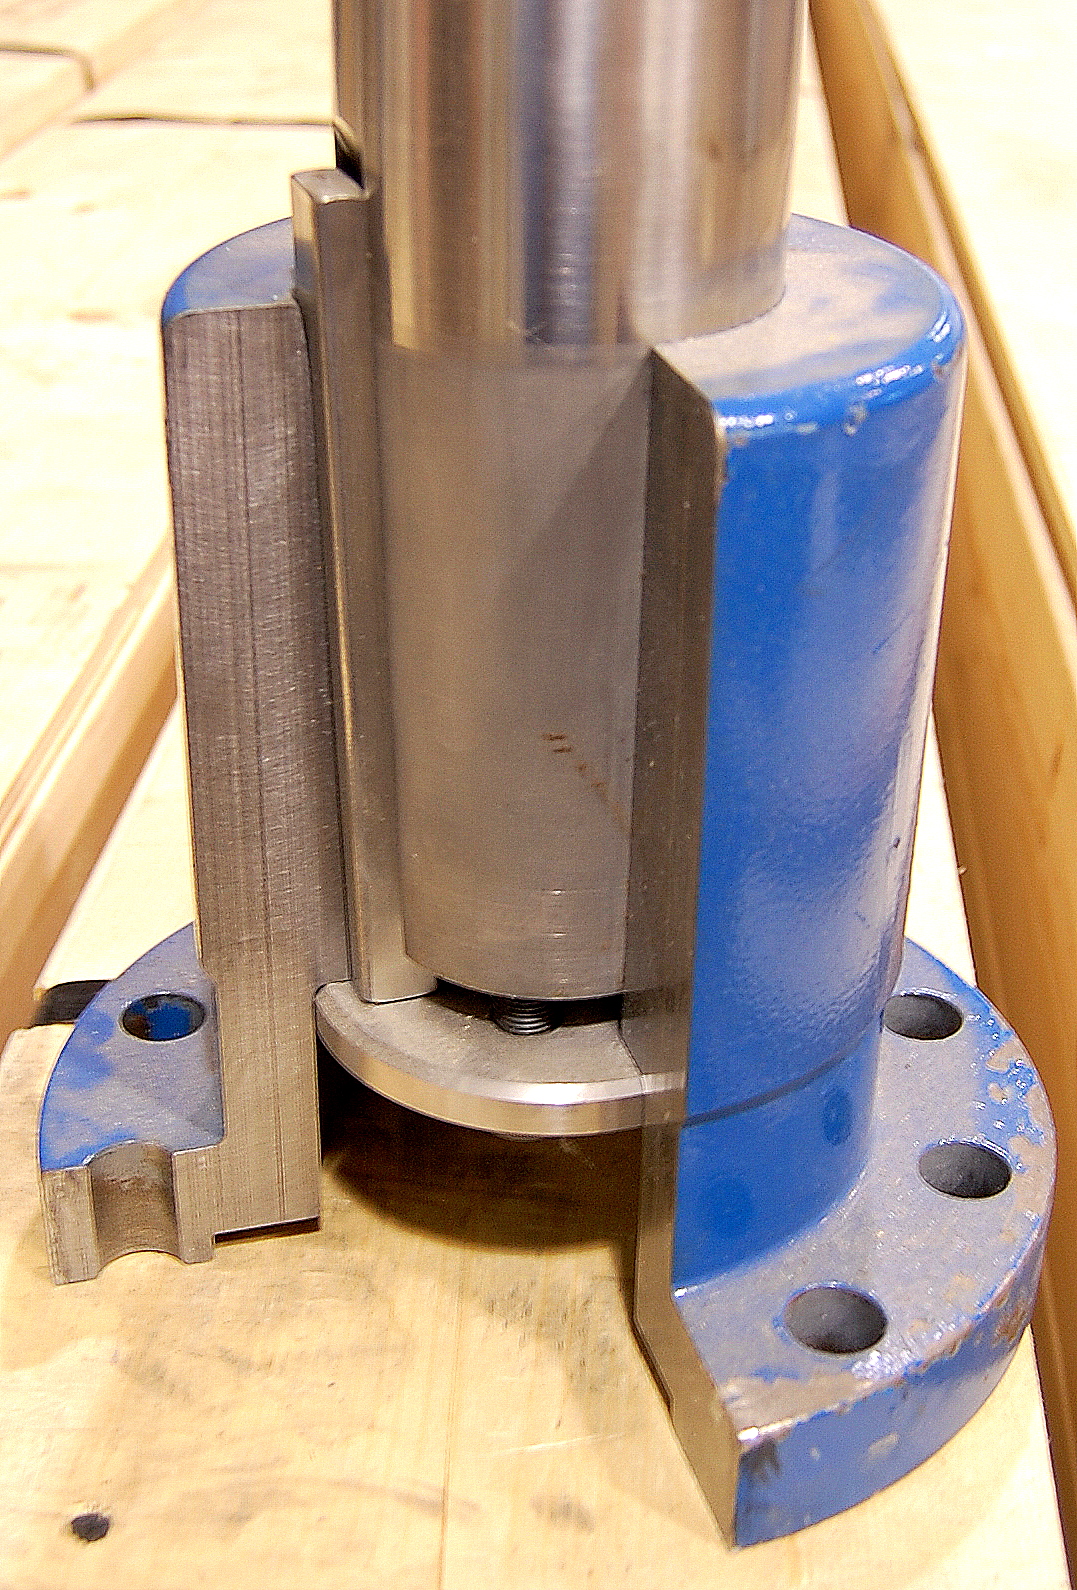
Fitting the Coupling to the Shaft
The two shims are placed in the “splits” to make the bore ID the same at both ends before “fitting” begins.
I hear it repeated all over the internet boating groups & forums that a split coupling is intended for DIY installations. While it certainly can be installed by a DIY, without a machine shop, it will not be a “correct” fit unless it has been properly fitted & faced to the shaft. Most DIY’s do not own the tools for this type of work.
In this image the coupling is being prepped for “fitting” it to the shaft. In order to do this, the split end of the coupling is shimmed parallel while the coupling is very carefully honed for a light interference fit. “Light interference fit just means the coupling actually requires some force to get the shaft into it. This “fitting” of the coupling to the shaft is just as critical with a split coupling as it is with a straight coupling.
A split or solid coupling that “slides” onto the shaft = incorrect fit and can be dangerous!
These couplings purposely ship a tad undersized for the SAE shaft tolerances. This allows a competent shafting shop to “fit” the shaft to the coupling. The proper fit for a straight coupling is a light press fit or light interference fit. This means it does not just “slide on” and requires some light tapping, or heat to expand the coupling while it is installed over the shaft.. Getting this level of fit can be time consuming.
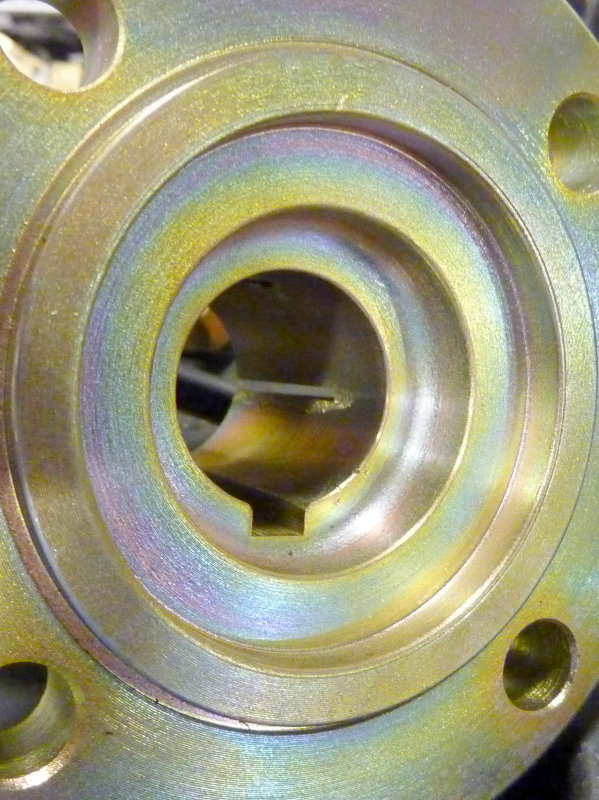
Inside Finish, Before Fitting
The inside of the coupling is reamed, then honed to get the final fit.
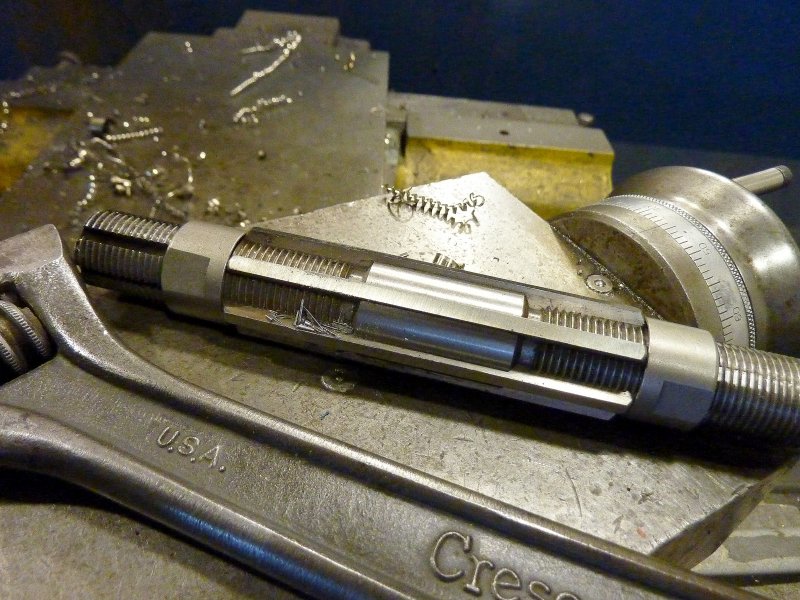
Rough Reaming Tool
This is the rough reaming tool. The finishing is done with grinding compound or other means of honing the coupling bore.
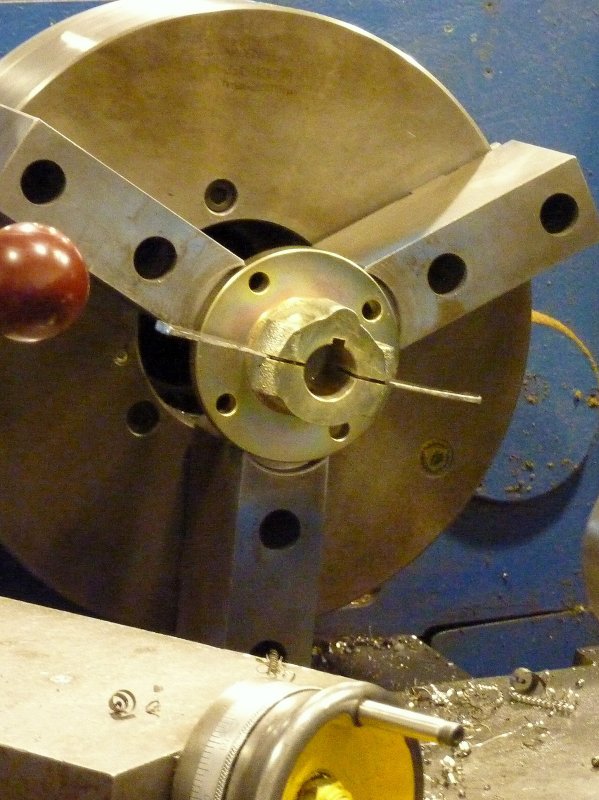
Flange Is Bored To Fit The Shaft
With the flange held tight in the jaw of the lathe, the reamer is very carefully adjusted and rotated to remove just barely enough material to start to get closer to a perfect fit. The final fit is done by hand with valve-grinding compound. It takes some time, and a lot of experience, to make it fit just right. This one took about 25 minutes until the fit was just right.

Should Be A Light Press Fit
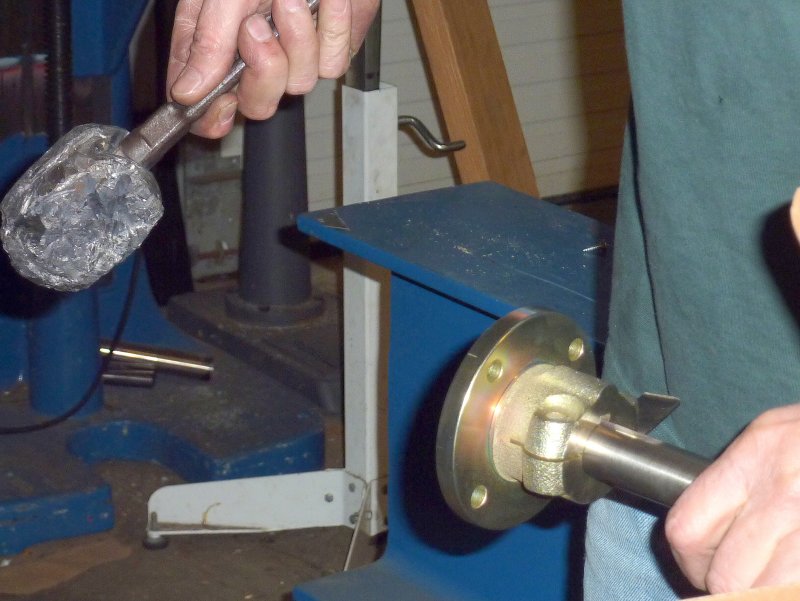
Here, the machinist is test-fitting the coupling to the shaft. A soft lead mallet is used to gently tap it on. This is not pounding but rather a light “tap fit”. Just enough interference so it won’t go on by hand is how it is done. With a good fit you may need to heat the coupling to make the shaft slide into it when doing the install at the boat.
Shafting Material is Cut To Length
For the shafting on sailboats & most power boats we only specify Aqualoy 22 or Aqualoy 22HS. This shafting is a high-alloy austenitic stainless steel that offers tremendous corrosion resistance and excellent strength properties. It is some of the best shafting there is and is made by world renowned Western Branch Metals.
Here a length of 1″ Aqualoy 22 is cut to length for machining.
Checking Shaft Run Out
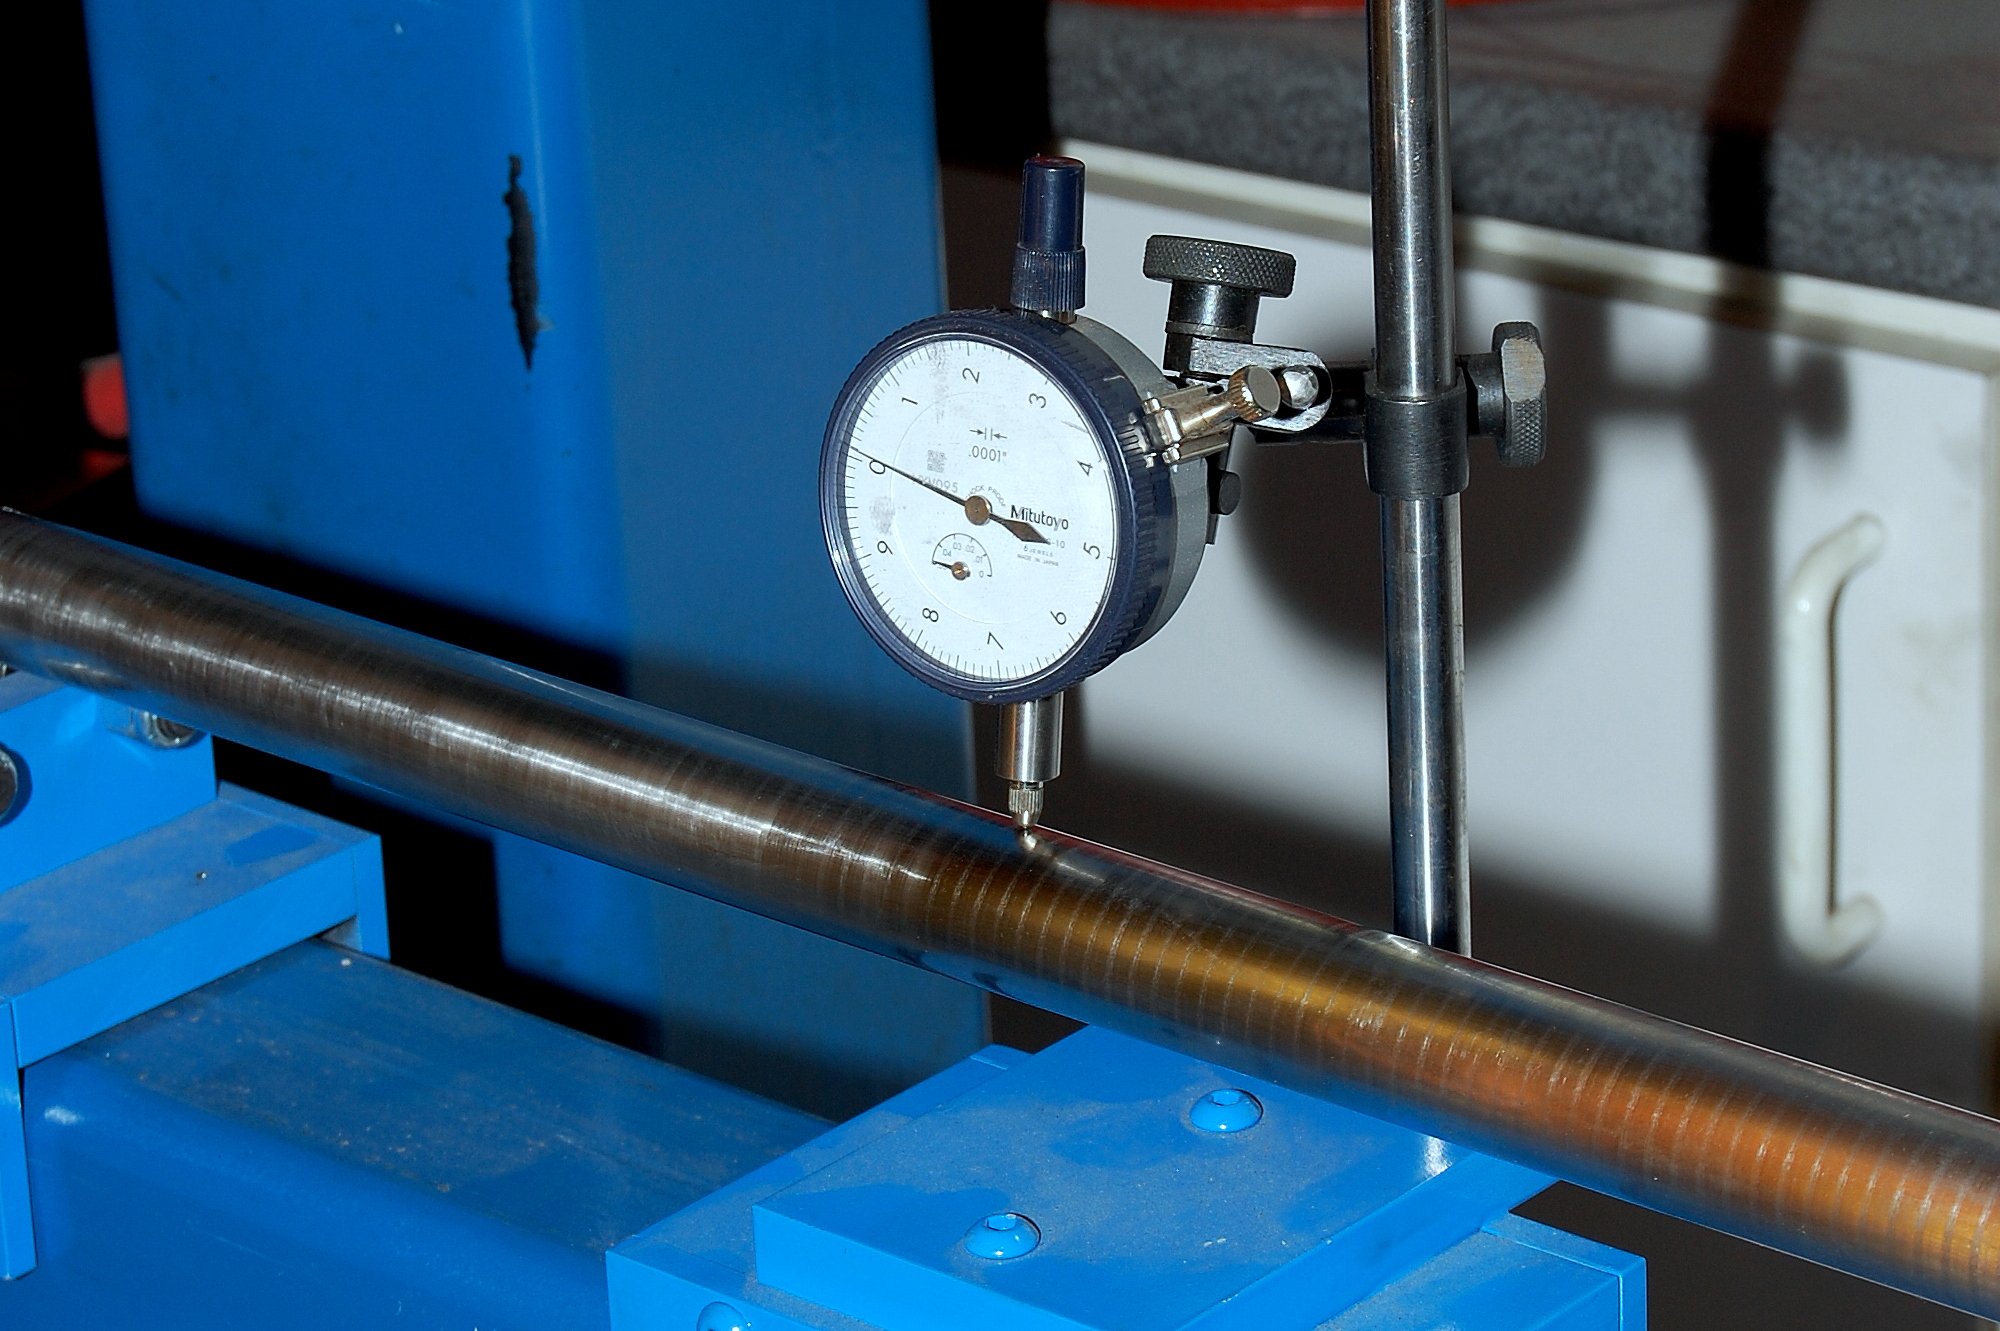
Once the shaft is cut to length, it is then tested for run out. A good shafting shop should always do this, even with a brand new shaft. If it does not meet tolerance it needs to be made true. This was was out by less than .001″ for a 52″ shaft. This shaft was also checked for true after the machining process.
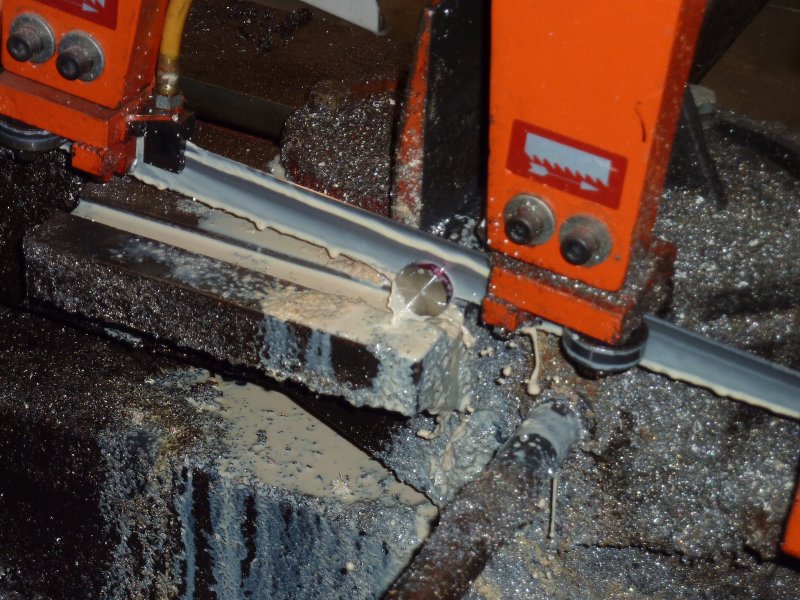
Machine for Cutting the Shaft Taper
Once the shaft is cut to length it’s placed in this very expensive machine to cut the taper, or tapers, if it’s a double-taper shaft.
Keyway Cutting Machine
This is the machine used for cutting the coupling and propeller end key ways.
Spotting The Shaft
After the coupling has been fit to the shaft, the set screw hole needs to be “spotted” into the shaft. This like many of the other nuances is a requirement under ABYC P-06. The drill press is spotting the shaft in this picture.
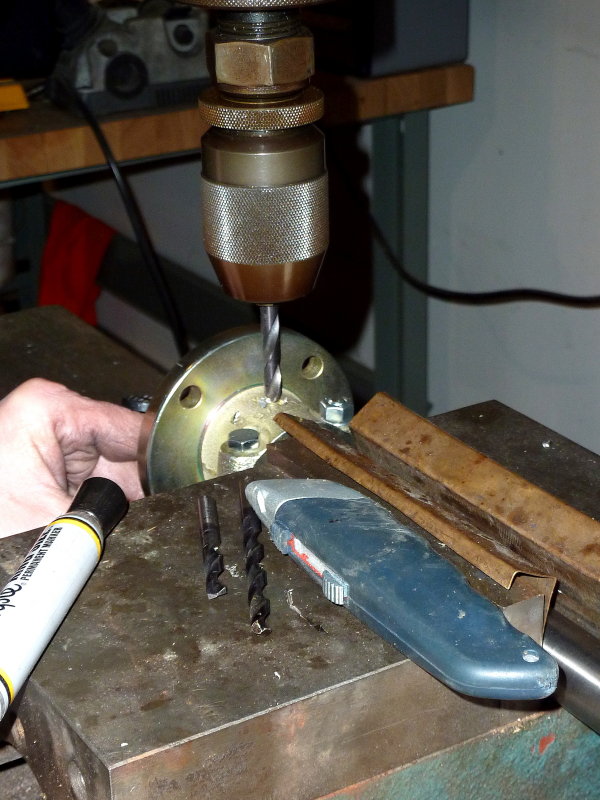
Spotting is the creation of a small dimple in the shaft for the head of the set screw to recess into. If your shaft is not spotted for the set screw/screws you have a poorly machined shaft that does not meet the ABYC marine safety standards. Some unscrupulous vendors do cut this corner.
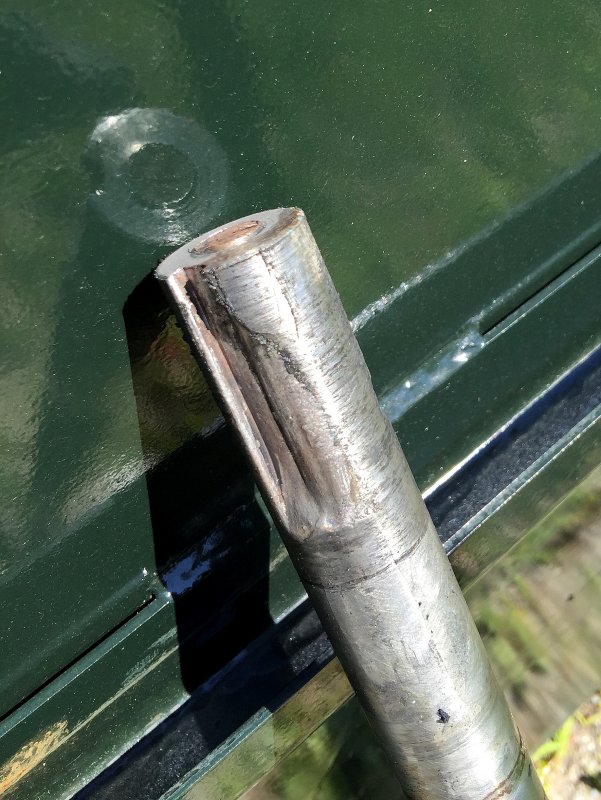
No Spotting

The above image is a prime example of sloppy machining. This shaft literally fell out of the coupling after a DIY pressed it off and tried to re-use it. The layer of rust that broke free was the fit”. The boat took on enough water so that is was a complete loss and the owner carried “liability only”. He’d spent over $10K on the boat since purchase and it was all gone in an instant because he did not follow best practices. Best practice when a coupling is removed is to drop it at a shafting shop for a “fit check”. In most instances a removed coupling will need to be replaced. This coupling was clearly never “fit” correctly to the shaft to begin with and then the set screws were never spotted to act as a fail-safe back up. Don’t let this happen to you. Insist on a light interference fit and properly spotted set screws!
Do Not Re-Use a Used Coupling Without a Fit-Check or Fit & Face
This DIY had actually taken the time to read this article. Sadly for him, he chose to ignore the advice on properly fitting couplings. You guessed it, he re-used the old one when he installed a new PSS Seal. He penny-pinched this in order to save approximately $80.00. In the end it cost many thousands in repairs and an insurance claim that wound up getting him cancelled the next year. His insurance premium is now more than double what it had been, every year. Lets see, spend $80.00 now or $26,000.00 a few weeks later? I call that penny-wise, pound foolish.
Sunk at Marina
Tow to Boat Yard $$$
Haul Out – $$$$
Short Term Storage -$$$$
Labor to Drop Rudder -$$$$
New Shaft & Coupling – $$
Prop Repair (prop hit hull & rudder) – $$$$
Strut Repair – $$$$
Water Damage Repairs – $$$$$$$ (boat was sinking when shaft backed out)
Rudder Repair $$$ – (prop hit rudder when it backed out of the boat)
Transmission Repair – $$$$
Losing of 85% of the Boating Season = Priceless
Please let the seriousness of cutting corners, when removing a coupling, sink in!
A Spotted Shaft
A shaft made by a reputable shafting shop will have spotting that looks like this;

Facing the Coupling to the Shaft
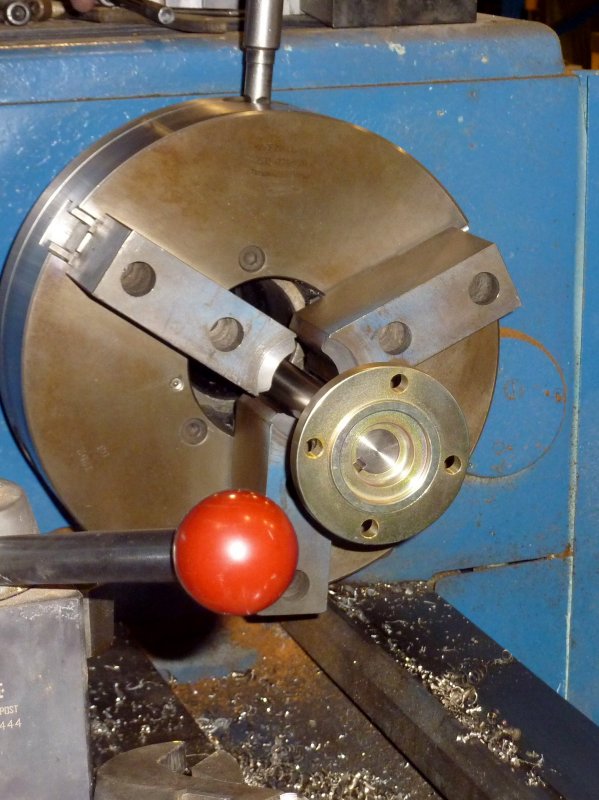
With all the other work done the coupling is finally installed and torqued properly to the shaft just as it would be on the vessel. The shaft is then spun in the lathe and the face of the coupling is made true to the shaft. This image shows the coupling before the facing has occurred.
Fully Fitted & Faced

Just like a brake rotor lathe the face of the coupling is made to rotate perfectly with the shafting. If you receive a shaft and rotor from a prop-shop and the face does not look “freshly cut” please do yourself a favor and question this. It would be extremely rare that a new shaft and coupling did not require an facing.
Now that you know what to look for you can now be your own best advocate when choosing the right prop shafting shop/supplier..
Good luck and happy boating.
Emergency!
We do not want to put this website behind a pay-wall!
Unfortunately, that is where we’re headed if our readers don’t help us with donations…
Please make a donation, that’s all we ask. Your donations are all we have to fund this web site. Please help to keep MarineHowTo.com a
FREE source of information!
 .!
.!